

184
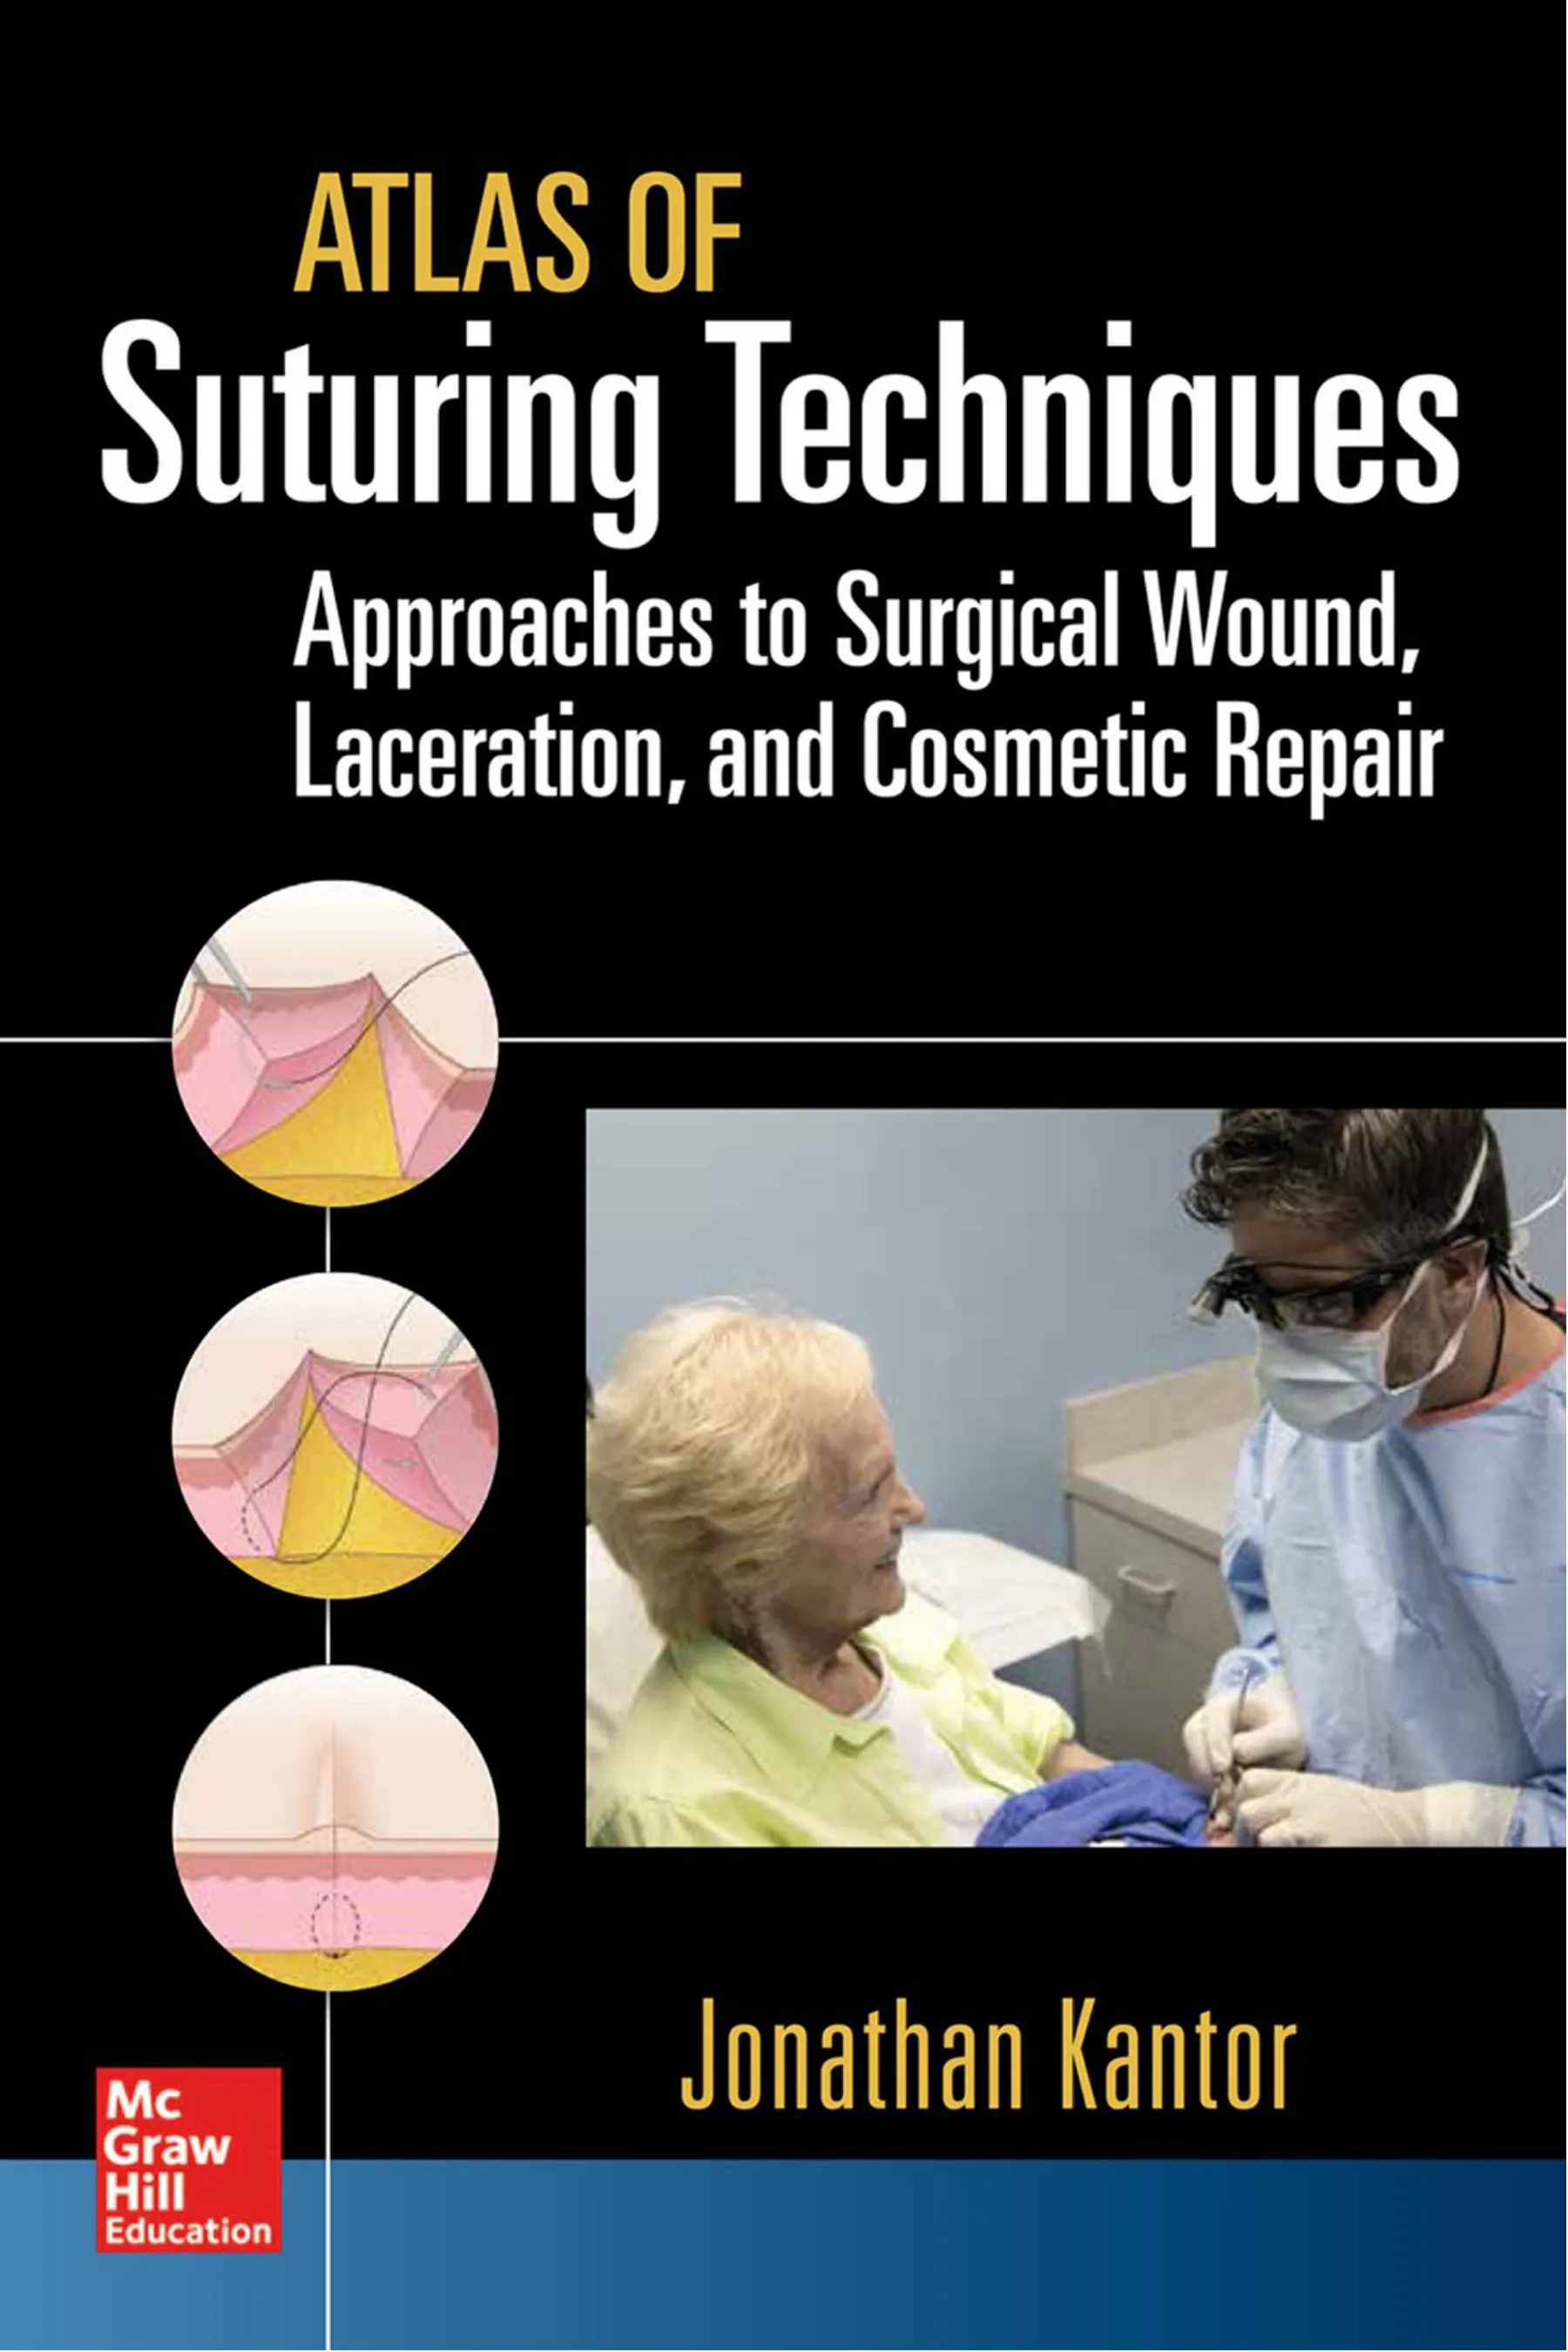
Atlas o Suturing Techniques: Approaches to Surgical Wound, Laceration, and Cosmetic Repair
Figure 5-3E. The running portion o the suture com-
mences. Note again that needle entry is at 90 degrees.
E
Figure 5-3F. Completion o the frst running suture.
Note that the needle exits again at 90 degrees.
F
Figure 5-3G. Subsequent throws continue in a similar
pattern.
G
Figure 5-3H. The fnal throw is per ormed with a
backhand technique.
H
Figure 5-3I. Appearance o the wound a ter a series
o simple running sutures.
I
suture material on the side o the
incision opposite to the needle.
9. The suture material is then tied to
the loop using an instrument tie
(Figures 5-3A through 5-3I).
Tips and Pearls
As with the simple interrupted suture,
it is important to enter the epidermis at
90 degrees, allowing the needle to travel
slightly laterally away rom the wound
edge be ore ully ollowing the curva-
ture o the needle when utilizing this
technique. This will allow or maximal
wound eversion and accurate wound-
edge approximation.
The simple running suture is gener-
ally used layered over the top o another
suture in order to ne-tune epidermal
approximation. For example, i set-back
dermal sutures were placed to acilitate
eversion, occasionally the wound edges
may not be ully approximated. A layer
185
The Simple Running Suture
o simple running sutures, may be used
to solve this problem and e ect accurate
approximation o the wound edges.
Care should be taken to avoid skimming
the needle super cially beneath the epi-
dermis. This results rom ailing to enter
the skin at a perpendicular angle and ail-
ing to ollow the curvature o the needle.
This may result in wound inversion as the
tension vector o the shallow bite pulls the
wound edges outward and down.
In order to maintain uni ormity in the
length o the visible running sutures and
to allow the suture loops to remain paral-
lel, it is important to take uni orm bites
with each throw o the simple running
suture technique. There ore, each sub-
sequent loop should begin at the same
point lateral to the incised wound edge
and at a uni orm distance closer to the
surgeon than the preceding entry point.
Some surgeons pre er to nesse their
running closures so that the loops o
suture appear to run perpendicular to
the incision line. This approach, however,
requires that each loop o running suture
be placed at a uni orm angle across the
incised wound edge, rather than perpen-
dicular to the incised wound edge. Since
this a ects the orce vectors across the
wound, and since a row o parallel diago-
nally oriented sutures is also aesthetically
pleasing, this approach is a reasonable
option but is not necessary.
It is critical to permit su cient laxity
between the epidermis and the suture
material when using this technique in
order to minimize the risk o track marks
or an exaggerated inf ammatory response.
Recalling that this technique is designed
exclusively or epidermal approxima-
tion, and that some postoperative wound
edema is expected, will help with con-
ceptualizing the need to keep the throws
o suture material loose.
Drawbacks and Cautions
The central drawback o this approach is
that, as with all running techniques, the
integrity o the entire suture line rests
on two knots. Moreover, suture mate-
rial compromise at any point may lead
to a complete loss o the integrity o the
line o sutures. Since this technique is
designed or low-tension environments,
however, even in the ace o suture mate-
rial breakage the remaining throws o
suture may permit some residual epider-
mal approximation.
Since all loops o suture are placed
in succession, this technique does not
permit the same degree o ne-tuning
o the epidermal approximation as a
simple interrupted suture. This must
be weighed against the bene t o the
increased speed o placement o a line
o running sutures versus interrupted
suture placement, w here each throw
is secured with its own set o three or
more knots.
Moreover, since each loop o the run-
ning suture material is designed to hold
an equal amount o tension, it ollows
that areas o the wound under greater
tension, such as its central portion, may
tend to gape or potentially exist under
greater tension leading to an increased
risk o track marks.
With any suturing technique, knowl-
edge o the relevant anatomy is critical.
When placing simple running sutures it
is important to recall that the structures
deep to the epidermis may be compro-
mised by the passage o the needle and
suture material. For example, the needle
may pierce a vessel leading to increased
bleeding.
Similarly, particularly i the knot is tied
relatively tightly, structures deep to the
de ect may be constricted. This can lead
186
Atlas o Suturing Techniques: Approaches to Surgical Wound, Laceration, and Cosmetic Repair
to necrosis due to vascular compromise
or even, theoretically, super cial nerve
damage; again, this risk may be mitigated
by maintaining some laxity in the suture
throws.
This technique may elicit an increased
risk o track marks, necrosis, inf am-
mation, and other complications when
compared with techniques that do not
entail suture material traversing the
scar line, such as buried or subcuticular
approaches. There ore, sutures should be
removed as early as possible to minimize
these complications, and consideration
should be given to adopting other closure
techniques in the event that sutures will
not be able to be removed in a timely
ashion.
References
Adams B, Levy R, Rademaker AE, Goldberg LH,
Alam M. Frequency of use of suturing and
repair techniques preferred by dermatologic
surgeons. Dermatol Surg. 2006;32(5):682-689.
Gurusamy KS, Toon CD, Allen VB, Davidson BR.
Continuous versus interrupted skin sutures for
non-obstetric surgery. Cochrane Database Syst
Rev. February 14, 2014;2:CD010365.
McLean NR, Fyfe AH, Flint EF, Irvine BH, Calvert
MH. Comparison of skin closure using continu-
ous and interrupted nylon sutures. Brit J Surg.
1980;67(9):633-635.
Orozco-Covarrubias ML, Ruiz-Maldonado R.
Surgical facial wounds: simple interrupted per-
cutaneous suture versus running intradermal
suture. Dermatol Surg. 1999;25(2):109-112.
Pauniaho SL, Lahdes-Vasama T, Helminen MT, et al.
Non-absorbable interrupted versus absorbable
continuous skin closure in pediatric appendec-
tomies. Scandinavian J Surg. 2010;99(3):142-146.
187
suture is use ul in areas under moderate
tension where the goal o suture placement
is relieving tension or hemostasis as well
as epidermal approximation.
Technique
1. The needle is inserted perpendicular
to the epidermis, approximately one-
hal the radius o the needle distant
to the wound edge. This will allow
the needle to exit the wound on the
contralateral side at an equal distance
rom the wound edge by simply ol-
lowing the curvature o the needle.
2. With a uid motion o the wrist, the
needle is rotated through the dermis,
taking the bite wider at the deep
margin than at the sur ace, and the
needle tip exits the skin on the con-
tralateral side.
3. The needle body is grasped with
surgical orceps in the le t hand and
pulled upward with the surgical
orceps as the body o the needle is
released rom the needle driver. Alter-
natively, the needle may be released
rom the needle driver and the needle
driver itsel may be used to grasp the
needle rom the contralateral side o
the wound to complete its rotation
through its arc, obviating the need or
surgical orceps.
4. The suture material is then tied o
gently, with care being taken to
minimize tension across the epider-
mis and avoid overly constricting the
wound edges. This orms the f rst
The Running Locking Suture
C H A P T E R 5 . 4
Video 5-4. Running locking
suture
Access to video can be ound via
SuturingTechniques.com.
Application
This is a locking variation o the stan-
dard running suture used or epidermal
approximation. It may be used alone in
the context o small wounds under mini-
mal to no tension, such as those ormed
by a traumatic laceration. It is generally
used as a secondary layer to aid in the
approximation o the epidermis when the
dermis has been closed using a dermal or
other deep suturing technique.
It is used or three central reasons:
(1) To aid in hemostasis, (2) To provide
improved eversion over the standard run-
ning suture, and (3) To provide equal ten-
sion across all loops o the running suture.
Suture Material Choice
With all techniques, it is best to use the
thinnest suture possible in order to mini-
mize the risk o track marks and oreign-
body reactions. Suture choice will depend
largely on anatomic location and the goal
o suture placement. On the ace and eye-
lids, a 6-0 or 7-0 monof lament suture is
use ul or epidermal approximation. When
the goal o the running locking suture layer
is solely epidermal approximation, 6-0
monof lament may be used on the extrem-
ities as well. Otherwise, 5-0 monof lament
suture material may be used i there is
minimal tension, and 4-0 monof lament
188
Atlas o Suturing Techniques: Approaches to Surgical Wound, Laceration, and Cosmetic Repair
Figure 5-4A. Overview o the running locking suture
technique.
A
Figure 5-4B. Beginning o the frst throw o the run-
ning locking suture technique. Note the needle enters
the skin at 90 degrees.
B
Figure 5-4C. Completed frst anchoring throw o the
running locking suture technique. This is essentially a
simple interrupted suture used or anchoring the set o
running sutures.
C
Figure 5-4D. Knot tied a ter placing the anchoring suture.
D
anchoring knot or the running line
o sutures. The loose tail is trimmed,
and the needle is reloaded.
5. Starting proximal to the prior knot
relative to the surgeon, steps (1)
through (3) are then repeated, but
rather than pulling all o the suture
material through a ter completing
the throw, a loop o suture is le t
rom the beginning o the throw, and
the needle is then passed through
the loop o suture, locking the suture
in place.
6. Instead o tying a knot, step (5) is
then sequentially repeated until the
end o the wound is reached.
7. For the f nal throw at the in erior apex
o the wound, the needle is loaded
with a backhand technique and
inserted into the skin at a 90-degree
angle in a mirror image o the other
throws, entering just proximal to the
exit point relative to the surgeon on
the same side o the incision line and
exiting on the contralateral side.
8. The suture material is only partly
pulled through, leaving a loop o
suture material on the side o the
incision opposite to the needle.
9. The suture material is then tied to
the loop using an instrument tie
(Figures 5-4A through 5-4L).
189
The Running Locking Suture
Figure 5-4E. Beginning o running suture placement.
E
Figure 5-4F. Completion o frst running throw.
F
Figure 5-4G. Locking the suture. Note the needle
driver is inserted through the loop o suture created by
the prior throw be ore grasping the needle, permitting
the locking e ect o this technique.
G
Figure 5-4H. The needle is grasped.
H
Figure 5-4I. The suture and needle are pulled
laterally, locking the suture.
I
Figure 5-4J. The running technique continues.
J
K
Figure 5-4K. The suture is locked with each succes-
sive throw.
L
Figure 5-4L. Appearance o the completed running
locking suture.
190
Atlas o Suturing Techniques: Approaches to Surgical Wound, Laceration, and Cosmetic Repair
Tips and Pearls
The running-locking technique permits
better hemostasis than the standard sim-
ple running technique, and there ore it is
sometimes used with traumatic lacerations
(when a small amount o oozing may be
present) or as a secondary layer in repairs
on patients who are on aspirin or other-
wise may have a small amount o oozing
even a ter placement o deeper sutures.
Importantly, the hemostatic e ect o the
locking should not be used as a replace-
ment or properly tying o deeper vessels
or cauterizing small vessels.
This technique also a ords improved
eversion over the standard simple run-
ning suture approach, since the locked
edges o suture have an almost horizontal
mattress-like e ect on the epidermis,
leading sometimes to the ormation o a
ridge along the wound.
Standard simple running sutures may
lead to gaping at the central portions o
the wound, since the equal tension across
each loop in the context o unequal lateral
orces over the course o the length o the
wound mean that the areas under greatest
tension—those in the central wound—
may pull laterally while areas under only
minimal tension at the apices do not exert
a similar e ect. This tendency is obviated
with the running-locking technique, as
the amount o tension across each loop
o suture is individually controlled.
An assistant may be help ul in keeping
each o the loops under a small degree
o tension be ore the needle and suture
material are passed through the loops.
This helps with maintaining a uni orm
degree o tension across the loops o
suture and aids in permitting each throw
o suture to be easily locked.
As with the simple running suture, it
is important to enter the epidermis at
90 degrees, allowing the needle to travel
slightly laterally away rom the wound
edge be ore ully ollowing the curva-
ture o the needle when utilizing this
technique. This will allow or maximal
wound eversion and accurate wound-
edge approximation.
Care should be taken to avoid skim-
ming the needle superf cially beneath
the epidermis. This results rom ailing
to enter the skin at a perpendicular angle
and ollowing the curvature o the needle.
This may result in wound inversion as the
tension vector o the shallow bite pulls
the wound edges outward and down.
In order to maintain uni ormity in the
length o the visible running sutures and
to allow all o the suture loops to remain
parallel, it is important to take uni orm
bites with each throw o the running
locking suture technique. There ore, each
subsequent loop should begin at the same
point lateral to the incised wound edge
and at a uni orm distance closer to the
surgeon than the preceding entry point.
As with the simple running technique,
it is critical to permit su f cient laxity
between the epidermis and the suture
material when using this technique in
order to minimize the risk o track marks
or an exaggerated in ammatory response.
Recalling that this technique is designed
exclusively or epidermal approxima-
tion, and that some postoperative wound
edema is expected, will help with con-
ceptualizing the need to keep the throws
o suture material loose.
Drawbacks and Cautions
The central drawback o this approach is
that, as with all running techniques, the
integrity o the entire suture line rests
on two knots. Moreover, suture mate-
rial compromise at any point may lead
to a complete loss o the integrity o the
line o sutures. Since this technique is
designed or low-tension environments,
however, and the locked loops o suture
191
The Running Locking Suture
may hold in place due to pressure rom
the skin against the suture, this problem is
less pronounced with this technique than
with many other running approaches.
In order to avoid wound-edge necrosis,
it is important not to be over-zealous with
tightening the locking loops o suture.
While it may be tempting to pull each
loop tight to maximize the hemostatic
e ect o this approach, this should be
avoided. This is particularly important as
postoperative edema may lead the sutures
to be even tighter a ter time has passed,
increasing the risk o tissue strangulation.
Since all loops o suture are placed
in succession, this technique does not
permit the same degree o f ne-tuning
o epidermal approximation as a simple
interrupted suture. This must be weighed
against the benef t o the increased speed
o placement o a line o running locking
sutures versus interrupted suture place-
ment, where each throw is secured with
its own set o three or more knots.
While this technique may help mini-
mize some o the potential risk o
track marks associated w ith running
techniques—the di erential pull across
di erent areas o the wound—overly
tight throws may actually increase this
risk, since the locked loops lead to a
secondary row o sure material running
parallel to the incision line.
With any suturing technique, knowl-
edge o the relevant anatomy is critical.
When placing running locking sutures it
is important to recall that the structures
deep to the epidermis may be compro-
mised by the passage o the needle and
suture material.
Similarly, particularly i the throws are
locked relatively tightly, structures deep
to the de ect may be constricted. This
can lead to necrosis due to vascular com-
promise or even, theoretically, superf cial
nerve damage; again, this risk may be
mitigated by maintaining some laxity in
the locked suture throws.
This technique may elicit an increased
risk o track marks, necrosis, in amma-
tion, and other complications when com-
pared with techniques that do not entail
suture material traversing the scar line,
such as buried or subcuticular approaches.
There ore, sutures should be removed
as early as possible to minimize these
complications, and consideration should
be given to adopting other closure tech-
niques in the event that sutures will not
be able to be removed in a timely ashion.
References
Joshi AS, Janjanin S, Tanna N, Geist C, Lindsey
WH. Does suture material and technique
really matter? Lessons learned from 800
consecutive blepharoplasties. Laryngoscope.
2007;117(6):981-984.
MacDougal BA. Locking a continuous running
suture. J Am Coll Surg. 1995;181(6):563-564.
Schlechter B, Guyuron B. A comparison of different
suture techniques for microvascular anastomo-
sis. Ann Plast Surg. 1994;33(1):28-31.
Wong NL. The running locked intradermal suture.
A cosmetically elegant continuous suture for
wounds under light tension. J Dermatol Surg
Oncol. 1993;19(1):30-36.
192
need or suture removal. When the goal
o the horizontal mattress suture place-
ment is solely to encourage wound-edge
eversion, ne-gauge suture material may
be used on the extremities as well. Oth-
erwise, 5-0 mono lament suture material
is use ul i there is minimal tension, and
4-0 mono lament suture may be used
in areas under moderate tension where
the goal o suture placement is relieving
tension as well as epidermal approxi-
mation. In select high-tension areas, 3-0
mono lament suture may be utilized as
well, sometimes in the context o a mul-
timodality approach, or example when
mattress sutures are placed in the center
o the wound to maximize tension relie
and eversion and to obviate any dead
space beneath a large wound.
Technique
1. The needle is inserted perpendicu-
lar to the epidermis, approximately
one-hal the radius o the needle
distant to the wound edge. This will
allow the needle to exit the wound
on the contralateral side at an equal
distance rom the wound edge by
simply ollowing the curvature o
the needle.
2. With a f uid motion o the wrist, the
needle is rotated through the dermis,
taking the bite wider at the deep
margin than at the sur ace, and the
needle tip exits the skin on the con-
tralateral side.
The Horizontal Mattress Suture
C H A P T E R 5 . 5
Video 5-5. Horizontal mattress
suture
Access to video can be ound via
SuturingTechniques.com.
Application
This is a requently used everting tech-
nique employed or closure and epidermal
approximation. As with many interrupted
techniques, it may be used alone or
wounds under minimal tension, such
as those ormed by either a small punch
biopsy or a traumatic laceration. It is also
requently used as a secondary layer to
aid in everting the wound edges when
the dermis has been closed using a deep
suturing technique. This technique may
also be used in the context o atrophic
skin, as the broader anchoring bites may
help limit tissue tear-through that may
be seen with a simple interrupted suture.
Suture Material Choice
With all techniques, it is best to use the
thinnest suture possible in order to mini-
mize the risk o track marks and oreign-
body reactions. Suture choice will depend
largely on anatomic location and the goal
o suture placement. Horizontal mattress
sutures may be placed with the goal o :
(1) e ecting eversion, or (2) adding an
additional layer o closure or wound
stability and dead-space minimization.
On the ace and eyelids, a 6-0 or 7-0
mono ilament suture may be used,
though ast-absorbing gut may be used
on the eyelids and ears to obviate the
193
The Horizontal Mattress Suture
3. The needle body is grasped with
surgical orceps in the le t hand and
pulled upward as the body o the nee-
dle is released rom the needle driver.
Alternatively, the needle may be
released rom the needle driver and
the needle driver itsel may be used
to grasp the needle rom the contra-
lateral side o the wound to complete
its rotation through its arc, obviating
the need or surgical orceps.
4. The needle is then reloaded in a
backhand ashion and inserted at
90 degrees perpendicular to the
Figure 5-5A. Overview o the horizontal mattress
suture technique.
A
Figure 5-5B. Beginning o the irst throw o the
horizontal mattress suture technique. Note that
the needle enters the skin at a 90-degree angle.
B
Figure 5-5C. Completion o the frst throw o the hori-
zontal mattress suture technique. Note that the needle
now exits the skin on the contralateral wound edge at
a 90-degree angle.
C
Figure 5-5D. Beginning o the second throw o the
horizontal mattress suture technique. Note that the
needle again enters the skin at a 90-degree angle, now
distal to its exit point.
D
epidermis proximal (relative to the
surgeon) to its exit point along the
length o the wound on the same side
o the incision line as the exit point.
5. The needle is rotated through its
arc, exiting on the right side o the
wound (relative to the surgeon) in a
mirror image o steps (2) and (3).
6. The suture material is then tied o
gently, with care being taken to
minimize tension across the epi-
dermis and avoid overly constrict-
ing the wound edges (Figures 5-5A
through 5-5F).
194
Atlas o Suturing Techniques: Approaches to Surgical Wound, Laceration, and Cosmetic Repair
Figure 5-5E. Completion o the second throw o the
horizontal mattress suture technique. Note that the
needle again exits the skin on the contralateral wound
edge at a 90-degree angle.
E
Figure 5-5F. Wound appearance a ter placement o a
horizontal mattress suture. Note the pronounced ever-
sion o the wound edges.
F
Tips and Pearls
It is important to enter the epidermis at
90 degrees, allowing the needle to travel
slightly laterally away rom the wound
edge be ore ully ollowing the curva-
ture o the needle when utilizing this
technique. This will allow or maximal
wound eversion and accurate wound-
edge approximation.
As with the simple interrupted suture,
care should be taken to avoid skimming
the needle super cially beneath the epi-
dermis. This results rom ailing to enter
the skin at a perpendicular angle and ail-
ing to ollow the curvature o the needle.
This may result in wound inversion as the
tension vector o the shallow bite pulls
the wound edges outward and down.
Since a wide bite o dermis and epi-
dermis is included in the suture arc, it is
particularly important to avoid tying the
suture material too tight, as this could
lead to wound-edge necrosis. Some sur-
geons utilize bolsters when utilizing this
technique under high tension, such as
when a 3-0 suture is used on the back,
in an attempt to avoid track marks and
reduce the risk o tissue necrosis. A wide
array o materials may be used or the
bolster, including gauze, dental rolls, or
plastic tubing. In practice, bolsters are
rarely needed with this technique as long
as the bulk o the wound tension has
been shi ted deep using ascial or dermal
buried sutures.
Drawbacks and Cautions
This technique does not typically per-
mit the same degree o wound-edge
apposition as can be accomplished with
other transepidermal sutures, since the
everting e ect o the suture technique
may be associated with a small degree
o gaping at the center o the horizontal
mattress suture. In the event that deeper
sutures were care ully placed, this may
not be a signi cant drawback, since the
wound edges may be well-aligned rom
the placement o these deeper sutures.
I not, or i there is a need or improved
wound-edge apposition even a ter placing
the horizontal mattress suture, a small
simple interrupted suture may be placed
centrally over the horizontal mattress
suture to bring the wound edges together
more precisely.
Suture removal with this technique
may be more involved than with simple
interrupted sutures, particularly i sutures
are le t in situ or an extended period o
time and some o the suture material has
been overgrown by the healing epidermis,
as the knot may be somewhat buried in
the context o a ridged everted repair.
195
The Horizontal Mattress Suture
With any suturing technique, knowl-
edge o the relevant anatomy is criti-
cal. When placing a horizontal mattress
suture it is important to recall that the
structures deep to the epidermis may
be compromised by the passage o the
needle and suture material. For example,
the needle may pierce a vessel leading to
increased bleeding.
Similarly, particularly i the knot is
tied relatively tightly, structures deep to
the de ect may be constricted. This can
lead to necrosis due to vascular com-
promise or even, theoretically, super -
cial nerve damage. These concerns are
more acute with the horizontal mattress
suture than with the simple interrupted
suture, since the wide arc o the suture
material and its horizontal component
incorporate more skin and underlying
structures, thus increasing the risk o
strangulation.
The potential to constrict deeper
structures may be used to the surgeon's
advantage in the event that a small vessel
deep to the incision line is oozing; rather
than opening the wound, localizing the
source o the bleed, and tying o the
individual vessel, it may be possible to
simply place a horizontal mattress suture
incorporating the culprit vessel within
its arc, tie it tightly, and thus indirectly
ligate the vessel. This should only be
used in the event that the o ending ves-
sel is relatively small, since otherwise
there is a signi cant risk that this indirect
ligation will not be su ciently resilient.
Moreover, tying the suture too tightly
may increase the risk o developing track
marks or super cial necrosis.
This technique may elicit an increased
risk o track marks, necrosis, and other
complications w hen compared w ith
techniques that do not entail suture
material traversing the scar line, such
as buried or subcuticular approaches.
There ore, sutures should be removed
as early as possible to minimize these
complications, and consideration should
be given to adopting other closure tech-
niques in the event that sutures w ill
not be able to be removed in a timely
ashion.
Reference
Zuber TJ. The mattress sutures: vertical, hori-
zontal, and corner stitch. Am Fam Physician.
2002;66(12):2231-2236.
196
and the goal o suture placement. Locking
horizontal mattress sutures may be placed
with the goal o : (1) e ecting eversion,
or (2) adding an additional layer o clo-
sure or wound stability and dead-space
minimization.
On the ace, a 6-0 or 7-0 mono la-
ment suture may be used, though ast-
absorbing gut may be used on the eyelids
and ears to obviate the need or suture
removal; in these cases, standard hori-
zontal mattress sutures are probably
pre erable to their locking counterparts.
When the goal o the horizontal mattress
suture placement is solely to encourage
wound-edge eversion, ne-gauge suture
material may be used on the extremities
as well. Otherwise, 5-0 mono lament
suture material is use ul i there is mini-
mal tension, and 4-0 mono lament suture
maybe used in areas under moderate ten-
sion where the goal o suture placement
is relieving tension as well as epidermal
approximation. In select high-tension
areas, 3-0 mono lament suture may be
utilized as well.
Technique
1. The needle is inserted perpendicu-
lar to the epidermis, approximately
one-hal the radius o the needle
distant to the wound edge. This will
allow the needle to exit the wound
on the contralateral side at an equal
distance rom the wound edge by
simply ollowing the curvature o
the needle.
The Locking Horizontal
Mattress Suture
C H A P T E R 5 . 6
Synonym
Modi ed locking horizontal mattress
Video 5-6. Locking horizontal
mattress suture
Access to video can be found via
Application
This is a modi cation o the horizon-
tal mattress suture, a requently used
everting technique used or closure and
epidermal approximation. As with many
interrupted techniques, it may be used
alone or wounds under minimal tension,
such as those ormed by a small punch
biopsy or a traumatic laceration. It is also
requently used as a secondary layer to
aid in everting the wound edges when
the dermis has been closed using a deep
suturing technique. This technique may
also be used in the context o atrophic
skin, as the broader anchoring bites may
help limit the tissue tear-through that
may be seen with a simple interrupted
suture. This locking variation con ers
tw o advantages over the traditional
horizontal mattress suture: better ease
o suture removal and improved wound-
edge apposition.
Suture Material Choice
With all techniques, it is best to use
the thinnest suture possible in order to
minimize the risk o track marks and
oreign-body reactions. Suture choice
will depend largely on anatomic location
197
The Locking Horizontal Mattress Suture
2. With a f uid motion o the wrist, the
needle is rotated through the dermis,
taking the bite wider at the deep
margin than at the sur ace, and the
needle tip exits the skin on the con-
tralateral side.
3. The needle body is grasped with sur-
gical orceps in the le t hand, with
care being taken to avoid grasping the
needle tip, which can be easily dulled
by repetitive riction against the sur-
gical orceps. It is gently grasped
and pulled upward with the surgi-
cal orceps as the body o the needle
is released rom the needle driver.
Alternatively, the needle may be
released rom the needle driver and
the needle driver itsel may be used
to grasp the needle rom the contra-
lateral side o the wound to complete
its rotation through its arc, obviating
the need or surgical orceps.
4. The needle is then reloaded in a
backhand ashion and inserted at
90-degrees perpendicular to the epi-
dermis proximal (relative to the sur-
geon) to its exit point on the same
side o the incision line as the exit
point. Importantly, a loop o suture
material is le t protruding rom the
wound rom where the needle exited
on the prior throw to where it enters
on this throw.
5. The needle is rotated through its
arc, exiting on the right side o the
wound (relative to the surgeon) in a
mirror image o steps (2) and (3).
6. The needle is then passed under the
loop o suture material on the contra-
lateral side.
7. The suture material is then tied o
gently, with care being taken to mini-
mize tension across the epidermis and
avoid overly constricting the wound
edges (Figures 5-6A through 5-6F).
Figure 5-6A. Overview of the locking horizontal mat-
tress suture.
A
Figure 5-6B. The needle is inserted perpendicular to
the skin, exiting on the contralateral side of the wound
edge.
B
Figure 5-6C. The needle is then reinserted from the
same side as the entry point, slightly further along the
wound edge, exiting back on the side the suture began.
C
198
Atlas of Suturing Techniques: Approaches to Surgical Wound, Laceration, and Cosmetic Repair
Figure 5-6D. The needle is then passed under the
newly formed loop.
D
Figure 5-6E. This has the effect of locking the suture
material under the loop.
E
Figure 5-6F. Immediate postoperative appearance.
F
Tips and Pearls
The locking technique con ers tw o
important advantages over the tradi-
tional horizontal mattress suture. First,
the standard horizontal mattress suture
does not typically permit the same degree
o w ound-edge apposition as can be
accomplished with other transepidermal
sutures, since the everting e ect o the
suture technique may be associated with
a small degree o gaping at the center o
the horizontal mattress suture. Locking
the suture material brings the knot, as
well as the two parallel external rows o
suture, to the center o the wound, thus
improving wound-edge approximation.
Second, suture removal with the stan-
dard horizontal mattress technique may
be challenging, particularly i sutures are
le t in situ or an extended period o time
and some o the suture material has been
overgrown by the healing epidermis, as
the knot may be buried in the context o
a ridged everted repair. Bringing the knot,
along with the parallel rows o external
suture material, centrally with the locking
technique allows the knot to be more eas-
ily grasped at the time o suture removal.
A modi cation o this technique has
also been described, where instead o
passing the needle under the loop o
suture, the loop is instead incorporated
into the knot, thus increasing economy
o motion. For this modi cation, a loop is
le t as described previously and all steps
are ollowed through step (5). Then, the
end o the suture with needle attached
is looped twice around the needle driver
and the tip o the needle driver is passed
through the loop to grasp the tail o suture.
Once the suture tail is pulled, the hori-
zontal mattress suture becomes locked.
As with most transepidermal tech-
niques, it is important to enter the epi-
dermis at 90 degrees, allowing the needle
to travel slightly laterally away rom the
wound edge be ore ully ollowing the
curvature o the needle when utilizing
this technique. This will allow or maxi-
mal wound eversion and accurate wound-
edge approximation.
199
The Locking Horizontal Mattress Suture
As with the simple interrupted suture,
care should be taken to avoid skimming
the needle super cially beneath the epi-
dermis. This results rom ailing to enter
the skin at a perpendicular angle and ail-
ing to ollow the curvature o the needle.
This may result in wound inversion as the
tension vector o the shallow bite pulls
the wound edges outward and down.
Drawbacks and Cautions
With any suturing technique, knowledge
o the relevant anatomy is critical. When
placing a locking horizontal mattress
suture it is important to recall that the
structures deep to the epidermis may
be compromised by the passage o the
needle and suture material. For example,
the needle may pierce a vessel leading to
increased bleeding.
Similarly, particularly i the knot is tied
relatively tightly, structures deep to the
de ect may be constricted. This can lead
to necrosis due to vascular compromise or
even, theoretically, super cial nerve dam-
age. These concerns are more acute with
the locking horizontal mattress suture
than with the simple interrupted suture,
since the wide arc o the suture material
and its horizontal component incorporate
more skin and underlying structures, thus
increasing the risk o strangulation.
The potential to constrict deeper
structures may be used to the surgeon’s
advantage in the event that a small vessel
deep to the incision line is oozing; rather
than opening the wound, localizing the
source o the bleed, and tying o the
individual vessel, it may be possible to
simply place a locking horizontal mattress
suture incorporating the culprit vessel
within its arc, tie it tightly, and thus indi-
rectly ligate the vessel. This should only
be used in the event that the o ending
vessel is relatively small, since otherwise
there is a signi cant risk that this indirect
ligation will not be su ciently resilient.
Moreover, tying the suture too tightly
may increase the risk o developing track
marks or super cial necrosis.
This technique may elicit an increased
risk o track marks, necrosis, and other
complications when compared with tech-
niques that do not entail suture material
traversing the scar line, such as buried
or subcuticular approaches. There ore,
sutures should be removed as early as
possible to minimize these complica-
tions, and consideration should be given
to adopting other closure techniques in
the event that sutures will not be able to
be removed in a timely ashion.
References
Hanasono MM, Hotchkiss RN. Locking hori-
zontal mattress suture. Dermatol Surg.
2005;31(5):572-573.
Niazi ZB. Two novel and use ul suturing techniques.
Plast Reconstr Surg. 1997;100(6):1617-1618.
Olson J, Berg D. Modif ed locking horizontal mat-
tress suture. Dermatol Surg. 2014;40(1):72-74.
Zuber TJ. The mattress sutures: vertical, hori-
zontal, and corner stitch. Am Fam Physician.
2002;66(12):2231-2236.
200
directly across rom its exit point,
perpendicular to the epidermis and
parallel to the incised wound, now
acing in the opposite direction. With
a uid motion o the wrist, the needle
is rotated through the dermis, and the
needle tip exits the skin on the ipsilat-
eral side, across the wound edge rom
the original insertion point.
3. The suture material is then tied o
gently, with care being taken to mini-
mize tension across the epidermis and
avoid overly constricting the wound
edges (Figures 5-7A through 5-7F).
Tips and Pearls
This approach is very use ul w hen
attempting to recreate a natural crease,
especially since traditional everting
sutures have a tendency to blunt natu-
ral creases. Since the eye is naturally
draw n to skin olds and creases, this
small change may have a dramatic
e ect on the ultimate outcome o the
repair.
Unlike the traditional horizontal mat-
tress, this technique does not result in
signif cant compression o the underlying
vascular plexus, and in act it results in
only modest tension across the wound
sur ace.
A gap remains between the suture
material and the incised wound edge,
since the inversion o the wound edges
causes them to be depressed relative to
the surrounding skin. There ore, track
marks are unlikely with this technique.
The Inverting Horizontal
Mattress Suture
C H A P T E R 5 . 7
Video 5-7. Inverting
horizontal mattress suture
Access to video can be found via
Application
This is a niche technique designed to
encourage wound-edge inversion, and
is use ul primarily to recreate a natural
crease. It may be used to recreate the
alar creases as well as to better def ne the
helical rim, and may also be use ul when
recreating the mental crease.
Suture Material Choice
With all techniques, it is best to use the
thinnest suture possible in order to mini-
mize the risk o track marks and oreign-
body reactions. Generally, this suture is
used on the ace and ears, and there ore
a 6-0 or 7-0 monof lament suture may be
best, though ast-absorbing gut may be
used to obviate the need or suture removal.
Technique
1. The needle is inserted perpendicular
to the epidermis in a direction parallel
to the incised wound edge, approxi-
mately 5 mm rom the wound edge.
The needle is rotated, ollowing its
curvature, through the dermis, exit-
ing proximal relative to the surgeon
but still on the ipsilateral side o the
incised wound edge.
2. The needle is then reloaded in a
backhand ashion, and inserted on
the contralateral side o the incision
201
The Inverting Horizontal Mattress Suture
A
Figure 5-7A. Overview of the inverting horizontal mat-
tress technique.
B
Figure 5-7B. The needle is inserted at 90 degrees, on
a trajectory parallel to the wound edge.
C
Figure 5-7C. The needle exits further along its trajec-
tory further along the wound but the same distance
from the wound edge.
D
Figure 5-7D. The needle is then inserted lateral to the
contralateral wound edge, across from its exit point on
the other wound edge, again on a trajectory parallel to
the incised wound edge.
E
Figure 5-7E. The needle then exits further along its
trajectory, directly across from its original insertion
point.
F
Figure 5-7F. Immediate postoperative appearance.
202
Atlas of Suturing Techniques: Approaches to Surgical Wound, Laceration, and Cosmetic Repair
It is help ul to take the bites o the invert-
ing horizontal mattress suture approxi-
mately 5-mm lateral to the incised wound
edge, as this leads to a relative li t on the
skin lateral to the wound edge, helping to
accentuate the desired wound inversion.
Drawbacks and Cautions
This technique may lead to dramatic
wound inversion, and there ore should
only be used when the goal is recreating
a natural crease. Moreover, since wound
inversion may be associated with in erior
cosmesis over the long term, the benef t o
accentuated inversion should be weighed
against the possibility that the long-term
cosmetic outcome o the suture scar may
be less than ideal. The over-inversion o
the wound edges caused by the suturing
technique relaxes somewhat a ter suture
removal, allowing the wound edges to
meet and heal.
This technique also does not lead to
dramatic wound-edge apposition, which
is again an important consideration when
choosing this approach. There ore, it is
best used when the deep sutures have
resulted in acceptable w ound-edge
approximation.
Reference
Wentzell JM, Lund JJ. The inverting horizontal
mattress suture: applications in dermatologic
surgery. Dermatol Surg. 2012;38(9):1535-1539.
203
to the wound edge. This will allow
the needle to exit the wound on the
contralateral side at an equal distance
rom the wound edge by simply ol-
lowing the curvature o the needle.
2. With a uid motion o the wrist,
the needle is rotated through the
dermis, taking the bite wider at the
deep margin than at the sur ace,
and the needle tip exits the skin on
the contralateral side.
3. The needle body is grasped with sur-
gical orceps in the le t hand, with
care being taken to avoid grasping the
needle tip, which can be easily dulled
by repetitive riction against the
surgical orceps. It is gently grasped
and pulled upward with the surgi-
cal orceps as the body o the needle
is released rom the needle driver.
Alternatively, the needle may be
released rom the needle driver and
the needle driver itsel may be used
to grasp the needle rom the contra-
lateral side o the wound to complete
its rotation through its arc, obviating
the need or surgical orceps.
4. The suture material is then tied o
gently, with care being taken to
minimize tension across the epider-
mis and avoid overly constricting
the wound edges.
5. Starting proximal relative to the sur-
geon, the needle is then reinserted
perpendicular
to
the
epidermis,
approximately one-hal the radius o
the needle distant to the wound edge.
The Running Horizontal
Mattress Suture
C H A P T E R 5 . 8
Video 5-8. Running horizontal
mattress suture
Access to video can be ound via
SuturingTechniques.com.
Application
This is a requently used running evert-
ing technique employed or closure and
epidermal approximation. It is use ul,
especially on the ace, to aid in evert-
ing the wound edges when the dermis
has been closed using a deep suturing
technique. This technique may also be
used in patients with atrophic skin, as the
broader anchoring bites may help limit
tissue tear-through that may be seen with
a simple interrupted suture.
Suture Material Choice
With all techniques, it is best to use the
thinnest suture possible in order to mini-
mize the risk o track marks and oreign-
body reactions. On the ace and eyelids,
a 6-0 or 7-0 monof lament suture may
be used, though ast-absorbing gut may
be used on the eyelids and ears to obvi-
ate the need or suture removal. Since
the goal o the running horizontal mat-
tress suture placement is primarily to
encourage wound-edge eversion, f ne-
gauge suture material may be used on
the extremities as well.
Technique
1. The needle is inserted perpendicular
to the epidermis, approximately one-
hal the radius o the needle distant
A
204
Atlas o Suturing Techniques: Approaches to Surgical Wound, Laceration, and Cosmetic Repair
6. With a uid motion o the wrist,
the needle is rotated through the
dermis, taking the bite wider at the
deep margin than at the sur ace,
and the needle tip exits the skin on
the contralateral side.
7. The needle body is grasped with
surgical orceps in the le t hand and
pulled upward with the surgical
orceps as the body o the needle is
released rom the needle driver.
8. The needle is then reloaded in a
backhand ashion and inserted at
90 degrees perpendicular to the
Figure 5-8A. Overview o the running horizontal mat-
tress technique.
A
Figure 5-8B. Initiation o the anchoring suture o the
running horizontal mattress suture technique. Note the
needle entry at 90 degrees.
B
Figure 5-8C. Completion o the frst pass o the
needle, now exiting at 90 degrees.
C
Figure 5-8D. The anchoring suture is tied o , and the
running component o the suture begins.
D
epidermis proximal (relative to the
surgeon) to its exit point on the same
side o the incision line as the exit
point.
9. The needle is rotated through its
arc, exiting on the right side o the
wound (relative to the surgeon) in a
mirror image o step (6).
10. Moving proximally relative to the
surgeon, steps (5) through (9) are
then sequentially repeated, until
the end o the wound is reached.
At that point, a loop is le t in the
penultimate throw and the suture
material is then tied o gently, with
care being taken to minimize ten-
sion across the epidermis and avoid
overly
constricting
the
wound
edges (Figures 5-8A through 5-8H).
205
The Running Horizontal Mattress Suture
Figure 5-8E. Completion o the frst pass o the run-
ning component.
E
Figure 5-8F. The needle is then reinserted in a back-
hand ashion on the ipsilateral wound edge, just proxi-
mal to its exit point.
F
Figure 5-8G. The needle exits on the contralateral
wound edge.
G
Figure 5-8H. Immediate postoperative wound
appearance.
H
Tips and Pearls
This technique is requently used on
the ace, as it aids with dramatic wound
eversion. Generally, i the dermis was
closed using the set-back dermal suture,
no additional eversion is needed; how-
ever, when the buried dermal suture or
even the buried vertical mattress suture,
are used, occasionally the wound edges
do not evert to the desired degree.
This approach also helps minimize
cross-hatched railroad track marks, since
the suture material does not cross over
the incised wound edge. Similarly, this
technique can sometimes yield a neater
immediate postoperative appearance, as
even i bite sizes are not uni orm this is
not apparent to the observer, as only the
portions o suture material parallel to the
incision line are visible.
As always, it is important to enter
the epidermis at 90 degrees, allowing
the needle to travel slightly laterally
away rom the wound edge be ore ully
ollowing the curvature o the needle
when utilizing this technique. This will
allow or maximal wound eversion and
accurate wound-edge approximation.
As with the simple interrupted suture,
care should be taken to avoid skimming
the needle superf cially beneath the epi-
dermis. This results rom ailing to enter
the skin at a perpendicular angle and ail-
ing to ollow the curvature o the needle.
This may result in wound inversion as the
tension vector o the shallow bite pulls
the wound edges outward and down.
206
Atlas o Suturing Techniques: Approaches to Surgical Wound, Laceration, and Cosmetic Repair
Drawbacks and Cautions
This technique does not typically permit
the same degree o wound-edge apposi-
tion as can be accomplished with other
running transepidermal sutures, since
the everting e ect o the suture tech-
nique may even be associated with a
small degree o gaping at the center o
the horizontal mattress suture, and suture
material does not cross over the incised
wound edge. In the event that deeper
sutures were care ully placed, this may
not be a signif cant drawback, since the
wound edges may be well-aligned rom
the placement o these deeper sutures.
I not, or i there is a need or improved
wound-edge apposition even a ter placing
the running horizontal mattress suture, a
small simple interrupted suture may be
placed intermittently over the horizontal
mattress suture to bring the wound edges
together more precisely.
Suture removal with this technique
may be more involved than with simple
interrupted sutures, particularly i sutures
are le t in situ or an extended period o
time and some o the suture material
has been overgrown by the healing epi-
dermis, and the knot may be somewhat
buried in the context o a ridged everted
repair. Moreover, since this is a running
technique it may be di f cult to locate a
portion o suture easily amenable to cut-
ting at the time o suture removal, as it
is best to minimize the length o pulled
through suture material at the time o
removal.
As w ith any suturing technique,
knowledge o the relevant anatomy is
critical. When placing a running horizon-
tal mattress suture it is important to recall
that the structures deep to the epidermis
may be compromised by the passage o
the needle and suture material.
Similarly, structures deep to the de ect
may be constricted. This can lead to
necrosis due to vascular compromise or
even, theoretically, superf cial nerve dam-
age. These concerns are more acute with
the running horizontal mattress suture
than with the simple running suture, since
the wide arc o the suture material and
its horizontal component incorporate
more skin and underlying structures, thus
increasing the risk o strangulation.
This technique may elicit an increased
risk o track marks, necrosis, and other
complications w hen compared w ith
techniques that do not entail suture
material traversing the scar line, such
as buried or subcuticular approaches.
There ore, sutures should be removed
as early as possible to minimize these
complications, and consideration should
be given to adopting other closure tech-
niques or utilizing ast-absorbing gut
suture material in the event that sutures
will not be able to be removed in a timely
ashion.
Reference
Moody BR, McCarthy JE, Linder J, Hruza GJ.
Enhanced cosmetic outcome with running
horizontal mattress sutures. Dermatol Surg.
2005;31(10):1313-1316.
207
distant to the wound edge. This will
allow the needle to exit the wound
on the contralateral side at an equal
distance rom the wound edge by
simply ollowing the curvature o
the needle.
2. With a uid motion o the wrist,
the needle is rotated through the
dermis, taking the bite wider at the
deep margin than at the sur ace,
and the needle tip exits the skin on
the contralateral side.
3. The needle body is grasped with sur-
gical orceps in the le t hand, with
care being taken to avoid grasping the
needle tip, which can be easily dulled
by repetitive riction against the sur-
gical orceps. It is gently grasped
and pulled upward with the surgi-
cal orceps as the body o the needle
is released rom the needle driver.
Alternatively, the needle may be
released rom the needle driver and
the needle driver itsel may be used
to grasp the needle rom the contra-
lateral side o the wound to complete
its rotation through its arc, obviating
the need or surgical orceps.
4. The suture material is then tied o
gently, with care being taken to
minimize tension across the epider-
mis and avoid overly constricting
the wound edges. The trailing end
o suture is then trimmed.
5. Starting proximal relative to the sur-
geon, the needle is then reinserted
perpendicular
to
the
epidermis,
The Running Horizontal
Mattress Suture with
Intermittent Simple Loops
C H A P T E R 5 . 9
Video 5-9. Running horizontal
mattress suture with
intermittent simple loops
Access to video can be ound via
SuturingTechniques.com.
Application
Like the standard running horizontal mat-
tress suture, this is a running everting
technique used or closure and epidermal
approximation. It is use ul, especially on
the ace, to aid in everting the wound
edges when the dermis has been closed
using a deep suturing technique. This
technique may also be used in patients
with atrophic skin, as the broader anchor-
ing bites may help limit tissue tear-
through that may be seen with a simple
interrupted suture.
Suture Material Choice
With all techniques, it is best to use the thin-
nest suture possible in order to minimize
the risk o track marks and oreign-body
reactions. On the ace and eyelids a 6-0
or 7-0 monof lament suture may be used,
though ast-absorbing gut may be used on
the eyelids and ears to obviate the need
or suture removal. Since the goal o this
technique is primarily to encourage wound-
edge eversion, f ne-gauge suture material
may be used on the extremities as well.
Technique
1. The needle is inserted perpendicu-
lar to the epidermis, approximately
one-hal the radius o the needle
208
Atlas o Suturing Techniques: Approaches to Surgical Wound, Laceration, and Cosmetic Repair
approximately one-hal the radius o
the needle distant to the wound edge.
6. With a uid motion o the wrist,
the needle is rotated through the
dermis, taking the bite wider at the
deep margin than at the sur ace,
and the needle tip exits the skin on
the contralateral side.
7. The needle body is grasped with
surgical orceps in the le t hand, and
pulled upward with the surgical
orceps as the body o the needle is
released rom the needle driver.
8. The needle is then reloaded in a
backhand ashion and inserted at
90-degrees perpendicular to the epi-
dermis proximal (relative to the sur-
geon) to its exit point on the same
side o the incision line as the exit
point.
9. The needle is rotated through its
arc, exiting on the right side o the
wound (relative to the surgeon) in a
mirror image o step (6).
10. Steps (5) through (9) are then
repeated.
11. Moving proximally, the needle is
then reinserted perpendicular to the
epidermis on the right side o the
wound, approximately one-hal
the radius o the needle distant to
the wound edge.
12. With a uid motion o the wrist,
the needle is rotated through the
dermis, taking the bite wider at the
deep margin than at the sur ace,
and the needle tip exits the skin on
the contralateral side.
13. Again
moving
proximally,
the
needle is reinserted perpendicular
to the epidermis on the right side o
the wound, approximately one-hal
the radius o the needle distant to the
wound edge.
14. With a uid motion o the wrist,
the needle is rotated through the
dermis, taking the bite wider at the
deep margin than at the sur ace,
and the needle tip exits the skin on
the contralateral side.
15. The needle is then reloaded in a
backhand ashion and inserted at
90 degrees perpendicular to the epi-
dermis proximal (relative to the sur-
geon) to its exit point on the same
side o the incision line as the exit
point.
16. The needle is rotated through its
arc, exiting on the right side o the
wound (relative to the surgeon) in a
mirror image o step (6).
17. Moving proximally relative to the
surgeon, these steps are sequen-
tially repeated, occasionally inserting
simple interrupted throws between
the running horizontal mattress
throws, until the end o the wound
is reached. At that point, a loop is
le t in the penultimate throw and the
suture material is then tied o gently,
with care being taken to minimize
tension across the epidermis and
avoid overly constricting the wound
edges (Figures 5-9A through 5-9I).
Figure 5-9A. Overview o the running horizontal mat-
tress suture with intermittent simple loops.
A
209
The Running Horizontal Mattress Suture with Intermittent Simple Loops
Figure 5-9B. The anchoring suture is placed.
B
Figure 5-9C. The anchoring suture knot has been
tied, and the frst running horizontal mattress suture is
begun. Note the 90-degree entry angle.
C
Figure 5-9D. The frst running horizontal mattress
suture continues.
D
Figure 5-9E. The needle is reloaded in a backhand
ashion and again inserted into the skin at 90 degrees.
E
Figure 5-9F. The needle is reloaded in a standard
ashion and passed through the skin.
F
G
Figure 5-9G. This process is repeated to place a
simple running loop.
210
Atlas o Suturing Techniques: Approaches to Surgical Wound, Laceration, and Cosmetic Repair
H
Figure 5-9H. The horizontal mattress component then
continues.
I
Figure 5-9I. Immediate postoperative appearance.
Tips and Pearls
The ratio o horizontal mattress to simple
running throws can be greater than 1 to 1;
many surgeons avor a ratio o 2:1, while
the original published description o this
approach advocates a ratio o 4:1. On rela-
tively short repairs on the ace, a simple
running interrupted loop may be placed
at the center o the wound.
This approach helps mitigate the prob-
lem o challenging suture removal that is
associated with the running horizontal
mattress approach. The simple running
loops are easily accessible at the time
o suture removal and may be cut, thus
allowing the suture material to be pulled
through. An additional benef t is that
the intermittent simple running loops
help with wound-edge apposition, as the
horizontal mattress components tend to
evert the edges but do not always bring
the wound edges together as elegantly
as would otherwise be desired.
This technique is requently used on
the ace, as it aids with dramatic wound
eversion. Generally, i the dermis was
closed using the set-back dermal suture,
no additional eversion is needed; how-
ever, when the buried dermal suture or
even the buried vertical mattress suture,
are used, occasionally the wound edges
do not evert to the desired degree.
This approach also helps minimize
cross-hatched railroad track marks, since
most o the suture material does not cross
over the incised wound edge. Similarly,
this technique can sometimes yield a
neater immediate postoperative appear-
ance, as even i bite sizes are not uni orm
this is not apparent to the observer, as
only the portions o suture material paral-
lel to the incision line are visible.
As always, it is important to enter the
epidermis at 90 degrees, allowing the
needle to travel slightly laterally away
rom the wound edge be ore ully ol-
lowing the curvature o the needle when
utilizing this technique. This will allow
or maximal wound eversion and accurate
wound-edge approximation.
As with the simple interrupted suture,
care should be taken to avoid skimming
the needle super icially beneath the
epidermis. This results rom ailing to enter
the skin at a perpendicular angle and ail-
ing to ollow the curvature o the needle.
This may result in wound inversion as the
tension vector o the shallow bite pulls the
wound edges outward and down.
Drawbacks and Cautions
Even with the placement o intermittent
simple running loops, this technique does
not uni ormly permit the same degree
211
The Running Horizontal Mattress Suture with Intermittent Simple Loops
o w ound-edge apposition as can be
accomplished with other running tran-
sepidermal sutures, since the everting
e ect o the suture technique may even
be associated with a small degree o gap-
ing at the center o the horizontal mat-
tress suture, and suture material does not
cross over the incised wound edge. In
the event that deeper sutures were care-
ully placed, this may not be a signif cant
drawback, since the wound edges may
be well-aligned rom the placement o
these deeper sutures.
With any suturing technique, knowl-
edge o the relevant anatomy is criti-
cal. When placing a running horizontal
mattress suture with intermittent simple
loops it is important to recall that the
structures deep to the epidermis may
be compromised by the passage o the
needle and suture material.
As always, structures deep to the de ect
may be constricted. This can lead to necro-
sis due to vascular compromise or even,
theoretically, superf cial nerve damage.
These concerns are more acute with the
running horizontal mattress suture than
with the simple running suture, since the
wide arc o the suture material and its hor-
izontal component incorporate more skin
and underlying structures, thus increasing
the risk o strangulation.
This technique may elicit an increased
risk o track marks, necrosis, and other
complications when compared with tech-
niques that do not entail suture material
traversing the scar line, such as buried
or subcuticular approaches. There ore,
sutures should be removed as early as
possible to minimize these complica-
tions, and consideration should be given
to adopting other closure techniques or
utilizing ast-absorbing gut suture mate-
rial in the event that sutures will not be
able to be removed in a timely ashion.
Reference
Wang SQ, Goldberg LH. Surgical pearl: running hori-
zontal mattress suture with intermittent simple
loops. J Am Acad Dermatol. 2006;55(5):870-871.
212
material may be used on the extremities
and neck, and thicker suture material,
including 3-0, may be used on the trunk
i the anticipated tension is marked.
Technique
1. The needle is inserted perpendicular
to the epidermis, approximately one-
hal the radius o the needle distant
to the wound edge. This will allow
the needle to exit the wound on the
contralateral side at an equal distance
rom the wound edge by simply ol-
lowing the curvature o the needle.
2. With a uid motion o the wrist,
the needle is rotated through the
dermis, taking the bite wider at the
deep margin than at the sur ace,
and the needle tip exits the skin on
the contralateral side.
3. The needle body is grasped with
surgical orceps in the le t hand,
with care being taken to avoid
grasping the needle tip, which can
be easily dulled by repetitive ric-
tion against the surgical orceps. It
is gently grasped and pulled upward
with the surgical orceps as the
body o the needle is released rom
the needle driver. Alternatively, the
needle may be released rom the
needle driver and the needle driver
itsel may be used to grasp the nee-
dle rom the contralateral side o
the wound to complete its rotation
through its arc, obviating the need
or surgical orceps.
The Running Alternating
Simple and Horizontal
Mattress Suture
C H A P T E R 5 . 1 0
Synonym
Running combined mattress suture
Video 5-10. Running alternating
simple and horizontal mattress
suture
Access to video can be found via
Application
This is a hybrid running everting tech-
nique used or closure and epidermal
approximation. It incorporates a hori-
zontal mattress component, w hich
encourages wound eversion, and a simple
running component, which encourages
wound-edge apposition. This technique
may also be used in patients with atrophic
skin, as the broader anchoring bites o the
horizontal mattress component may help
limit the tissue tear-through that may be
seen with a simple running suture.
Suture Material Choice
With all techniques, it is best to use the
thinnest suture possible in order to mini-
mize the risk o track marks and oreign-
body reactions. On the ace and eyelids, a
6-0 or 7-0 monof lament suture is use ul.
Since the goal o this technique is primarily
to encourage wound-edge eversion, f ne-
gauge suture material may be used on the
extremities as well, though i the wound
is under signif cant tension or i the simple
running component o the technique is
being used to approximate wound edges
under signif cant tension, then 5-0 suture
213
The Running Alternating Simple and Horizontal Mattress Suture
4. The suture material is then tied o
gently, with care being taken to
minimize tension across the epider-
mis and avoid overly constricting
the wound edges. The trailing end
o suture is trimmed.
5. Starting proximal relative to the sur-
geon, the needle is then reinserted
perpendicular
to
the
epidermis,
approximately one-hal the radius o
the needle distant to the wound edge.
6. With a uid motion o the wrist,
the needle is rotated through the
dermis, taking the bite wider at the
deep margin than at the sur ace,
and the needle tip exits the skin on
the contralateral side.
7. The needle body is grasped with
surgical orceps in the le t hand, and
pulled upward with the surgical
orceps as the body o the needle is
released rom the needle driver.
8. The needle is then reloaded in a
backhand ashion and inserted at
90 degrees perpendicular to the epi-
dermis proximal (relative to the sur-
geon) to its exit point on the same
side o the incision line as the exit
point.
9. The needle is rotated through its
arc, exiting on the right side o the
wound (relative to the surgeon) in a
mirror image o step (6).
10. Starting proximal relative to the sur-
geon, the needle is then reinserted
perpendicular
to
the
epidermis,
approximately one-hal the radius o
the needle distant to the wound edge.
11. With a uid motion o the wrist,
the needle is rotated through the
dermis, taking the bite wider at the
deep margin than at the sur ace,
and the needle tip exits the skin on
the contralateral side.
12. The needle body is grasped with
surgical orceps in the le t hand, and
pulled upward with the surgical
orceps as the body o the needle is
released rom the needle driver.
13. Starting proximal relative to the sur-
geon, the needle is then reinserted
perpendicular to the epidermis,
approximately one-hal the radius
o the needle distant to the wound
edge.
14. With a uid motion o the wrist,
the needle is rotated through the
dermis, taking the bite wider at the
deep margin than at the sur ace,
and the needle tip exits the skin on
the contralateral side.
15. The needle body is grasped with
surgical orceps in the le t hand, and
pulled upward with the surgical
orceps as the body o the needle is
released rom the needle driver.
16. The needle is then reloaded in a
backhand ashion and inserted at
90 degrees perpendicular to the epi-
dermis proximal (relative to the sur-
geon) to its exit point on the same
side o the incision line as the exit
point.
17. The needle is rotated through its
arc, exiting on the right side o the
wound (relative to the surgeon) in a
mirror image o step (6).
18. Moving proximally relative to
the surgeon, the previously men-
tioned steps are then sequentially
repeated, alternating the place-
ment o a simple running suture
with a running horizontal mattress
suture, until the end o the wound
is reached. At that point, a loop
is le t in the penultimate throw
and the suture material is then
tied o gently, w ith care being
taken to minimize tension across
the epidermis and avoid overly
constricting the wound edges
(Figures 5-10A through 5-10G).
214
Atlas of Suturing Techniques: Approaches to Surgical Wound, Laceration, and Cosmetic Repair
Figure 5-10A. Overview of the running alternating
simple and horizontal mattress suture.
A
Figure 5-10B. The anchoring suture is tied.
B
Figure 5-10C. The needle is then inserted through the
skin and rotated diagonally across the wound, exiting
on the contralateral side.
C
Figure 5-10D. The needle is then reloaded and
inserted, again from the contralateral side of the wound,
with a trajectory perpendicular to the wound edge.
D
Figure 5-10E. Using a backhand technique, the needle
is then reinserted from the ipsilateral side, again with a
course directly across the incised wound edge.
E
Figure 5-10F. The needle is then inserted, again from
same side, and rotated diagonally across the wound.
This pattern is continued along the course of the wound.
F
Figure 5-10G. Immediate postoperative appearance.
G
215
The Running Alternating Simple and Horizontal Mattress Suture
Tips and Pearls
Since this technique entails alternating
between a simple running and a run-
ning horizontal mattress suture, two bites
should be taken rom each side o the
wound in succession in order to e ec-
tively combine these techniques.
This technique addresses a shortcom-
ing in the running horizontal mattress
suture, which tends to e ectively evert
the skin edges but may be unreliable at
wound-edge apposition and coaptation.
By combining these two approaches, this
technique encourages excellent wound-
edge eversion with its horizontal com-
ponent while concomitantly permitting
wound-edge apposition with the simple
running component.
Moreover, a shortcoming o the tradi-
tional running horizontal mattress suture
is that suture removal may be challenging.
Since this technique entails alternating
the mattress sutures with their simple
running counterparts, suture removal is
straight orward as the simple running
loops are easily visualized and grasped
at the time o suture removal.
As always, it is important to enter the
epidermis at 90 degrees, allowing the
needle to travel slightly laterally away
rom the wound edge be ore ully ol-
lowing the curvature o the needle when
utilizing this technique. This will allow
or maximal wound eversion and accurate
wound-edge approximation.
Again, care should be taken to avoid
skimming the needle superf cially beneath
the epidermis. This results rom ailing
to enter the skin at a perpendicular angle
and ailing to ollow the curvature o the
needle. This may result in wound inversion
as the tension vector o the shallow bite
pulls the wound edges outward and down.
Drawbacks and Cautions
One o the advantages o the standard run-
ning horizontal mattress suture is that no
suture material crosses over the incision
line, and there ore the chance o leaving
track marks is small. Since this technique
includes a simple running component,
track marks may represent a potential
complication, and there ore suture mate-
rial should be removed as early as possible.
As w ith any suturing technique,
know ledge o the relevant anatomy is
critical. Similarly, structures deep to
the de ect may be constricted. This can
lead to necrosis due to vascular com-
promise or even, theoretically, super-
icial nerve damage. These concerns
are more acute w ith the running alter-
nating simple and horizontal mattress
suture than w ith the simple running
suture, since the w ide arc o the suture
material and its horizontal component
incorporate more skin and underlying
structures, thus increasing the risk o
strangulation.
This technique may elicit an increased
risk o track marks, necrosis, and other
complications when compared with tech-
niques that do not entail suture material
traversing the scar line, such as buried
or subcuticular approaches. There ore,
sutures should be removed as early as
possible to minimize these complications,
and consideration should be given to
adopting other closure in the event that
sutures will not be able to be removed
in a timely ashion.
Reference
Niazi ZB. Two novel and useful suturing techniques.
Plast Reconstr Surg. 1997;100(6):1617-1618.
216
When the goal o the running locking
horizontal mattress suture placement is
solely to encourage wound-edge eversion,
ne-gauge suture material may be used
on the extremities as well. Otherwise,
5-0 mono lament suture material may
be used i there is minimal tension, and
4-0 mono lament suture is use ul in areas
under moderate tension where the goal
o suture placement is relieving tension
as well as epidermal approximation. In
select high-tension areas, 3-0 mono la-
ment suture may be utilized as well.
Technique
1. The needle is inserted perpendicular
to the epidermis, approximately one-
hal the radius o the needle distant
to the wound edge. This will allow
the needle to exit the wound on the
contralateral side at an equal distance
rom the wound edge by simply ol-
lowing the curvature o the needle.
2. With a f uid motion o the wrist, the
needle is rotated through the dermis,
taking the bite wider at the deep
margin than at the sur ace, and the
needle tip exits the skin on the con-
tralateral side.
3. The needle body is grasped with
surgical orceps in the le t hand and
pulled upward with the surgical
orceps as the body o the needle is
released rom the needle driver.
4. The suture material is then tied o
gently, with care being taken to min-
imize tension across the epidermis
The Running Locking
Horizontal Mattress Suture
C H A P T E R 5 . 1 1
Synonym
Running looped mattress suture
Video 5-11. Running locking
horizontal mattress suture
Access to video can be found via
Application
This is a modi cation o the running
horizontal mattress suture, an everting
technique used or closure and epidermal
approximation. It is best used as a second-
ary layer when deeper sutures have been
previously placed. This technique may be
particularly use ul in the context o atrophic
skin, as the broader anchoring bites may
help limit tissue tear-through. This lock-
ing variation con ers two advantages over
the traditional horizontal mattress suture:
(1) better ease o suture removal, and
(2) improved wound-edge apposition.
Suture Material Choice
With all techniques, it is best to use the
thinnest suture possible in order to mini-
mize the risk o track marks and oreign-
body reactions. Suture choice will depend
largely on anatomic location and the goal
o suture placement.
On the ace, a 6-0 or 7-0 mono la-
ment suture may be used, though ast-
absorbing gut may be used on the eyelids
and ears to obviate the need or suture
removal; in these cases, standard running
horizontal mattress sutures are probably
pre erable to their locking counterparts.
217
The Running Locking Horizontal Mattress Suture
and avoid overly constricting the
wound edges. Only the loose end o
suture is trimmed.
5. Moving proximally toward the sur-
geon, the needle is again inserted
perpendicular
to
the
epidermis,
approximately one-hal the radius o
the needle distant to the wound edge.
6. With a f uid motion o the wrist,
the needle is rotated through the
dermis, taking the bite wider at the
deep margin than at the sur ace,
and the needle tip exits the skin on
the contralateral side.
7. The needle body is grasped with
surgical orceps in the le t hand and
pulled upward with the surgical
orceps as the body o the needle is
released rom the needle driver.
8. The needle is then reloaded in a
backhand ashion and inserted at
90 degrees perpendicular to the epi-
dermis proximal (relative to the sur-
geon) to its exit point on the same
side o the incision line as the exit
point. Importantly, a loop o suture
Figure 5-11A. Overview of the running locking hori-
zontal mattress technique.
A
Figure 5-11B. After the anchoring suture is placed,
the needle is again inserted at 90 degrees through the
epidermis, exiting on the contralateral wound edge.
B
Figure 5-11C. The needle is then reloaded in a back-
hand fashion and enters the skin on the ipsilateral
wound edge, exiting on the contralateral side.
C
material is le t protruding rom
the wound rom where the needle
exited on the prior throw to where
it enters on this throw.
9. The needle is rotated through its
arc, exiting on the right side o the
wound (relative to the surgeon) in
a mirror image o steps (6) and (7).
10. The needle is then passed under the
loop o suture material on the con-
tralateral side.
11. Steps (5) through (10) are then
sequentially
repeated,
moving
proximally toward the surgeon.
12. The suture material is then tied o
gently, with care being taken to mini-
mize tension across the epidermis and
avoid overly constricting the wound
edges (Figures 5-11A through 5-11G).
218
Atlas of Suturing Techniques: Approaches to Surgical Wound, Laceration, and Cosmetic Repair
Figure 5-11D. The needle is then passed through the
loop formed by the horizontal mattress suture.
D
Figure 5-11E. The needle is then pulled laterally,
securing the locking loop.
E
Figure 5-11F. The pattern continues, moving along the
course of the wound.
F
Figure 5-11G. Immediate postoperative appearance.
G
Tips and Pearls
The running locking technique con ers
two important advantages over the tradi-
tional running horizontal mattress suture.
First, the standard horizontal mattress
suture does not typically permit the same
degree o wound-edge apposition as can be
accomplished with other transepidermal
sutures, since the everting e ect o the
suture technique may even be associated
with a small degree o gaping at the center
o the horizontal mattress suture. Locking
the suture material brings the knot, as
well as the two parallel external rows o
suture, to the center o the wound, thus
improving wound-edge approximation.
Second, suture removal with the stan-
dard running horizontal mattress tech-
nique may be challenging, particularly
i sutures are le t in situ or an extended
period o time and some o the suture
material has been overgrown by the heal-
ing epidermis, as the knot may be buried
in the context o a ridged everted repair.
Bringing the knot, along with the parallel
rows o external suture material, centrally
with the locking technique allows the
knot to be more easily grasped at the
time o suture removal.
As with most transepidermal tech-
niques, it is important to enter the epi-
dermis at 90 degrees, allowing the needle
to travel slightly laterally away rom the
wound edge be ore ully ollowing the
curvature o the needle when utilizing
this technique. This will allow or maxi-
mal wound eversion and accurate wound-
edge approximation.
As with the simple interrupted suture,
care should be taken to avoid skimming
219
The Running Locking Horizontal Mattress Suture
the needle super cially beneath the epi-
dermis. This results rom ailing to enter
the skin at a perpendicular angle and to
ollow the curvature o the needle. This
may result in wound inversion as the
tension vector o the shallow bite pulls
the wound edges outward and down.
Drawbacks and Cautions
This variation has a disadvantage when
compared with the standard running
horizontal mattress technique, in that
locking each throw means that there is
suture material passing over the incision
line with every throw. As suture material
passing over the center o the wound may
be associated with track-like scarring, this
disadvantage needs to be weighed care-
ully against any perceived advantages
o this technique.
Moreover, particularly i the suture
material is under signi cant tension,
structures deep to the de ect may be
constricted. This can lead to necrosis
due to vascular compromise or even,
theoretically, super cial nerve damage.
These concerns are more acute w ith
the running locking horizontal mattress
suture than w ith the simple running
suture, since the wide arc o the suture
material and its horizontal component
incorporate more skin and underlying
structures, thus increasing the risk o
strangulation.
The potential to constrict deeper
structures may be used to the surgeon’s
advantage in the context o a slowly ooz-
ing surgical wound, since this technique
may indirectly ligate the culprit vessels.
This should only be used in the event that
the o ending vessel is relatively small,
since otherwise there is a signi cant risk
that this indirect ligation will not be su -
ciently resilient. Moreover, tying the
suture too tightly may increase the risk
o developing track marks or super cial
necrosis.
This technique may elicit an increased
risk o track marks, necrosis, and other
complications when compared with tech-
niques that do not entail suture material
traversing the scar line, such as buried
or subcuticular approaches. There ore,
sutures should be removed as early as
possible to minimize these complications,
and, as noted previously, consideration
should be given to adopting other closure
techniques in the event that sutures will
not be able to be removed in a timely
ashion.
References
Hanasono MM, Hotchkiss RN. Locking hori-
zontal mattress suture. Dermatol Surg.
2005;31(5):572-573.
Niazi ZB. Running looped mattress suturing tech-
nique. Plast Reconstr Surg. 1998;101(1):248-249.
Niazi ZB. Two novel and use ul suturing techniques.
Plast Reconstr Surg. 1997;100(6):1617-1618.
Olson J, Berg D. Modif ed locking horizontal mat-
tress suture. Dermatol Surg. 2014;40(1):72-74.
Zuber TJ. The mattress sutures: vertical, hori-
zontal, and corner stitch. Am Fam Physician.
2002;66(12):2231-2236.
220
oreign-body reactions. Suture choice
will depend largely on anatomic location
and the goal o suture placement. This
technique is rarely used on the ace, but
i it is used there a 6-0 or 7-0 mono la-
ment suture may be used or epidermal
approximation. On the extremities, a 5-0
mono lament suture may be used i there
is minimal tension, and 4-0 mono lament
suture can be used in areas under moder-
ate tension where the goal o suture place-
ment is relieving tension or hemostasis as
well as epidermal approximation. In select
high-tension areas, 3-0 mono lament
suture may be utilized as well. When
used or hemostasis on the interior o
a wound, a 4-0 absorbable suture may
be used.
Technique
1. The needle is inserted perpendicular
to the epidermis, approximately one-
hal the radius o the needle distant
to the wound edge. This will allow
the needle to exit the wound on the
contralateral side at an equal distance
rom the wound edge by simply ol-
lowing the curvature o the needle.
2. With a f uid motion o the wrist, the
needle is rotated through the dermis,
taking the bite wider at the deep
margin than at the sur ace, and the
needle tip exits the skin on the con-
tralateral side.
3. The needle body is grasped with sur-
gical orceps in the le t hand, with
care being taken to avoid grasping the
The Cruciate Mattress Suture
C H A P T E R 5 . 1 2
Synonym
Figure o 8 suture
Video 5-12. Cruciate mattress
suture
Access to video can be ound via
SuturingTechniques.com.
Application
This is an in requently used technique that
is a hybrid between a simple interrupted
suture, a mattress suture, and a simple
running suture. It is use ul when the ben-
e ts o interrupted sutures—especially
the requent knot placement leading to a
more secure closure—is desired. It may
also be used i the wound length is slightly
too long or a single simple interrupted
suture. This approach entails taking two
simple interrupted bites in succession and
then tying o the suture, leaving an “x”
o suture material over the wound edge.
It may be used alone in the context o
small wounds under minimal to no ten-
sion, such as those ormed by a punch
biopsy or a traumatic laceration. It may
also be used as a secondary layer to aid
in the approximation o the epidermis
when the dermis has been closed using a
dermal or other deep suturing technique.
This technique may also be used or vessel
ligation and hemostasis, where it is classi-
cally re erred to as the gure o 8 suture.
Suture Material Choice
With all techniques, it is best to use
the thinnest suture possible in order to
minimize the risk o track marks and
221
The Cruciate Mattress Suture
needle tip, which can be easily dulled
by repetitive riction against the sur-
gical orceps. It is gently grasped
and pulled upward with the surgi-
cal orceps as the body o the needle
is released rom the needle driver.
Alternatively, the needle may be
released rom the needle driver and
the needle driver itsel may be used
to grasp the needle rom the contra-
lateral side o the wound to complete
its rotation through its arc, obviating
the need or surgical orceps.
Figure 5-12A. Overview o the cruciate mattress tech-
nique. Note that this essentially represents a simple
running suture with two loops.
A
Figure 5-12B. First step o the cruciate mattress
suture. The needle is inserted at 90 degrees to the
epidermis and rotated through to the contralateral side
o the wound, again exiting at 90 degrees.
B
Figure 5-12C. Second step o the cruciate mattress
technique. The needle is again rotated through the
skin, repeating the frst step.
C
Figure 5-12D. Appearance a ter placement o the two
sutures.
D
Figure 5-12E. Immediate postoperative appearance
a ter tying the suture. Note the characteristic cruciate
appearance.
E
4. Starting proximally relative to the
surgeon, steps (1) through (3) are then
repeated.
5. The suture material is then tied o
gently (Figures 5-12A through 5-12E).
222
Atlas o Suturing Techniques: Approaches to Surgical Wound, Laceration, and Cosmetic Repair
Tips and Pearls
This technique is use ul when attempting
to obtain hemostasis in a punch biopsy
site or when some super cial oozing
remains in a patient on aspirin or antico-
agulant therapy. It can be conceptualized
as a transepidermal gure o 8 suture, as
it has the potential to loosely ligate small
vessels in the dermis and subcutis. This
approach is, interestingly, airly popular
in the veterinary literature.
As always, it is important to enter the
epidermis at 90 degrees, allowing the
needle to travel slightly laterally away
rom the wound edge be ore ully ol-
lowing the curvature o the needle when
utilizing this technique. This will allow
or maximal wound eversion and accurate
wound-edge approximation.
Care should be taken to avoid skim-
ming the needle super cially beneath
the epidermis. This results rom ailing
to enter the skin at a perpendicular angle
and to ollow the curvature o the needle.
This may result in wound inversion as the
tension vector o the shallow bite pulls
the wound edges outward and down.
Drawbacks and Cautions
The larger amount o suture material
traversing the skin in this technique
translates into an increased risk o track
marks over comparable techniques.
Instead o the single section o suture
material that traverses the skin with a
simple interrupted suture, the cruciate
mattress leaves an “x” o suture material
taut against the skin; all o this mate-
rial has the tendency to bury itsel in
the underlying epidermis during healing
and this phenomenon may be exacer-
bated during the course o postoperative
wound edema, leading to an increased
risk o unsightly track marks i the suture
material is not removed promptly.
As with any suturing technique, knowl-
edge o the relevant anatomy is critical.
When placing a cruciate mattress suture
it is important to recall that the structures
deep to the epidermis may be compro-
mised by the passage o the needle and
suture material. For example, the needle
may pierce a vessel leading to increased
bleeding.
While this may occasionally represent
an advantage o this technique, particu-
larly i the knot is tied relatively tightly,
structures deep to the de ect may be con-
stricted. This can lead to necrosis due to
vascular compromise or even, theoreti-
cally, super cial nerve damage.
The potential to constrict deeper
structures may be used to the surgeon’s
advantage in the event that a small vessel
deep to the incision line is oozing; rather
than opening the wound, localizing the
source o the bleed, and tying o the
individual vessel, it may be possible to
simply place a cruciate mattress suture
incorporating the culprit vessel within
its arc, tie it tightly, and thus indirectly
ligate the vessel. This should only be
used in the event that the o ending ves-
sel is relatively small, since otherwise
there is a signi cant risk that this indirect
ligation will not be su ciently resilient.
Moreover, tying the suture too tightly
may increase the risk o developing track
marks or super cial necrosis.
This technique may elicit an increased
risk o track marks, necrosis, and other
complications when compared with tech-
niques that do not entail suture material
traversing the scar line, such as buried
or subcuticular approaches. There ore,
sutures should be removed as early as
possible to minimize these complica-
tions, and consideration should be given
to adopting other closure techniques in
the event that sutures will not be able to
be removed in a timely ashion.
223
under signi cant tension, then 5-0 suture
material may be used on the extremities
and neck, and thicker suture material,
including 3-0, may be used on the trunk
i the anticipated tension is marked.
Technique
1. The needle is inserted perpendicu-
lar to the epidermis, approximately
6-mm distant to the wound edge.
2. With a f uid motion o the wrist, the
needle is rotated through the dermis,
taking the bite wider at the deep
margin than at the sur ace, and the
needle tip exits the skin on the con-
tralateral side.
3. The needle body is grasped with sur-
gical orceps in the le t hand, with
care being taken to avoid grasping the
needle tip, which can be easily dulled
by repetitive riction against the sur-
gical orceps. It is gently grasped
and pulled upward with the surgi-
cal orceps as the body o the needle
is released rom the needle driver.
Alternatively, the needle may be
released rom the needle driver and
the needle driver itsel may be used
to grasp the needle rom the contra-
lateral side o the wound to complete
its rotation through its arc, obviating
the need or surgical orceps.
4. The suture material is then tied o gen-
tly, with care being taken to minimize
tension across the epidermis and avoid
overly constricting the wound edges.
The trailing end o suture is trimmed.
The Running Oblique
Mattress Suture
C H A P T E R 5 . 1 3
Synonym
Continuous oblique mattress suture
Video 5-13. Running oblique
mattress suture
Access to video can be found via
Application
This is a hybrid running everting technique
used or closure and epidermal approxi-
mation. It incorporates an oblique mat-
tress component, which encourages both
wound eversion and wound-edge appo-
sition. This technique may be use ul or
patients with atrophic skin, as the broader
anchoring bites o the oblique mattress
technique may help limit the tissue tear-
through that may be seen with a simple
running suture, while concomitantly pro-
viding improved wound-edge eversion.
Suture Material Choice
With all techniques, it is best to use
the thinnest suture possible in order to
minimize the risk o track marks and
oreign-body reactions. This technique
was originally described or the trunk
and extremities, where a 2-0 nonabsorb-
able suture was advocated. Unless there
is marked tension across the wound,
smaller gauge suture material is pre erable.
Indeed, since the goal o the continuous
oblique mattress suture is primarily to
encourage wound-edge eversion, ne-
gauge suture material may be used on the
extremities as well, though i the wound is
224
Atlas of Suturing Techniques: Approaches to Surgical Wound, Laceration, and Cosmetic Repair
5. Starting approximately 2 mm proxi-
mal relative to the surgeon, the nee-
dle is then reinserted perpendicular
to the epidermis, 3 mm rom the
wound edge on the right side o the
wound.
6. With a f uid motion o the wrist, the
needle is rotated through the dermis,
and the needle tip exits the skin on the
contralateral side, again approximately
3 mm set back rom the incised wound
edge.
7. The needle is then reloaded in a
backhand ashion and inserted 3 mm
proximal and approximately 6 mm
distant rom the incised wound edge
on the same side o the incision line
as the exit point.
8. The needle is rotated through its arc,
exiting on the contralateral side o the
wound, again approximately 6 mm
distant rom the incised wound edge.
9. Moving proximally relative to the sur-
geon, steps (5) through (8) are then
sequentially repeated, until the end o
the wound is reached. At that point,
a loop is le t in the penultimate throw
and the suture material is then tied o
Figure 5-13A. Overview of the running oblique
mattress suture.
A
Figure 5-13B. The anchoring knot is tied.
B
Figure 5-13C. The needle is then inserted at 90 degrees
through the skin near to the incision line, exiting on the
contralateral side near to the incision line.
C
Figure 5-13D. The needle is reloaded in a backhand
fashion and inserted just distal to its exit point and
further away from incision line, following a course
perpendicular to the incision line, exiting far from the
incision line.
D
gently, with care being taken to mini-
mize tension across the epidermis and
avoid overly constricting the wound
edges (Figures 5-13A through 5-13F).
225
The Running Oblique Mattress Suture
Figure 5-13E. The needle is then inserted distal to
its exit point, near to the incision line, exiting on the
contralateral side near to the incision line. This pattern
is then repeated along the course of the wound.
E
Figure 5-13F. Immediate postoperative appearance.
F
Tips and Pearls
Like the running alternating simple and
horizontal mattress approach, this tech-
nique addresses a shortcoming in standard
mattress sutures, which tend to e ec-
tively evert the skin edges but may be
unreliable at wound-edge apposition and
coaptation. As a hybrid approach, this
technique encourages excellent wound-
edge eversion with its mattress com-
ponent while concomitantly permitting
slightly improved wound-edge apposition.
Suture removal with this approach is
easier than with a running horizontal or
vertical mattress approach, as there is
less o a tendency or the transepidermal
portion o the sutures to become quickly
overgrown with healing epidermis.
In the context o atrophic skin, the
modest bites o epidermis taken with a
traditional running suture may be insu -
cient and result in suture tear-through.
The larger bites taken with the continu-
ous oblique mattress suture may help
mitigate some o these concerns in the
context o atrophic skin.
Drawbacks and Cautions
As with the running horizontal mattress
suture, no suture material crosses over the
incision line, and there ore the chance o
leaving track marks is small. The oblique
portions o the suture may tend to con-
strict with postoperative edema, which
may result in obliquely oriented short
track marks i sutures are not removed
in a timely ashion.
As always, knowledge o the relevant
anatomy is critical. Structures deep to the
de ect may be constricted. This can lead
to necrosis due to vascular compromise or
even, theoretically, super cial nerve dam-
age. These concerns are more acute with
the continuous oblique mattress suture
than with the simple running suture, since
the wide arc o the suture material and its
oblique component incorporate more skin
and underlying structures, thus increasing
the risk o strangulation.
This technique may elicit an increased
risk o track marks, necrosis, and other
complications w hen compared w ith
techniques that do not entail suture
material traversing the scar line, such
as buried or subcuticular approaches.
There ore, as noted previously, sutures
should be removed as early as possible
to minimize these complications, and
consideration should be given to adopt-
ing other closure in the event that sutures
will not be able to be removed in a timely
ashion.
Reference
Sonanis SV, Gholve PA. Continuous oblique
m attress suture. Plast Reconstr Surg.
2003;111(7):2472-2473.
226
largely on anatomic location and the goal
o suture placement.
On the ace and eyelids, though this
technique is rarely used, a 6-0 or 7-0
mono lament suture may be used; in
these cases, standard horizontal mat-
tress sutures are probably pre erable to
their locking counterparts. Elsewhere,
5-0 mono lament suture material may
be used i there is minimal tension, and
4-0 mono lament suture is used in areas
under moderate tension where the goal
o suture placement is relieving tension
as well as epidermal approximation. In
select high-tension areas, 3-0 mono la-
ment suture may be utilized as well.
Technique
1. The needle is inserted perpendicular
to the epidermis, approximately one-
hal the radius o the needle distant
to the wound edge. This will allow
the needle to exit the wound on the
contralateral side at an equal distance
rom the wound edge by simply ol-
lowing the curvature o the needle.
2. With a f uid motion o the wrist,
the needle is rotated through the
dermis, taking the bite wider at the
deep margin than at the sur ace,
and the needle tip exits the skin on
the contralateral side.
3. The needle body is grasped with
surgical orceps in the le t hand,
with care being taken to avoid
grasping the needle tip, which can
be easily dulled by repetitive riction
The Double Locking
Horizontal Mattress Suture
C H A P T E R 5 . 1 4
Synonym
Double loop mattress suture
Video 5-14. Double locking
horizontal mattress suture
Access to video can be found via
Application
This is a modi cation o the locking hori-
zontal mattress suture, which adds an
extra one-hal horizontal mattress suture
and then is locked through each o the
resultant loops. As with many inter-
rupted techniques, it may be used alone
or wounds under minimal tension, such
as those ormed by a small punch biopsy
or a traumatic laceration. It is use ul in
cle t palate repair, and may be used as
a transepidermal suture when deeper
structures have already been closed.
This technique may also be used in the
context o atrophic skin, as the broader
anchoring bites may help limit tissue
tear-through that may be seen with a
simple interrupted suture. The double
locking variation con ers three advantages
over the traditional horizontal mattress
suture: (1) better ease o suture removal,
(2) improved wound-edge apposition,
and (3) improved strength under tension.
Suture Material Choice
With all techniques, it is best to use the
thinnest suture possible in order to mini-
mize the risk o track marks and oreign-
body reactions. Suture choice will depend
227
The Double Locking Horizontal Mattress Suture
against the surgical orceps. It is
gently grasped and pulled upward
with the surgical orceps as the
body o the needle is released rom
the needle driver. Alternatively, the
needle may be released rom the
needle driver and the needle driver
itsel may be used to grasp the nee-
dle rom the contralateral side o
the wound to complete its rotation
through its arc, obviating the need
or surgical orceps.
4. The needle is then reloaded in a
backhand ashion and inserted at
90 degrees perpendicular to the epider-
mis proximal (relative to the surgeon)
to its exit point on the same side o
the incision line as the exit point.
Importantly, a loop o suture mate-
rial is le t protruding rom where
the needle exited on the prior throw
to where it enters on this throw.
5. The needle is rotated through its
arc, exiting on the right side o the
wound (relative to the surgeon) in
a mirror image o steps (2) and (3).
6. The needle is then reloaded in a
standard ashion, and inserted per-
pendicular to the epidermis proxi-
mal (relative to the surgeon) to its
exit point on the same side o the
incision line as the exit point. Again,
a loop o suture material is le t
protruding rom where the needle
exited on the prior throw to where
it enters on this throw.
7. The needle is rotated through its
arc, exiting on the le t side o the
wound (relative to the surgeon).
8. The needle driver is then passed
through the rst loop and the tail o
the suture material is then grasped
and gently pulled through the loop,
temporarily locking it in place.
The tail o the suture material is
then released.
9. The needle driver is then passed
through the second loop o suture
material, and the needle is grasped
with the needle driver and gently
pulled through the loop, similarly
locking it into place. At this point,
both the leading and trailing strands
o suture material are on the same
side o the incision line.
10. The suture material is then tied o
gently (Figures 5-14A through 5-14J).
Figure 5-14A. Overview of the double locking horizon-
tal mattress suture.
A
Figure 5-14B. The needle is inserted perpendicularly
through the skin.
B
228
Atlas of Suturing Techniques: Approaches to Surgical Wound, Laceration, and Cosmetic Repair
Figure 5-14C. The needle is reinserted through the
undersurface of the dermis, exiting on the contralateral
side. Note that for small wounds, the preceding two
steps may be combined.
C
Figure 5-14D. The needle is then inserted on the
ipsilateral side at 90 degrees, exiting in the open
wound space.
D
Figure 5-14E. The needle is inserted through the
undersurface of the dermis, exiting on the contralateral
wound edge.
E
Figure 5-14F. Another horizontal mattress loop is
then again placed, with the needle exiting back on the
contralateral side.
F
Figure 5-14G. The trailing end of suture is then pulled
through the loop closest to its location.
G
Figure 5-14H. The leading edge of suture with the
needle is then pulled through the other loop.
H
229
The Double Locking Horizontal Mattress Suture
I
Figure 5-14I. Appearance after pulling through both
loops.
J
Figure 5-14J. Immediate postoperative appearance
after tying the ends of suture together.
Tips and Pearls
This double-locking technique allows
or some wound eversion while con-
comitantly taking advantage o the pulley
e ect o spreading the wound tension
over multiple loops. Its central advantage
is the increased strength o this approach
over the standard locking horizontal mat-
tress suture, and it is there ore best used
in closures under signi cant tension, such
as the back and shoulders, or when a
transepidermal approach is desired and
no deeper sutures have been placed, such
as the closure o punch biopsy sites.
The double-locking technique con ers
three important advantages over the tra-
ditional horizontal mattress suture. First,
the standard horizontal mattress suture
does not typically permit the same degree
o w ound-edge apposition as can be
accomplished with other transepidermal
sutures, since the everting e ect o the
suture technique may even be associated
with a small degree o gaping at the center
o the horizontal mattress suture. Double
locking the suture material brings the
knot, as well as the parallel external rows
o suture, to the center o the wound, thus
improving wound-edge approximation.
Second, suture removal with the stan-
dard horizontal mattress technique may
be challenging, particularly i sutures are
le t in situ or an extended period o time
and some o the suture material has been
overgrown by the healing epidermis, as
the knot may be buried in the context o
a ridged everted repair. Bringing the knot,
along with the parallel rows o external
suture material, centrally with the locking
technique allows the knot to be more eas-
ily grasped at the time o suture removal.
Finally, the double-locking approach
adds a pulley e ect, thus increasing the
strength o the suture and permitting clo-
sure under higher-tension environments.
As an added bene t, the double-locking
technique incorporates an extra throw o
the horizontal mattress suture, meaning
that each suture extends urther along the
wound, thus necessitating ewer knot ties
or a given incision length.
As w ith m ost transepiderm al
techniques, it is important to enter the
epidermis at 90 degrees, allowing the
needle to travel slightly laterally away
rom the wound edge be ore ully ol-
lowing the curvature o the needle when
utilizing this technique. This will allow
or maximal wound eversion and accurate
wound-edge approximation.
As with the simple interrupted suture,
care should be taken to avoid skimming
the needle super cially beneath the epi-
dermis. This results rom ailing to enter
230
Atlas of Suturing Techniques: Approaches to Surgical Wound, Laceration, and Cosmetic Repair
the skin at a perpendicular angle and to
ollow the curvature o the needle. This
may result in wound inversion as the
tension vector o the shallow bite pulls
the wound edges outward and down.
Drawbacks and Cautions
This technique incorporates three
strands o suture crossing the wound,
along with a signi cant amount o suture
material resting parallel to the wound,
and there ore may be associated with
a higher risk o track marks than many
other techniques. In addition, the double-
locking component and the change in
the tension vectors markedly reduce the
everting e ect o the horizontal mattress
technique, thus negating one o the major
bene ts o this approach.
Additionally, the tension vectors associ-
ated with this suture are not uni ormly
perpendicular to the incision line, theo-
retically increasing the chances o tissue
bunching.
Moreover, structures deep to the de ect
may be constricted or may be per orated
by the multiple passes o suture. This
can lead to necrosis due to vascular
compromise, bleeding, or even, theo-
retically, super cial nerve damage. These
concerns are more acute with the double
locking horizontal mattress suture than
with the simple interrupted suture, since
the wide arc o the suture material and
its horizontal component incorporate
more skin and underlying structures, thus
increasing the risk o strangulation.
As noted previously, this technique
may elicit an increased risk o track
marks, necrosis, and other complications
when compared with techniques that do
not entail suture material traversing the
scar line, such as buried or subcuticular
approaches. There ore, this technique
is best used when the closure is under
signi cant tension. Regardless, sutures
should be removed as early as possible
to minimize these complications, and
consideration should be given to adopting
other closure techniques in the event that
sutures will not be able to be removed in
a timely ashion.
Reference
Biddlestone J, Samuel M, Creagh T, Ahmad T. The
double loop mattress suture. Wound Repair
Regen. 2014;22(3):415-423.
231
distant to the wound edge. This will
allow the needle to exit the wound
on the contralateral side at an equal
distance rom the wound edge by
simply ollowing the curvature o
the needle.
2. With a uid motion o the wrist,
the needle is rotated through the
dermis, taking the bite wider at the
deep margin than at the sur ace,
and the needle tip exits the skin on
the contralateral side.
3. The needle body is grasped with
surgical orceps in the le t hand,
with care being taken to avoid
grasping the needle tip, which can
be easily dulled by repetitive ric-
tion against the surgical orceps. It
is gently grasped and pulled upward
with the surgical orceps as the
body o the needle is released rom
the needle driver. Alternatively, the
needle may be released rom the
needle driver and the needle driver
itsel may be used to grasp the nee-
dle rom the contralateral side o
the wound to complete its rotation
through its arc, obviating the need
or surgical orceps.
4. The suture material is then tied o
gently, with care being taken to
minimize tension across the epider-
mis and avoid overly constricting
the wound edges. The trailing end
o suture is then trimmed.
5. Starting proximal relative to the sur-
geon, the needle is then reinserted
The Running Diagonal
Mattress Suture
C H A P T E R 5 . 1 5
Synonyms
Victory stitch, running V mattress
Video 5-15. Running diagonal
mattress suture
Access to video can be found via
Application
This is a modif cation o the running
horizontal mattress suture, where suture
material crosses the wound on a diagonal.
It is use ul in low-tension environments
w hen additional w ound eversion is
desired, such as the ace and extremi-
ties, as it leads to marked eversion o the
wound edges.
Suture Material Choice
With all techniques, it is best to use
the thinnest suture possible in order to
minimize the risk o track marks and
oreign-body reactions. On the ace and
eyelids a 6-0 or 7-0 monof lament suture
may be used, though ast-absorbing gut
may be used on the eyelids and ears to
obviate the need or suture removal.
Since the goal o the running diagonal
mattress suture placement is primarily
to encourage wound-edge eversion, f ne-
gauge suture material may be used on the
extremities as well.
Technique
1. The needle is inserted perpendicu-
lar to the epidermis, approximately
one-hal the radius o the needle
232
Atlas of Suturing Techniques: Approaches to Surgical Wound, Laceration, and Cosmetic Repair
perpendicular to the epidermis,
approximately one-hal the radius
o the needle distant to the wound
edge. The trajectory o the needle,
however, is designed to be on a
45-60—degree angle relative to the
incision line, pointed away rom the
starting apex.
6. With a uid motion o the wrist,
the needle is rotated through the
dermis, and the needle tip exits the
skin on the contralateral side, ur-
ther along the incision line than its
entry point.
7. The needle body is grasped with
surgical orceps in the le t hand as
the body o the needle is released
rom the needle driver.
8. The needle is then reloaded in a
backhand ashion and inserted at
90 degrees perpendicular to the
epidermis just proximal (relative
to the surgeon) to its exit point on
the same side o the incision line
as the exit point. The trajectory o
the needle, however, is designed
to be on a 45-60—degree angle rel-
ative to the incision line, pointed
away rom the starting apex.
9. The needle is rotated through its
arc, exiting on the contralateral
side o the wound (relative to the
surgeon) urther along the incision
line.
10. Moving proximally relative to the
surgeon, steps (5) through (9) are
then sequentially repeated, until
the end o the wound is reached.
At that point, a loop is le t in the
penultimate throw and the suture
material is then tied o gently,
with care being taken to mini-
mize tension across the epider-
mis and avoid overly constricting
the wound edges (Figures 5-15A
through 5-15F).
Figure 5-15A. Overview of the running diagonal mat-
tress technique.
A
Figure 5-15B. The anchoring suture is placed.
B
Figure 5-15C. After tying off the anchoring suture,
the needle is then reinserted adjacent to the anchor-
ing suture at a 90-degree angle and passed across the
wound at a 45-degree angle relative to the incision line.
C
233
The Running Diagonal Mattress Suture
Figure 5-15D. Moving along the length of the wound,
the needle is then again inserted adjacent to its exit
point at a 90-degree angle and passed across the
wound at a 45-degree angle relative to the incision line.
D
Figure 5-15E. This pattern continues along the length
of the wound.
E
Figure 5-15F. Immediate postoperative appearance.
F
Tips and Pearls
This technique ostensibly provides the
benef t o decreased risk o tissue necro-
sis when compared with the running
horizontal mattress technique, since
the watershed area at risk or vascular
compromise is smaller when the bites
are taken at a diagonal than when they
are perpendicular to the incision line.
That said, in clinical experience, loosely
tied running horizontal mattress sutures
almost never result in wound necrosis.
This technique does, however, have
the advantage o taking very short bites
parallel to the incision line, so that i any
track marks are le t they will be very
short and inconspicuous. This approach is
there ore well suited to utilizing a rapidly
absorbable suture, such as ast-absorbing
gut, since there is little risk that a slowly
degraded suture will leave track marks.
This technique is requently used on
the ace, as it aids with dramatic wound
eversion. Generally, i the dermis was
closed using the set-back dermal suture,
no additional eversion is needed; how-
ever, when the buried dermal suture or
even the buried vertical mattress suture,
are used, occasionally the wound edges
do not evert to the desired degree.
This approach also helps minimize
cross-hatched railroad track marks, since
the suture material does not cross over
the incised wound edge. Similarly, this
technique can sometimes yield a neater
immediate postoperative appearance, as
even i bite sizes are not uni orm this is
not apparent to the observer, as only the
portions o suture material parallel to the
incision line are visible.
Drawbacks and Cautions
Since the suture material traverses the
wound on a diagonal, it introduces a orce
vector across the sur ace o the wound
that is not perpendicular to the incised
wound edge. In wounds under only mini-
mal tension due to the proper placement
o deeper sutures, this is not a signif -
cant issue, since the running diagonal