

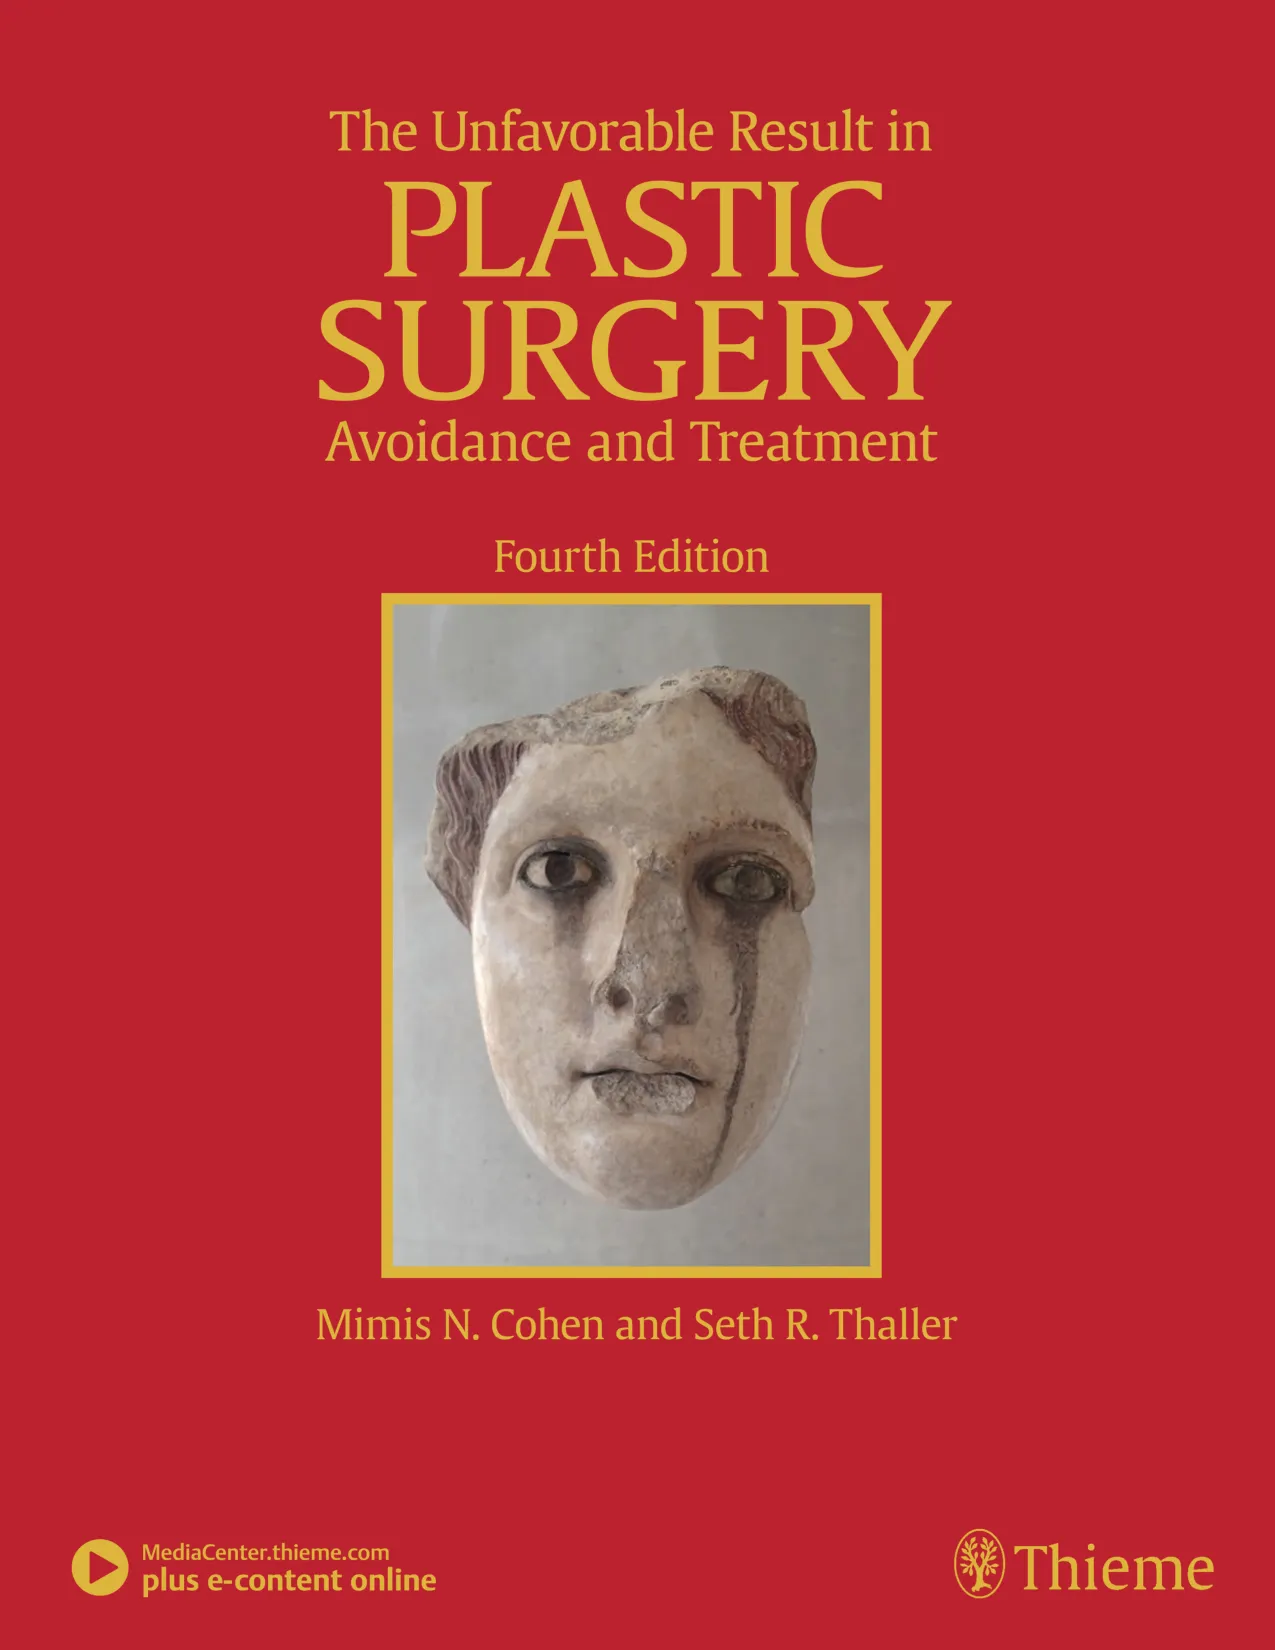


The eyes of the votive relief dedicated by Praxias.
(© Acropolis Museum Athens, Greece. Photo: Socrates Mavromatis.)
266
CHAPTER
22
Blepharoplasty
Kevin H. Small and Henry M. Spinelli
The demand for blepharoplasty (cosmetic eyelid surgery)
continues to rise annually in the United States; according
to the American Society of Plastic Surgery, 206,509 blepha
roplasties were performed in 2014.1 The frequency of this
procedure has predictably coincided with an increased
number of early and late complications. Complications are
inevitable, but surgeons must be able to recognize postop
erative complications and guide appropriate management.
Most important, complications can be significantly mini
mized with a detailed understanding of the surgical anat
omy, focused history and physical examination, patient
education and informed consent, and a refined surgical ap
proach. This chapter discusses the spectrum of complica
tions seen with blepharoplasty, preventive solutions, and
treatment options.2–4
Anatomy
Skin
The skin of the eyelid is the thinnest in the body and has mini
mal subcutaneous fat. As patients age, the periorbital skin
has decreased type I collagen synthesis and increased dermal
collagenase activity. With time, these metabolic shifts lead to
thinning, folding, and wrinkling of the eyelid skin.2–10
Orbicularis Oculi
The orbicularis oculi is the sphincter of the eyelid. This
muscle is adherent to the overlying skin and comprises
three parts: orbital, palpebral, and lacrimal. The outer,
orbital portion attaches medially to the medial canthal
tendon, the nasal part of the frontal bone, and along the
inferomedial orbital margin. Laterally, the orbital portion
continues around the orbit and attaches to the lateral can
thus. The palpebral portion of the orbicularis oculi, the
middle segment, has pretarsal and preseptal segments.
Medially, the preseptal segment of the palpebral portion of
the orbicularis oculi has the anterior head, which becomes
the anterior crus of the medial canthal tendon and inserts
into the frontal process of the maxilla, and the posterior
head, which inserts into the posterior lacrimal crest (Horn
er’s muscle). Laterally, the preseptal fibers of the palpebral
portion of the orbicularis oculi coalesce with the lateral
palpebral ligament to form the lateral palpebral raphe. The
small, inner portion of orbicularis oculi, the lacrimal seg
ment, interdigitates with the medial palpebral ligament.
This portion of the orbicularis oculi arises from the orbital
surface of the lacrimal bone, passes behind the lacrimal
sac, and divides into two slips, upper and lower, which are
inserted into the superior and inferior tarsi, medial to the
puncta lacrimalia.2–10
The three segments of the orbicularis oculi have dis
tinct functions. The orbital portion of the orbicularis oculi
tightly closes the eye. Contraction of the pretarsal and pre
septal portions of the palpebral orbicularis oculi primarily
closes the eyelid. The lacrimal portion transposes the lac
rimal canals medially to receive tears and compresses the
lacrimal sac.2–10
The orbicularis oculi is anchored by well-defined lig
amentous attachments. Medially, the orbicularis oculi
attaches directly to the inferior orbital rim. Laterally, the or
bital retaining ligament bridges the fascia of the orbicularis
oculi to the periosteum of the orbital rim. At the lateral can
thus, the orbital retaining ligament merges with the lateral
orbital thickening, a triangular condensation of the superfi
cial and deep orbicularis oculi that extends across the fron
tal process of the zygoma onto the deep temporalis fascia.
Release of the orbital retaining ligament and lateral orbital
thickening allows untethered redraping of the eyelid.2–10
With age, the orbicularis oculi muscles relax, and the
ligamentous attachments attenuate. This transformation
267
Chapter 22 Blepharoplasty
superior tarsal border and joins the levator aponeurosis. On
the lower eyelid, the orbital septum joins the capsulopal
pebral fascia 5 mm below the tarsal border. In addition, in
feriorly, the orbital septum fixates to the rim of the orbital
periosteum and forms the arcus marginalis.2–10
Postseptal (Intraorbital) Fat
The upper eyelid has two distinct intraorbital fat compart
ments, medial and central, divided by the superior oblique.
The medial fat pad is lighter and firmer than the central fat
pad. In addition, the medial fat pad encompasses the in
fratrochlear nerve and the terminal branch of the ophthal
mic artery. Of note, the lacrimal gland occupies the lateral
compartment.2–10
The lower eyelid has three distinct fat compartments:
the medial, central, and lateral fat pads. The inferior oblique
separates the medial and central fat pads. The central and
lateral fat pads are separated by the arcuate expansion, a
fascial band extending from the capsulopalpebral fascia to
the inferolateral orbital rim.2–10
Of note, the interconnecting septae of the intraorbital fat
link the extraconal (outside the muscle cone) and intraconal
(within the muscle cone) spaces. Therefore traction on fat
just posterior to the orbital septum can produce forces in
any of these spaces and accounts for the small but defini
tive risk of orbital hemorrhage and even blindness when ad
dressing anterior orbital fat in surgical procedures.2–10
Preseptal (Extraorbital) Fat
The preseptal, or extraorbital, fat represents retro-orbicu
laris oculi fat and may accumulate outside the orbital rim
on the inferior lateral brow and upper malar areas.2–10
Upper Eyelid Retractors
The levator palpebrae muscle is the upper eyelid retractor
and originates from the lesser wing of the sphenoid, extend
ing anteriorly along the superior orbit. The levator condenses
approximately 14 to 20 mm above the superior border of the
tarsus into Whitnall’s ligament. Anterior to Whitnall’s liga
ment, the levator forms a bilamellar aponeurosis that joins
with the septum to insert into the tarsus. A lateral horn di
vides the lacrimal gland into the palpebral and orbital lobes
and contributes to the lateral retinaculum. A medial horn
inserts into the lacrimal crest. The posterior lamella of the
levator aponeurosis contains Mueller’s muscle.2–10
Lower Eyelid Retractors
The capsulopalpebral fascia forms the lower eyelid retrac
tors. This fibroelastic tissue originates from the inferior
oblique muscle, fuses into Lockwood’s ligament, and in
serts approximately 5 mm below the inferior tarsus.2–10
results in progressive eyelid ptosis. Malar ptosis compounds
this eyelid ptosis, forming a malar crescent or festoon over
the malar eminence with an aged appearance. In addition,
the pigment of the orbicularis oculi becomes more apparent
over the thinning skin.2–10
Fig. 22.1a demonstrates a patient with ectropion and
lower lid retraction with malar ptosis after a lower lid
blepharoplasty by a referring plastic surgeon. Fig. 22.1b
demonstrates the correction of the ectropion and lower lid
contraction with a tarsal strip canthoplasty that I (H.M.S.)
performed. Of note, the patient elected not to correct the
malar ptosis.
Tarsal Plates
The tarsal plates, composed of dense fibrous tissue, are lo
cated directly above the lid margins and contribute to the
integrity and support of each eyelid. Each tarsus measures
approximately 29 mm long and 1 mm thick. The semilunar,
superior tarsus measures 10 mm centrally and narrows
medially and laterally. Conversely, the rectangular, inferior
tarsus measures 3.5 to 5 mm centrally. The medial and lat
eral ends of the tarsi are attached to the orbital rims by the
medial and lateral palpebral ligaments. Each tarsus contains
approximately 25 sebaceous meibomian glands, which se
crete meibum, an oily substance that prevents evaporation
of tear film.2–10
Septum
The orbital septum has dense fibroelastic tissue and forms
the anterior boundary of the orbital contents. On the upper
eyelid, the orbital septum inserts 10 to 15 mm above the
Fig. 22.1 (a) This patient had ectropion and lower lid retraction with
malar ptosis after a lower lid blepharoplasty by a referring plastic
surgeon. (b) Correction of the ectropion and lower lid contraction
with a tarsal strip canthoplasty. This patient elected not to correct
the malar ptosis.
a
b
SECTION IV AESTHETIC SURGERY
268
Medial Canthus
The medial canthal tendon inserts into the bony orbit with
three leaflets: anterior and posterior horizontal leaflets and
a vertical leaflet. The medial canthal tendon is the culmina
tion of the medial canthal retinaculum, the confluence of
the deep head of the pretarsal orbicularis, the orbital sep
tum, the medial end of Lockwood’s ligament, the medial
horn of the levator aponeurosis, the check ligaments of the
medial rectus muscle, and Whitnall’s ligament. Of note, the
upper, lower, and common lacrimal canaliculi are closely
approximated to the medial canthal retinaculum, and care
should be taken to preserve their integrity when altering
its position2–10 (Fig. 22.3).
Avoiding Unfavorable
Results and Complications in
Blepharoplasty
Lateral Canthus
The lateral canthus partitions into an anterior and poste
rior leaflet. The anterior leaflet inserts onto the orbital rim
periosteum, and the posterior leaflet inserts onto the lat
eral orbital tubercle (Whitnall’s), approximately 3 mm be
hind the orbital rim. The lateral canthus lies approximately
6 mm below the lacrimal gland fossa and is the culmination
of the lateral canthal retinaculum, which consists of the fol
lowing:
•• Lateral horn of the levator palpebrae superioris
•• Preseptal and pretarsal orbicularis oculi
•• Lockwood’s ligament
•• Check ligament of the lateral rectus muscle
Of note, all key elements of the lateral retinaculum need to
be addressed before mobilizing the lateral canthus for any
repositioning or tightening procedures. The most anatomi
cally ideal and aesthetically pleasing position of the lateral
canthal tendon is 10 to 15 degrees above the medial can
thal tendon.2–10
Fig. 22.2a demonstrates a patient with lateral canthal
effacement and displacement after three blepharoplasties
by a referring plastic surgeon. In addition, this patient has
levator dehiscence and ptosis of the upper lid and ectropion
of the lower lid. Fig. 22.2b demonstrates the correction of
the lateral canthus, lid ptosis, and ectropion with levator
advancement and a canthoplasty that I (H.M.S.) performed.
Fig. 22.2 (a) This patient had lateral canthal effacement and dis
placement after three blepharoplasties by a referring plastic sur
geon. In addition, he had levator dehiscence and ptosis of the upper
lid and ectropion of the lower lid. (b) After correction of the lateral
canthus, lid ptosis, and ectropion with levator advancement and a
canthoplasty.
a
b
Summary Box
Unfavorable Results and Complications
Associated with Blepharoplasty
•• Visual loss secondary to hemorrhage
•• Perforation of the globe during anesthesia
•• Damage to the extraocular muscle
•• Damage to the cornea
•• Wound dehiscence
•• Lower eyelid malposition
•• Upper eyelid malposition (ptosis)
•• Loss of lashes
•• Dryness
•• Infection
•• Incisional scarring
•• Excessive upper lid fat resection
•• Inappropriate lower lid fat resection
Patient Evaluation
A detailed history and physical examination may not only
differentiate an ideal surgical approach but also elucidate
the patient’s desires. The preoperative consultation should
dismantle any preconceived notions of blepharoplasty
and educate the patient on the appropriate surgical steps
based on the patient’s aesthetic aspirations, clinical history,
269
Chapter 22 Blepharoplasty
Fig. 22.3 (a) An oblique cross-section of the right orbit and adnexa. (b) A lateral cross-section of the right orbit and adnexa. Note the rela
tionship of the levator, the superior rectus, the inferior oblique, and rectus muscles. Also, note the preaponeurotic fat pad superiorly and
the postseptal fat pad (precapsulopalpebral) inferiorly.
Medial puncta
Orbital septum
Orbitomalar
ligament
Glands of Krause
Tarsal plate
Mueller’s muscle
Conjunctiva
Inferior rectus
muscle
Orbital septum
Post-septal fat
Orbicularis oculi
muscle
Levator palpebrae
aponeurosis
Periosteum
Whitnall’s
ligament
Tarsus
Orbital septum
Orbital septum
Whitnall’s ligament
Levator aponeurosis
Levator palpebrae
superioris muscle
Superior rectus muscle
Inferior rectus muscle
Lockwood’s ligament
Mueller’s muscle
Inferior tarsal muscle
Orbiculari oculi muscle
Capsulopalpebral fascia
Inferior oblique muscle
SECTION IV AESTHETIC SURGERY
270
lid excursion, and appropriate wetting of the ocular sur
face. Eyelid folds should be symmetrical; the fold height
varies according to the patient’s sex and race. The patient’s
superior sulcus should be examined, including the level of
concavity or convexity and its relationship to eyelid move
ment.2–4,11–15 Fig. 22.4a demonstrates a patient with up
per eyelid ptosis after four blepharoplasties by a referring
plastic surgeon. Fig. 22.4b demonstrates the correction of
the lid ptosis with levator advancement and a canthoplasty
that I (H.M.S.) performed.
Eyelid margin abnormalities (ectropion or entropion)
and whether they change with the blinking cycle should
be determined. For example, patients with involutional en
tropion will usually present with lax lower eyelids, scleral
show, and sometimes a tendency toward ectropion until
they are asked to close their eye forcibly. Almost imme
diately, the lower eyelid of these patients will briskly roll
inward against the globe with forced blinking.2–4,11–15 Fig.
22.5a demonstrates a patient with chemosis, scleral show,
and lid retraction after a blepharoplasty by a referring plas
tic surgeon. Fig. 22.5b demonstrates the correction with a
canthoplasty and a palatal graft that I (H.M.S.) performed.
Furthermore, baseline visual acuity should be docu
mented with a Snellen chart; the right and left eye should be
assessed with and without corrective lenses. Commonly, pa
tients complain about visual acuity changes postoperatively;
as such, a baseline should be documented presurgically. Of
note, astigmatism in a selective meridian can be alleviated
or induced by surgery, and an ophthalmologist referral may
be warranted before surgical intervention.2–4,11–15
Next, extraocular motion and pupillary function should
be assessed, with asymmetries being most notable. Normal
facial animation and a pupillary light and accommodation
response should identify appropriate innervation.2–4,11–15
and eyelid morphology. Together, the surgeon and patient
should develop a mutual understanding that the surgical
approach will be selected based on not only patient prefer
ence but also the tissue characteristics. The patient must
understand the limitations of his or her eyelid topography.
The surgeon and patient can review patient images and
physical attributes to determine the ideal clinical course.
This educational approach and informed consent has
proven to enhance patient satisfaction and overall aesthetic
outcomes.2–4,11–15
Medical History
Before the physical examination, the surgeon should take a
detailed history. The consultation should include a general
medical history and a detailed ocular history, including a
description of dry eyes or ophthalmic lubricants, correc
tive lenses, thyroid disease, previous refractive surgery, re
current acute or chronic blepharitis, and any other ocular
or periocular conditions. A detailed history may suggest
various procedures for the patient. For example, a patient
with a history of dry eyes and corrective lenses will cer
tainly demand greater tear production and tolerate less
evaporative loss than a patient without those underlying
issues. Alternatively, chronic blepharitis or recurrent her
pes zoster may be exacerbated by eyelid surgery, and pro
phylactic antibiotic or antiviral therapy may be warranted
before surgical intervention. The most important aspect of
obtaining a good history is to tailor the surgical procedure
to the individual patient; this approach will minimize risks
and maximize the cosmetic and therapeutic aspects of any
procedure.2–4,11–15
The aesthetic desires of the patient must be discussed
and determined; I (H.M.S.) prefer having the patient describe
his or her complaints while looking in a mirror. In addition,
reviewing static and dynamic eyelid and facial photographs
from multiple views may identify abnormalities, delineate
patient wishes, and enhance the consultation.2–4,11–15
Physical Examination
A detailed physical examination is essential to determining
the ideal surgical approach. The initial examination should
note any gross anatomic abnormalities and normal struc
tures; in addition, the proper anatomic position and rela
tionship of the upper and lower lids should be identified.
The upper lid should divide the width of the iris in half.
The lower lid should lie above or abut the corneoscleral
junction; the upper and lower lids should have a smooth
sweeping arch or contour. The highest point or maximal
arch of the upper lid should lie at the most medial aspect of
the pupillary aperture. Inflammatory changes and crusting
along the eyelid margins or within the eyelashes indicate
blepharitis. A clear glistening corneal surface, sclera, and
conjunctiva without injection indicate adequate coverage,
a
b
Fig. 22.4 (a) This patient had upper eyelid ptosis after four blepha
roplasties by a referring plastic surgeon. (b) After correction of the
lid ptosis with levator advancement and a canthoplasty.
271
Chapter 22 Blepharoplasty
tension created on the suborbital soft tissues. This manual
suspension may guide appropriate surgical intervention. In
addition, the surgeon should try to assess which lamella (an
terior, middle, posterior) is deficient. This differentiation will
assist in planning complementary procedures to the can
thopexy such as cheek or midface suspension, interposition
grafts, skin grafts, or external flaps.2–4,11–15 Fig. 22.6a dem
onstrates a patient with chemosis, scleral show, and lid re
traction after a blepharoplasty by a referring plastic surgeon.
Fig. 22.6b demonstrates the correction with a canthoplasty
and a palatal graft that I (H.M.S.) performed.
All patients should be assessed for baseline tear produc
tion with Schirmer’s test using topical anesthesia and pre
cut standardized No. 41 filter paper strips. This assessment
should take place in a dark room to prevent the effect of
ambient light on tear production. Patients can be subdivided
into three categories: low tear producers (0–9 mm), mod
erate tear producers (10–20 mm), or high tear producers
(21–30 mm). Of note, very high tear producers may have ob
struction of the nasolacrimal system and may present with
a spectrum of complaints including epiphora, recurrent me
dial canthal swelling, and/or mucopurulent discharge.2–4,11–15
In addition to tear production and tear quality, the abil
ity of tears to withstand evaporation or breakup should be
assessed; a simple test can be performed that measures film
breakup time. Fluorescein is introduced onto a topically
anesthetized eye, and after the patient blinks to disperse the
agent, the eyelids are then held apart and the uniform tear
film is visualized over the corneal surface through a cobalt
blue filter. The period between holding the patient’s eyes
open and deterioration of the tear layer (tear film breakup)
should be longer than 20 seconds. Of note, because of the
multifactorial etiology of tear quality, this test may have low
yield.2–4,11–15
After a detailed history and physical examination, the
surgeon should identify the problem and tailor the surgical
procedure according to the specific patient’s findings. There
are almost no contraindications to surgery in the periocu
lar region but rather definitive historical and physical signs
that dictate the ideal surgical approach for an individual pa
tient.2–4,11–15
Fig. 22.7 outlines key components of the preopera
tive physical examination before an upper and lower eyelid
blepharoplasty.3,16
Upper Lid Blepharoplasty
The morphology of the upper eyelid can be differentiated
into four different categories:
1. Occidental
2. Deep set
3. Baggy
4. Asian
The normal youthful Occidental upper eyelid has levator
extensions inserting into the skin surface to define a lid fold
that averages 6 to 8 mm above the lid margin. The orbital
septum coalesces with the levator aponeurosis, creating
Subsequently, tonicity of the lower eyelid should be
measured. The lower eyelid is gently pulled down and dis
tracted away from the globe and then allowed to retract back
into its regular anatomic position. Delays or asymmetries in
the rate or position of the lower lid snap-back should be re
corded. A youthful and intact lower eyelid should position
itself against the globe and revert to an appropriate height
within 1 second of distraction. I (H.M.S) grade snap-back as
weak, moderate, or brisk; anything but a brisk snap-back
requires increased intrinsic support or minimized extrinsic
distraction forces.2–4,11–15
In addition, the periorbital anatomy should be evalu
ated, specifically the presence or absence of zygomatic or
malar support. Patients whose malar eminence lies pos
terior to their cornea have poor lower lid support and are
prone to malposition. In patients with lower eyelid malposi
tion (scleral show), the surgeon should digitally elevate the
lower eyelid and tighten while concomitantly visualizing the
Fig. 22.5 (a) This patient had chemosis, scleral show, and lid retrac
tion after a blepharoplasty by a referring plastic surgeon. (b) After
correction with a canthoplasty and a palatal graft.
a
b
a
b
Fig. 22.6 (a) This patient had chemosis, scleral show, and lid retrac
tion after a blepharoplasty by a referring plastic surgeon. (b) After
correction with a canthoplasty and a palatal graft.
SECTION IV AESTHETIC SURGERY
272
Fig. 22.7 Key components of the preoperative examination for an upper and lower lid blepharoplasty. (a) A basic Snellen chart should be used
before surgery with all patients undergoing eyelid procedures to document their baseline visual acuity. (b) Schirmer’s test strips measure
baseline tear production. (c) A lower lid snap-back test. (d) The relationship of the anterior globe vector to the midfacial skeletal support
in a youthful face and malar support. (e) A Bell’s reflex test with a normal result. (a From Codner MA, McCord, CD Jr. Eyelid and Periorbital
Surgery. 2nd ed. New York: Thieme Medical; 2016.)
Visual acuity via Snellen chart
Schirmer’s test
Snap-back test
Malar support
Good
Poor
Tear film breakup time
d
e
c
b
a
273
Chapter 22 Blepharoplasty
or the height at which to create a new lid crease (if different
from the existing crease). Of note, a new lid crease would re
quire supratarsal fixation. The level of the lid crease serves as
the lower limb of the blepharoplasty incision and the height
of supratarsal fixation, if indicated. The width or extent of
skin excision is determined by pinching the lid skin between
forceps and using slight lash line eversion as the end point.
This superior mark will determine the location for the su
perior limb of the skin incision.2–4,17–23
Concurrently, the extent of lateral eyebrow ptosis and
the amount of lateral upper eyelid hooding should be de
termined. The degree of lateral hooding will dictate the lat
eral extent of the incision. In general, incisions that extend
beyond the orbital rim are not well tolerated. The upper
and lower limbs typically have unequal lengths to eliminate
dog-ears and must be exaggerated as when widening the
lateral skin excision. Sometimes, a balance must be made
between the extent of lateral hooding and maintaining the
incision lines within the confines of the orbital rim. Of note,
if the lateral extent of the incision becomes excessive, then
a lateral brow suspension should be entertained. In addi
tion, an enlarged or herniated lacrimal gland can also pro
duce fullness of the lateral portion of the upper eyelid. The
lacrimal gland can be resuspended or plicated; excision of
the gland is discouraged because of the risk of dry eye syn
drome.2–4,17–23 Fig. 22.9 demonstrates a herniated lacrimal
gland after an upper lid blepharoplasty by a referring plas
tic surgeon.
In practice, the upper lid blepharoplasty can be effi
ciently performed using a few technical manipulations con
sistent with the anatomy. Digital traction and light pressure
by the surgeon or assistant allow smooth, quick incisions.
Slightly more pressure must be exerted on the scalpel later
ally as the skin thickens. The skin may be elevated with the
orbicularis muscle with a needle-tipped, insulated cautery;
resection can be optimized by transposing the myocutane
ous flap superonasally while providing digital traction later
ally. The orbital septum may be stabbed or widely incised,
the fat-containing aponeurotic space. The position of the
levator-skin linkage and the anterior-posterior relation
ship of the preaponeurotic fat determine the lid fold height
and degree of sulcus concavity or convexity. In the deep-set
eyelid or in the case of levator dehiscence from the tarsal
plate, the upper lid crease is displaced superiorly, measur
ing 8 to 13 mm from the lid margin. The orbital septum
and preaponeurotic fat linked to the levator are displaced
superiorly and posteriorly. These anatomic changes create a
lid crease; a deep superior sulcus; and, in the case of levator
dehiscence, eyelid ptosis.2–4,17–23 Fig. 22.8a demonstrates a
patient with levator dehiscence and overresection of fat
after a blepharoplasty by a referring plastic surgeon. Fig.
22.8b identifies the levator dehiscence intraoperatively.
In the aging or baggy eyelid, the septum becomes at
tenuated and stretches. The preaponeurotic fat attachments
loosen, and this attenuation allows orbital fat to prolapse
forward and slide over the levator into an anterior and in
ferior position. The net result is an inferior displacement of
the levator skin attachments and a low and anterior posi
tion of the preaponeurotic fat pad. Clinically, this transposi
tion results in a low lid crease that is only a few millimeters
from the lid margin and may not be visible because of the
overhanging lid. The youthful Asian eyelid anatomically re
sembles the baggy or senescent upper lid with a low levator
skin zone of adhesion and an inferiorly, anteriorly located
preaponeurotic fat. The characteristic, but variable, low eye
lid crease and convex upper eyelid sulcus are classic.2–4,17–23
The four anatomic variations in the upper eyelid dis
played by different ethnic groups and the changes associated
with senescence within each group allow for a convergence
of anatomy. Many of these ethnic differences are erased by
aging or attenuation of structures, allowing for a unified lid
concept. Before an upper lid blepharoplasty, the upper eyelid
topography should be categorized with a tailored approach
to treat the pathology.2–4,17–23
In planning and executing the upper lid blepharoplasty,
the surgeon must first determine the endogenous lid crease
Fig. 22.8 (a) This patient had levator dehiscence and overresection
of fat after a blepharoplasty by a referring plastic surgeon. (b) The
levator dehiscence of the same patient.
a
b
Fig. 22.9 A herniated lacrimal gland after an upper lid blepharo
plasty by a referring plastic surgeon.
SECTION IV AESTHETIC SURGERY
274
tarsal fixation). These changes may be performed alone or
in combination and may be used freely with the standard
upper lid blepharoplasty.
Fig. 22.11 outlines the planning and execution of an up
per eyelid blepharoplasty.3
exposing the preaponeurotic space. The underlying levator
aponeurosis is protected by opening the septum as cephalad
as possible, because the levator and septum diverge as one
moves superiorly.2–4,17–23
Fat will prolapse spontaneously or with light digital
pressure. The medial fat is whiter and lies medial to the su
perior oblique muscle. The central or preaponeurotic fat is
darker and less fibrous. Care should be taken not to overly
resect fat when using digital pressure techniques. Excessive
traction and manipulation of fat could cause a deep orbital
hemorrhage and should therefore be avoided. Closure may
then be performed; I (H.M.S.) prefer 6–0 nylon interrupted
sutures laterally and 5–0 nylon intracuticular sutures me
dially.2–4,17–23
Once the upper lid skin is incised or excised, the leva
tor may be modified (shortened or lengthened) by various
interventions, including plicating the levator muscle alone,
removing a strip and apposing the cut ends, or plicating and
removing the excess levator above the suture line.2–4,17–23
Fig. 22.10 demonstrates intraoperative levator advancement
sutures. The skin edges may also be incorporated in these
modifications to accentuate or move the lid crease (supra
Fig. 22.10 Intraoperative levator advancement sutures, performed
with local anesthesia. Of note, the patient had a previous blepharo
plasty with untreated ptosis by a referring plastic surgeon.
Determine extent of
lateral eyelid ptosis
and amount of lateral
hooding.
Skin incised to level
of orbicularis muscle
Determine height of
of new lid crease.
a
b
c
d
Levator
aponeurosis
Orbital septum
Skin and muscle
resected
Fig. 22.11 Key steps in planning and executing an upper lid blepharoplasty. (a) Determination of the endogenous lid crease or height at
which to create a new lid crease (if different from the existing crease). The latter would require supratarsal fixation. (b) Determination of
the extent of lateral eyebrow ptosis and, hence, the amount of lateral upper eyelid hooding. The degree of hooding will dictate the point
of the lateral extension needed to treat the hooding. (c) Digital traction and light pressure by the surgeon or assistant allow smooth, quick
skin incisions. Slightly more pressure must be exerted on the scalpel laterally as the skin thickens around and lateral to the orbital rim.
(d) The skin may be elevated with the orbicularis muscle in one maneuver using an instrument on the skin muscle section to be resected
and pulling this superonasally while providing digital traction. A needle-tipped insulated cautery is most advantageous, especially in avoid
ing any delaying hemostasis problems. The orbital septum is then widely opened, exposing the preaponeurotic space.
Continued
275
Chapter 22 Blepharoplasty
the preseptal suborbicularis plane, with the other over the
skin surface. The scissors may be beveled toward the eye
ball (less skin, more muscle). Using the scissors, the second
incision is completed lateral to medial ending just lateral to
the lower lid punctum. Inferior digital traction and supe
rior traction with a small hook may stabilize this incision.
Using an insulated Desmarres retractor, the flap should
be mobilized to the orbital rim without violating the sep
tum.2–4,24–37
The septum may then be opened widely or with stab
incisions. In either case, the inferior oblique muscle should
be visualized and protected before resection or reposition
ing fat. The muscle is most anterior medially, adjacent to the
medial fat pad. Overresection of fat, especially in the lateral
compartment, can lead to unacceptable cosmetic results. Or
bital fat may be repositioned and/or resected depending on
the needs of the patient. Skin resection should be conser
vative with lateral and cephalic vectors; resection should
transpose the most tension under the canthus and the least
tension in the mid-lower lid. If the patient is awake, he or
she can look up and open the mouth to add conservation to
the skin excision step. Before closure, resection of a few mil
limeters of orbicularis muscle at the superior aspect of the
flap may diminish the annoying blepharoplasty bulge or roll.
Instead of discarding the muscle, the orbicularis flap may be
used as a sling, fixed to the lateral canthus, to reinforce the
repair. Closure is completed after hemostasis is controlled.
Typically, the I (H.M.S.) prefer 6–0 silk medially and inter
rupted nylon laterally.2–4,24–37
Lower Lid Blepharoplasty
The lower lid blepharoplasty can successfully address re
dundant skin and muscle, laxity of the septum, excess fat,
lower lid malposition, and prominence of the nasojugal
groove. The operative approach is multifactorial and should
be guided by the preoperative history and physical exami
nation, the cosmetic goals of the patient, and the preferred
surgical approach of the surgeon. Lower lid deformities can
be addressed by either a transcutaneous or transconjuncti
val approach. Both interventions can treat lower lid pathol
ogy, but certain techniques may be favored based on the
patient presentation or surgical preference. As with the up
per lid, the successful completion of the lower lid blepharo
plasty requires a few technical pearls that will simplify and
speed its execution.2–4,24–37
Transcutaneous Lower Lid Blepharoplasty
For a transcutaneous lower lid blepharoplasty, the primary
incision should be in a desired fold or potential fold lateral
to the lateral canthus (Video 22.1). This incision should be
limited but provide access for small curved scissors. The
scissors should be passed through the incision into the sub
orbicularis preseptal space. This plane is then developed
from lateral to medial while gently pushing and spreading
the scissors. Once the plane is developed, the myocutane
ous flap can be mobilized with ease. The scissors are with
drawn, and only one limb of the scissors is inserted into
Fig. 22.11, cont’d (e) The underlying levator aponeurosis is protected by opening the septum as cephalad as possible, because the levator
and septum diverge as one moves superiorly. (f) The medial fat pad may require some digital pressure to expose and grasp; however, care
should be taken not to overly resect fat when using digital pressure techniques. Excessive traction and manipulation of fat could cause a
deep orbital hemorrhage and should be avoided. (g) Closure may then be performed, preferably with 6–0 nylon interrupted sutures later
ally and 5–0 nylon intracuticular sutures medially.
Levator
aponeurosis
Medial fat pad
Central fat pad
Whitnall’s
ligament
e
f
g
b
Interrupted
sutures
Running intracuticular
suture
SECTION IV AESTHETIC SURGERY
276
The transconjunctival approach to the retroseptal space
may be preseptal or retroseptal; the most controlled and
anatomically consistent approach is the preseptal route. The
retroseptal route simply entails incising the conjunctiva and
cutting through the lower lid retractors into the postseptal
space. Conversely, the preseptal route requires entry into
the postorbicularis preseptal space above the fusion of the
lower lid retractors and the orbital septum. This approach
will allow direct visualization of the septum; each fat pad
can be addressed separately in a controlled fashion.2–4,24–37
Fig. 22.12 outlines the planning and execution of a lower
eyelid transcutaneous blepharoplasty.3
Transconjunctival Blepharoplasty
The ideal candidate for transconjunctival blepharoplasty is
a younger patient without midface ptosis. The orbital sep
tum is convex, but there is not sufficient skin redundancy to
require skin redraping. Small skin changes may be treated
with a skin trim or laser.2–4,24–37
Fig. 22.12 Key steps in planning and executing the lower lid blepharoplasty. (a) The primary incision should be in a desired fold or potential
fold at and lateral to the lateral canthus. The incision should be limited but be able to admit a small curved scissors. The scissors should be
passed through the incision into the suborbicularis preseptal space. (b) This plane is developed from lateral to medial while gently pushing
and spreading the scissors. Once this plane is developed, the myocutaneous flap can be mobilized with ease. The scissors are withdrawn and
only one limb is inserted into the preseptal postorbicularis plane, with the other over the skin surface. The scissors may be beveled toward
the eyeball (less skin, more muscle). (c) The second incision is completed lateral to medial with the assistance of inferior digital traction,
ending just lateral to the lower punctum. The flap should be mobilized to the orbital rim without violating the septum. This is best achieved
with a combination of digital cheek traction inferiorly and instrument elevation of the myocutaneous flap.
Primary
incision
Undermining in the preseptal
suborbicularis potential space
b
a
Orbital septum
Secondary incision
c
Continued
277
Chapter 22 Blepharoplasty
Fig. 22.12, cont’d (d) The septum may then be opened either widely or with stab incisions. (e) In either case the inferior oblique muscle
should be visualized and protected. The oblique muscle should be identified before resection or repositioning fat. The muscle is most anterior
medially adjacent to the medial fat pad, and this is the best place to identify it using an instrument to spread or probe while concomitantly
applying light digital pressure. (f) Overresection of fat, especially the lateral compartment, can lead to unacceptable cosmetic results. Skin
resection should be conservative and invoke lateral and cephalic vectors.
Orbital rim
Incised orbital septum
d
Remove medial
and central
fat pads.
Pressure on upper lid
causes lateral orbital fat pad
to bulge anteriorly.
Lateral
fat pad
Medial fat pad
Central
fat pad
Orbital rim
f
e
A few simple surgical pearls may streamline the transcon
junctival preseptal lower lid blepharoplasty procedure. A pro
tective lens should always be used. A conjunctival stay suture
can be placed deep in the fornix and the lid margin to apply
traction superiorly. This maneuver causes the inferior edge
of the tarsal plate to rise to the surgeon. The conjunctiva and
lower lid retractors are incised just below the tarsal plate en
tering the postorbicularis preseptal space. A plane can then
be developed to the orbital rim with the assistance of the
traction suture and a nonconductive instrument (Desmarres
rectractor). The orbital septum may then be widely incised
or punctured; the inferior oblique muscle must be identified
and preserved. The fat pads may be addressed individually;
resection, repositioning, and/or conservation are all viable op
tions depending on the preoperative examination. I (H.M.S.)
prefer a supraperiosteal tunnel with a temporary transcuta
neous stay suture to maintain the proper location when re
positioning fat. A single absorbable conjunctival suture may
Continued
SECTION IV AESTHETIC SURGERY
278
promise. Symptoms may include sudden pupillary changes,
proptosis, visual loss, and/or loss of ocular motility. Vision
should be checked immediately after surgery and before dis
charge. Patients should not only be able to visualize light but
also be able to discern gross objects; patients should be in
structed to contact the surgeon immediately if severe pain
or visual loss develops postoperatively.2–4,38–52
If retrobulbar hemorrhage is suspected during or after
the procedure, the surgeon, and preferably an ophthalmolo
gist, should evaluate the globe (including intraocular pres
sure) and the optic nerve for ischemia; all surgeons should
be familiar with basic techniques for assessing the globe,
including Schiotz tonometry, and a stepwise approach to
decompress the globe and alleviate symptoms. Mild hemor
rhage can be controlled by head elevation and close observa
tion. For more severe hemorrhage, lysis of one or both crura
of the lateral canthal ligament allows the globe to move for
ward and protects the eye from ischemic and/or decompres
sive damage. In addition, the intraocular pressure can be
reduced by topical medications (timolol 0.5%, dorzolamide
2%, or brimonidine) or systemic administration of hyper
osmolar agents (mannitol) and corticosteroids. Finally, in
cases of severe hematoma uncontrolled by the previously
described measures, the surgeon should explore the retro-
orbital space to control the hemorrhage. Finally, paracentesis
be useful, when closing, to avoid Tenon inclusion cysts; this
suture should be placed laterally to prevent postoperative
complaints of corneal irritation.2–4,24–37
Managing Complications in
Blepharoplasty
Visual Loss Secondary to Hemorrhage
Retrobulbar hemorrhage is one of the most commonly
feared complications of blepharoplasty, and the overall inci
dence has been reported to be 1 in 25,000 cases. Bleeding in
the orbital bed, either during the procedure or several days
after the procedure, can create a hematoma that can com
press the neurovascular structures, leading to ischemia of
the retina, central artery, and/or optic nerve. Bleeding may
be secondary to inadequate hemostasis, disruption of deep
orbital vessels from traction of superficial fat pads, or direct
trauma to the vasculature during local anesthetic injections.
In addition, patient comorbidities (including hypertension
and coagulopathies) and/or medication (such as aspirin and
vitamin E) may contribute to bleeding risks.2–4,38–52
Signs of retrobulbar hemorrhage should be instantly
identified and addressed to prevent permanent visual com
Fig. 22.12, cont’d (g) This will render the most tension under the canthus and the least distraction force in the mid-lower lid. The patient
should look up and open the mouth to add conservation to the skin excision step (inset). Before closure, a few millimeters of orbicularis
muscle can be resected at the superior aspect of the flap. This does not affect function and prevents the annoying postblepharoplasty
bulge or roll. (h) Closure is completed after hemostasis is attained. Running 6–0 silk medially and interrupted nylon laterally is preferable.
Patient looks up with mouth open
for skin redraping and excision.
Redrape skin
(cephalic and lateral)
and trim excess.
Excision line
Closure including interrupted
laterally and running sutures
medial to lateral
h
g
279
Chapter 22 Blepharoplasty
Wound Dehiscence
Wound dehiscence may occur immediately after surgery
or days to weeks postoperatively. This complication may
be directly related to inadequate closure or disruption of
sutures but also may be secondary to underlying pressure
on the incision, (i.e., a hematoma). Hematomas either occur
from poor hemostasis or rebound bleeding after the adren
aline effects have subsided. In general, minimal bleeding
from the surgical incision can be observed carefully in the
recovery room, and the patient should be counseled about
normal sequelae. Occasionally, however, if more brisk
bleeding develops, the surgical site should be explored in
the operating room. Of note, fat excision may be associated
with “flash” hemorrhage from traction of vessels deep in
the orbit. In some instances, the sutures can be loosened
from the incision to release fluid and avoid pressurizing the
orbit until hemostasis is obtained.2–4,38–52
Lower Eyelid Malposition
Final positioning of the lower eyelid directly correlates to
an adequate understanding of the lower lid anatomy, the
pathology of the aging eyelid, and the aesthetic goals of
the patient. Externally, the lower lid should abut the globe
in its entire length. In addition, an imaginary line drawn
from the medial canthal angle to the lateral canthal angle
should arc 10 to 15 degrees from the horizontal, position
ing the lateral canthus above the medial canthus. Further
more, the sclera should not be visible on primary gaze (i.e.,
inferior scleral show), the lashes should not be in contact
with the cornea (entropion), nor should the eyelid margin
be rotated (ectropion) so that the palpebral conjunctiva is
exposed.2–4,38–52
Overresection of skin or aggressive dissection and fat
removal during a blepharoplasty can lead to entropion or
ectropion. This presentation may be caused by the lack of
external skin, disinsertion of the lower lid retractors, or cica
tricial scarring.2–4,38–52
Many patients with dermatochalasis (excess skin) also
have variable degrees of eyelid laxity, which must be ad
dressed during the surgical intervention (e.g., canthal tight
ening, lateral canthal strip, etc.). Lower lid malposition often
becomes more apparent after a blepharoplasty if this laxity
is not corrected. The surgeon must carefully examine the
relative position of the eyelid margin and tarsal consistency
before surgery (i.e., snap-back test, eyelid distraction test,
etc.).2–4,38–52
Conjunctival chemosis (swelling) may be secondary
to significant tightening of the lower eyelid with resul
tant edema or may occur when repositioning severely and
chronically malpositioned eyelids. Malposition may increase
conjunctival exposure and subsequent desiccation, which
leads to edema and further exposure; conjunctiva, like any
mucous membrane, requires moisture, and desiccation is
not well tolerated. Proper wetting with topical drops and
of the anterior chamber is very effective in decreasing intra
ocular pressure, but this approach should be reserved for
the ophthalmologist or more experienced surgeons.2–4,38–52
Perforation of the Globe
Perforation of the globe is a rare but potentially devastat
ing surgical complication. To avoid this injury, the globe
should be protected with a corneal shield before surgical
intervention and local anesthesia injection; in addition, any
needle should always be directed away from the globe. If a
globe perforation occurs, ophthalmic consultation should
be obtained immediately, and the procedure should be in
terrupted. Signs and symptoms include sudden change in
vision or of the position or symmetry of the pupil.2–4,38–52
Damage to the Extraocular Muscles
Extraocular muscles may also be damaged during blepha
roplasties, resulting in temporary or permanent strabis
mus. Damage may occur from anesthetic injections or di
rect trauma during surgical dissection. The inferior oblique
muscle is at highest risk during a lower lid blepharoplasty,
because this muscle is the only extraocular muscle that
originates anteriorly in the orbit. This pink-purple structure
is located between the medial and central fat pads.2–4,38–52
A superior oblique palsy, although at a lower incidence,
has also been reported from damage to this muscle during
an upper lid blepharoplasty. This injury can be avoided with
careful nasal dissection, limited cautery in the trochlear re
gion, and proper identification of the superior medial pal
pebral artery below the medial fat pad.2–4,38–52
Damage to the Cornea
One of the most common complications during a blepha
roplasty is trauma to the corneal epithelium. Although
most injuries heal spontaneously within 24 hours or less,
damage to the corneal epithelium may cause significant
discomfort and potentiate a source of infection. This injury
may occur during surgical dissection but also may be sec
ondary to the traumatic insertion and removal of protec
tive corneal shields. To prevent this complication, surgeons
should not only have controlled, purposeful movements of
the instruments but also irrigate the corneal lenses with
balanced saline and fill them with lubricants before place
ment. In addition, at the conclusion of the procedure after
the shields have been removed, both eyes should be irri
gated with balanced saline to remove any foreign bodies,
and ophthalmic ointment should be applied. If an abrasion
occurs, antibiotic ophthalmic ointment can be prescribed,
and the patient should be observed frequently until heal
ing occurs. Topical ophthalmic anesthetic solutions must
be avoided; even though they may alleviate pain, these so
lutions can significantly delay healing and put the patient
at risk for a neurotrophic corneal ulcer.2–4,38–52
SECTION IV AESTHETIC SURGERY
280
the eye (lagophthalmos) must be carefully noted, because
lagophthalmos will likely worsen postoperatively. In ad
dition, when deciding the amount of skin to remove, care
must be taken not to confuse excessive upper eyelid skin
with brow ptosis (especially in men).2–4,38–52 Fig. 22.15
demonstrates a patient with two failed ptosis operations
by a referring plastic surgeon, with compensatory brow
elevation on the left brow. To determine the amount of
skin to be resected, the brow is placed in the desired ana
tomic position and smooth forceps can mark the skin to
be removed so that the lashes are only slightly everted.
Inadequate preoperative assessment of eyelid movement
and anatomy may result in postoperative lagophthalmos
and decompensation.2–4,38–52
Ptosis
Ptosis, drooping of the upper eyelid, is a rare complication
after blepharoplasty. This malposition may result from di
rect damage to the levator aponeurosis during surgical dis
section or secondary to a traction injury. In addition, sur
geons may fail to identify ptosis preoperatively, specifically
in those patients with significant dermatochalasis; this
inadequate preoperative assessment may compound un
wanted postoperative outcomes.2–4,38–52
Most important, for any malposition, surgeons should
attempt conservative measures before intervening too
quickly. The patient and/or the surgeon may feel compelled
to correct the problem; however, many of the issues from
eyelid malpositions spontaneously disappear or improve
significantly over time, and often the surgical approach to
ointments is usually helpful in preventing or alleviating this
cycle, but a temporary lateral tarsorrhaphy may be a faster
solution in the more severe cases.2–4,38–52
Fig. 22.13a demonstrates a patient with chemosis,
scleral show, and lid retraction after a blepharoplasty by a
referring plastic surgeon. Fig. 22.13b demonstrates the cor
rection with a canthoplasty and conjunctival resection that
I (H.M.S.) performed.
Upper Eyelid Malposition
Upper eyelid malpositions tend to be less common than
lower eyelid malpositions. Most upper eyelid malpositions
are secondary to excessive skin excision or damage to the
levator complex.2–4,38–52 Fig. 22.14a demonstrates a patient
with upper lid retraction after a blepharoplasty by a refer
ring plastic surgeon. Fig. 22.14b demonstrates the correc
tion with a deep temporal fascia spacer graft that I (H.M.S.)
performed.
A detailed preoperative examination, including as
sessment of eyelid closure, should minimize the inci
dence of postoperative malposition. Any inability to close
a
b
Fig. 22.13 (a) This patient had chemosis, scleral
show, and lid retraction after a blepharoplasty by
a referring plastic surgeon. (b) After correction
with a canthoplasty and conjunctival resection.
a
b
Fig. 22.14 (a) This patient had upper lid retraction after a blepha
roplasty by a referring plastic surgeon. (b) After correction with a
deep temporal fascia spacer graft.
Fig. 22.15 This patient had two failed ptosis operations by a refer
ring plastic surgeon with compensatory brow elevation on the left.
281
Chapter 22 Blepharoplasty
permanent punctal plugs in addition to aggressive, topical
wetting agents.2–4,38–52
Infection
Infection after blepharoplasty is extremely rare because of
the extensive vascularity of the eyelids. Nevertheless, once
the orbital septum has been violated, pathogens can easily
gain access to the deep orbital structures (orbital cellulitis).
A common source of infection may be an obstructed na
solacrimal outflow system in which bacteria can multiply
and reflux toward the conjunctiva. Signs of orbital cellulitis
include pain, redness, decreased vision, restricted ocular
motility, and proptosis. Systemic antibiotics are indicated
if an infection is suspected, and close management with
appropriate specialists is encouraged. Proper assessment
of the nasolacrimal apparatus before surgery may prevent
this potentially devastating complication.2–4,38–52
Incisional Scarring
Incisional scarring requiring surgical intervention rarely
occurs after a blepharoplasty; generally this sequela can be
managed with conservative measures—massage and intra
lesional and/or topical corticosteroids. Early scar revision
should be avoided until the scar matures. In cases in which
the scar may be secondary to tension, scar revision will
rarely improve the final scar, and in many instances may
worsen the result.2–4,38–52
Excessive Upper Lid Fat Resection
Overzealous fat resection of the upper eyelids should be
avoided whenever possible. Many older patients, in addi
tion to excess upper eyelid skin, present with considerable
atrophy of the orbit fat and laxity of the periocular aponeu
rotic system. Rather than excess orbital fat, these patients
have attenuation of tissues. Removal of excess fat from the
upper lid—especially in the midportion—may result in the
accentuated superior orbital rim and a hollowed appear
ance. Of note, the nasal fat pad is more forgiving, and over-
resection of this fat pad rarely results in any significant ab
normality. If the surgeon identifies excess upper eyelid fat,
he or she should sculpt the fat and reposition the tissues to
optimize the upper lid contour. Fat, superficial fascia, and
thin dermal grafts may all serve as potential late fillers for
hollowed orbits.2–4,38–52
Inappropriate Lower Lid Fat Resection
As in the upper eyelids, excessive fat resection from the
lower lids can result in a cosmetically displeasing defor
mity. This complication can be prevented if the relation
ship between the globe and the orbitomaxillary junction
(tear trough) is carefully assessed preoperatively. Excessive
fat removal from the lower lids must be avoided, and when
possible, the removed fat must be repositioned to soften
the orbital rim.2–4,38–52 Fig. 22.17a demonstrates a patient
correct the problem is inadequate, excessive, or not appro
priate in addressing the long-term issues (Fig. 22.16). 2–4,38–52
Loss of Lashes
Loss of eyelashes occurs more commonly after a combined
blepharoplasty and ptosis repair than after a blepharo
plasty alone. During a ptosis repair, excessive dissection
near the tarsus (2–3 mm from the lid margin in the upper
lid) can lead to damage of the hair follicle, with subsequent
atrophy and loss of lashes. As such, this area should be
avoided during blepharoplasty.2–4,38–52
Dryness
Postoperative dry eyes are most commonly seen in pa
tients with preoperative tear insufficiency. In addition,
a blepharoplasty may result in decompensation in these
predisposed patients because surgical steps may widen
the palpebral fissure and subsequently increase exposure
to the environment. Also, dryness may be the sequela of
cicatricial healing in the skin and/or conjunctiva. Finally,
the lacrimal gland itself may be damaged during upper lid
blepharoplasty, where the gland can mistakenly be excised
as upper lid fat. To avoid this complication, lateral dissec
tion near the lacrimal gland should be limited. Usually, the
lacrimal gland and the upper eyelid fat have a noticeable
color difference; lacrimal gland tissue is whiter and par
titioned, and eyelid fat has a pearly, smooth, yellowish ap
pearance.2–4,38–52
Often, dryness can be treated with artificial tears and lu
bricants. However, if symptoms persist, an ophthalmologist
should evaluate the consistency and production of corneal
tear film. Possible treatment options include temporary or
a
b
Fig. 22.16 (a) This patient had upper lid ptosis after a levator pro
cedure by a referring plastic surgeon. In addition, the patient had a
persistent low incision line of the left upper lid. (b) After ptosis cor
rection and supratarsal fixation.
SECTION IV AESTHETIC SURGERY
282
Conclusion
Blepharoplasty is a seemingly straightforward procedure;
however, even the most experienced and skilled surgeon
may be faced with complications. Many of the complica
tions are avoidable through comprehensive preoperative
evaluation, adequate preoperative patient education, thor
ough knowledge of eyelid anatomy, and meticulous surgi
cal technique. Despite all efforts, every surgeon will even
tually encounter postoperative complications and must be
prepared to handle them, or they risk causing serious func
tional or cosmetic morbidity to the patient.
with excessive fat resection after a four-lid blepharoplasty
by a referring plastic surgeon. Fig. 22.17b demonstrates
the correction with a canthoplasty and midface suspension
that I (H.M.S.) performed.
Underresection of fat may also create superficial asym
metry and a globular appearance of the lower skin. This
complication can be minimized intraoperatively by peri
odically palpating and reexamining the superficial contour
of the lower lid after the removal of fat from each compart
ment. Should an uneven appearance persist beyond the
3-month postoperative period, further repositioning and/
or fillers may be warranted to establish appropriate lower
lid contour.2–4,38–52
a
b
Fig. 22.17 (a) This patient had excessive fat resection after a four-lid blepharoplasty by a referring plastic surgeon. (b) After correction
with a canthoplasty and midface suspension.
References
1. 2014 Plastic Surgery Procedural Statistics. American So
ciety of Plastic Surgery. Available at
surgery.org/news/plastic-surgery-statistics
2. Klatsky S, Iliff N, Manson P. Blepharoplasty. In: Goldwyn
R, Cohen M, eds. The Unfavorable Result in Plastic Sur
gery: Avoidance and Treatment. 3rd ed. Philadelphia, PA:
Lippincott Williams & Wilkins; 2001:847–879
3. Spinelli HM, Lewis AB, Elahi E. Atlas of Aesthetic Eyelid
and Periocular Surgery. Philadelphia, PA: Saunders-An
Imprint of Elsevier, Inc; 2004
4. Meade R. “Blepharoplasty.” Selected Readings in Plastic
Surgery 2010; 11(C2)
5. Niechajev IA, Ljungqvist A. Central (third) fat pad of the
upper eyelid. Aesthetic Plast Surg 1991;15(3):223–228
6. Dutton JJ, Frueh BR. “Eyelid Anatomy and Physiology with
Reference to Blepharoptosis.” Evaluation and Manage
ment of Blepharoptosis 2010;13–26
7. Spinelli HM, Riou JP. “Lower Lid Anatomy & Aesthetic Sur
gery,” American Academy of Ophthalmology Focal Points
Clinical Modules for Ophthalmologists, San Francisco, CA;
1995;13(7):1–10
8. Spinelli HM, Ali-Salaam P. “Orbit,” Surgical Oncology Clin
ics of North America. Philadelphia, PA: W.B. Saunders;
1997;6:45–97
9. Spinelli HM, Falcone S, Lee G. Orbital venous approach to
the cavernous sinus: an analysis of the facial and orbital
venous system. Ann Plast Surg 1994;33(4):377–383, dis
cussion 384
10. Swartz KA, Spinelli HM. Ptosis. In: Lin SJ, Mustoe TA, eds.
Aesthetic Head and Neck: An Operative Atlas. New York,
NY: McGraw-Hill; 2012
11. Spinelli HM, Farris RL. The Tear Film, In: Smith BC, ed.
Ophthalmic Plastic and Reconstructive Surgery. St Louis,
MO: CV Mosby;1987:535–545
12. Macdonald KI, Mendez AI, Hart RD, Taylor SM. Eye
lid and brow asymmetry in patients evaluated for up
per lid blepharoplasty. J Otolaryngol Head Neck Surg
2014;43(1):36
13. Shapiro M, Peters S, Spinelli HM. Melkersson-Rosenthal
syndrome in the periocular area: a review of the litera
ture and case report. Ann Plast Surg 2003;50(6):644–648
14. Spinelli HM, Jelks GW. Periocular Reconstruction-A Sys
tematic Approach, Year Book of Plastic, Reconstructive,
and Aesthetic Surgery. St Louis, MO: Mosby-Year Book;
1994:88–90
15. Spinelli HM, Jelks GW. Periocular reconstruction: a sys
tematic approach. Plast Reconstr Surg 1993;91(6):1017–
1024, discussion 1025–1026
16. Codner MA, McCord CD Jr. Eyelid and Periorbital Surgery.
2nd ed. Thieme Medical Publishers; 2016
17. Cohen B, Reiffel AJ, Spinelli HM. Browpexy through the
upper lid (BUL): a new technique of lifting the brow us
ing a standard blepharoplasty incision. Aesthet Surg J
2011;31(2):163–169
18. Bartsich S, Swartz KA, Spinelli HM. Lateral canthoplasty
using the Mitek anchor system. Aesthetic Plast Surg 2012;
36(1):3–7
19. Schwarz GS, Spinelli HM. Correction of upper eyelid re
traction using deep temporal fascia spacer grafts. Plast
Reconstr Surg 2008;122(3):765–774
20. Tabatabai N, Spinelli HM. Limited incision nonendoscopic
brow lift. Plast Reconstr Surg 2007;119(5):1563–1570
283
Chapter 22 Blepharoplasty
36. Xue CY, Dai HY, Li L, et al. Reconstruction of lower eyelid
retraction or ectropion using a paranasal flap. Aesthetic
Plast Surg 2012;36(3):611–617
37. Hofmann RJ. Restylane injection for the lower eyelid tear
trough. In: Hartstein ME, Holds JB, Massry GG, eds. Pearls
and Pitfalls in Cosmetic Oculoplastic Surgery; 2014:485
38. Lisman RD, Hyde K, Smith B. Complications of blepharo
plasty. Clin Plast Surg 1988;15(2):309–335
39. Spinelli HM, Shapiro MD, Wei LL, Elahi E, Hirmand H.
The role of lacrimal intubation in the management of
facial trauma and tumor resection. Plast Reconstr Surg
2005;115(7):1871–1876
40. Zoumalan CI, Roostaeian J. Simplifying blepharoplasty.
Plast Reconstr Surg 2016;137(1):196e–213e
41. Suzman MS, Spinelli HM. Soft-tissue deformities in or
bital trauma: evaluation and repair of medial and lateral
canthal injury. Journal of Operative Techniques in Plastic
and Reconstructive Surgery 2003;8(4):249–258
42. Spinelli HM, Sherman JE, Lisman RD, Smith B. Human
bites of the eyelid. Plast Reconstr Surg 1986;78(5):610–
614
43. Sackeyfio R, Silich R, Spinelli HM. Eye Lid Rejuvenation, In:
Avram M, Avram M, Ratner D, eds. Procedural Dermatol
ogy. 1st ed. New York, NY: McGraw-Hill; 2014
44. Swartz KA, Newman MI, Spinelli HM, Canthal fixation,
Aesthetic Head and Neck: An Operative Atlas. New York,
NY: McGraw-Hill; 2012
45. Elahi E, Spinelli HM. Eyelid and Orbit Reconstruction, In:
Plastic Surgery. London, UK: Elsevier Limited; 2009
46. Small K, Brandon E, Spinelli HM. Evidence-based medi
cine in aesthetic medicine and surgery: reality or fanta
sy? Aesthetic Plast Surg 2014;38(6):1151–1155
47. Spinelli HM, Newman MI. Reconstruction of the Eyelids,
Correction of Ptosis, and Canthoplasty, In: Thorne CH, ed.
Grabb and Smith’s Plastic Surgery. 6th ed. Philadelphia,
PA: Lippincott Williams & Wilkins; 2006:397–416
48. Spinelli HM, Forman DL. Current Treatment of Post-Trau
matic Deformities—Residual, Ocular, Adnexal, and Soft
Tissue Abnormalities,” Clinics in Plastic Surgery, W.B.
Saunders, Philadelphia, PA; 1997;24(3)519-530
49. Lisman RD, Spinelli HM. “Soft Tissue Trauma and Orbital
Fractures,” Section VI, #2, World Atlas Series of Ophthal
mic Surgery, Highlights of Ophthalmology, El Dorado,
Panama; 1995:237–253
50. Lisman RD, Spinelli HM. “Orbital Adnexal Injuries,” In:
Foster CA, Sherman JE., ed. Surgery of Facial Bone Frac
tures, Churchill, Livingston; 1987:93–122
51. Park DH. “Treatment of Sunken Eyelid.” Autologous Fat
Transfer; 2009: 155–64
52. Small K, Kelly KM, Spinelli HM. Are nurse injectors the
new norm? Aesthetic Plast Surg 2014;38(5):946–955
21. Thomas CB, Pérez-Guisado J. A new approach: resection
and suture of orbicularis oculi muscle to define the upper
eyelid fold and correct asymmetries. Aesthetic Plast Surg
2013;37(1):46–50
22. Gulyás G, Toth BA. Improving the lateral fullness of the
upper eyelid. Aesthetic Plast Surg 2006;30(6):641–648,
discussion 649–650
23. Greco M, Vitagliano T, Fiorillo MA, Greto Ciriaco A. A new
technique of upper eyelid blepharoplasty using the orbi
cularis muscle flap. Aesthetic Plast Surg 2012;36(1):18–
22
24. Xu JH, Tan WQ, Yao JM. Bipedicle orbicularis oculi flap in
the reconstruction of the lower eyelid ectropion. Aesthet
ic Plast Surg 2007;31(2):161–166
25. Zarem HA, Resnick JI. Expanded applications for trans
conjunctival lower lid blepharoplasty. Plast Reconstr Surg
1999;103(3):1041–1043, discussion 1044–1045
26. Mizuno T. Subciliary augmentation of the lower eyelid in
Asians using a deep temporal fascia graft: a preliminary
report. Aesthetic Plast Surg 2014;38(2):303–308
27. Spinelli HM, Tabatabai N, Nunn DR. Correction of in
volutional
entropion
with
suborbicularis
septal
and lateral canthal tightening. Plast Reconstr Surg
2006;117(5):1560–1567, discussion 1568–1570
28. Miyawaki T, Hisako A, Suzuki H, Kurihara K, Jackson IT.
Pre-expansion of mucosa-lined flap for lower eyelid re
construction. Plast Reconstr Surg 2005;116(5):76e–82e,
discussion 83e–84e
29. Carraway JH, Grant MP, Lisman RD, Spinelli HM. Correc
tion of lower lid laxity. Aesthet Surg J 2005;25(2):159–
168
30. Patel MP, Shapiro MD, Spinelli HM. Combined hard pal
ate spacer graft, midface suspension, and lateral cantho
plasty for lower eyelid retraction: a tripartite approach.
Plast Reconstr Surg 2005;115(7):2105–2114, discussion
2115–2117
31. Spinelli HM. Aesthetic surgery of the lower eyelid. J Cutan
Laser Ther 2000;2:106–107
32. Chia CT, Swartz KA, Spinelli HM. Transcutaneous lower lid
blepharoplasty, Aesthetic Head and Neck: An Operative
Atlas. New York, NY: McGraw-Hill; 2012
33. Swartz KA, Silich R, Spinelli HM, Transconjunctival lower
lid blepharoplasty, Aesthetic Head and Neck: An Opera
tive Atlas. New York, NY: McGraw-Hill; 2012
34. Siddens JD. Lower eyelid blepharoplasty: procedure
pearls and pitfalls. In: Hartstein ME, Holds JB, Massry GG,
eds. Pearls and Pitfalls in Cosmetic Oculoplastic Surgery;
2008:137–38
35. Segal KL, Patel P, Levine B, Lisman RD, Lelli GJ Jr. The ef
fect of transconjunctival blepharoplasty on margin reflex
distance 2. Aesthetic Plast Surg 2016;40(1):13–18
SECTION IV AESTHETIC SURGERY
284
Discussion by Michael P. Ogilvie and Julius W. Few Jr.
It has been our experience that although blepharoplasty
is seemingly a straightforward procedure, even the
most skilled of surgeons will encounter complications.
We have found this particularly true when dealing with
the lower eyelid, which is one of the most unforgiving
anatomic areas in aesthetic surgery. Although many
complications can be avoided through comprehensive
preoperative evaluation, adequate patient education,
and thorough knowledge of eyelid anatomy with me
ticulous surgical technique, when complications do oc
cur, they can have drastic and devastating cosmetic and
functional implications. Operative surgeons must have
tools in their armamentarium to avoid complications
and minimize the known risks.
Preoperative Planning
As with every surgical patient, avoiding complica
tions starts with a comprehensive preoperative as
sessment. The initial evaluation must include ethnic
considerations, anatomic and physical examination,
and a thorough discussion of patient expectations
and potential complications. Preoperative planning,
particularly for upper blepharoplasty, should involve
the assessment of brow position, dermatochalasis, ele
ments of blepharoptosis, and herniating fat relative to
those of the “ideal eye.” The surgeon must be cogni
zant of the optimal brow position. Resting brow ptosis
is extremely common and is often concealed by con
tinual use of the frontalis muscle to lift the brow. In
the setting of untreated brow ptosis, if the surgeon is
attempting to surgically address upper eyelid hooding,
an upper blepharoplasty alone will likely prove insuf
ficient and in fact can worsen preexisting brow ptosis.
The brow must be addressed in concert with the upper
eyelid, using our preferred approach of the transpalpe
bral browpexy or alternative brow lifting and stabiliz
ing techniques. When the brow is elevated surgically
using our preferred approach, it is essential that the
excised supratarsal skin be done with the brow eleva
tion in mind to avoid the excessive scarring and exces
sive skin tension that can lead to lagophthalmos. We
have found that this is best accomplished by marking
the patient when he or she is awake, sitting upright,
and on forward gaze, making sure the upper and lower
limbs of the skin excision lines touch or overlap. Fig.
22D.1 shows a 40-year-old woman with asymmetri
cal brow ptosis, bilateral lateral hooding, and derma
tochalasis who underwent upper blepharoplasty and
internal browpexy.
Relevant anatomic consideration is key, in particu
lar as it relates to differing ethnicities, and published
work has shown the tendency for differing downward
movement of the lateral canthal complex with aging.
This progressive drop with aging is most dramatic in
African Americans, because the canthal complex is su
perior to the medial canthus in most African American
and Asian patients, making the rejuvenation plan more
involved, because a lateral canthopexy or canthoplasty
may be required to restore relevant anatomy.1
Upper Blepharoplasty
In regards to upper blepharoplasty, the goal is to re
store a healthy and youthful appearance. Much of this
has to do with avoidance of overcorrection, which can
lead to functional deficits and produce the “overdone”
look. This can typically occur when one attempts to
remove more than 50% of the upper eyelid skin when
Fig. 22D.1 A 40-year-old woman with asymmetrical bilateral
brow ptosis, bilateral lateral hooding, and bilateral dermato
chalasis. (a) Preoperatively. (b) At 3 weeks postoperatively after
bilateral upper blepharoplasty and internal browpexy. (c) At 16
months postoperatively.
a
b
c
285
Chapter 22 Blepharoplasty
marked from the supratarsal crease to the inferior brow
border. The inferior mark should be located at the su
pratarsal crease with the upper border determined by
a pinch test, allowing for as much skin to be removed
as possible but making sure the superior and inferior
marks touch with full eye opening, indicating a ten
sionless closure.
The traditional use of the “open sky” technique, in
which both skin and muscle are excised together to de-
bulk the eyelid, may not produce the best results; we
have found that keeping the maximum amount of mus
cle and fat is essential to a younger, healthier look.2 Pret
arsal orbicularis oculi muscle resection should typically
only be performed in the setting of ptosis repair or rees
tablishing the supratarsal crease to widen the aperture.
The amount of muscle to be removed is dependent on
brow position, blepharoptosis severity, and asymmetry
between the eyes, if any. The open sky technique is very
effective for blepharoptosis and allows for optimal con
trol and access.
Blepharoptosis
With regards to blepharoptosis repair, we believe there
are multiple methods of levator aponeurosis modifica
tion, including plication alone. This method is a tempt
ing primary tool of many surgeons because it does not
require as thorough an understanding of ptosis anat
omy or as meticulous dissection as other methods of
repair. In 2005, we elucidated the presence of the septal
extension, which connects the septum to the underly
ing tarsus.3 We believe that a lack of understanding of
the septal extension and it being mistaken for the leva
tor aponeurosis explains the high recurrence rates seen
with the plication technique.4
Lower Blepharoplasty
As mentioned previously, the lower eyelid is one of
the most unforgiving areas of ophthalmic plastic and
reconstructive surgery, which is illustrated by the fact
that lid margin abnormalities (ectropion or entropion)
and lid malposition are some of the more common
complications seen in lower blepharoplasties. Known
risk factors for these issues are poor lid tone, as mea
sured by the snap-back test (normal is less than 1 sec
ond), and poor malar support, indicated by a negative
vector. These are features of high-risk patients, under
scoring the importance of proper preoperative evalua
tion and surgical planning.
Our philosophy for lower eyelid blepharoplasty
is very similar to upper eyelid blepharoplasty in that
we favor more fat repositioning than excision, as little
muscle removal as possible, and the use of the septal
fat repositioning procedure in the presence of a tear
trough deformity and lid–cheek disharmony or irregu
larity. In the upper eyelid, removal of too much fat can
create a “hollowed out” or A-frame deformity appear
ance, whereas in the lower eyelid overresection of fat
can produce a “sunken” or cadaveric look. Whereas the
lower eyelid fat pads should be treated conservatively,
in patients with distinct tear trough deformities, orbital
fat can be transposed onto the arcus marginalis for im
proved lid–cheek junction harmony and contour.
Lower lid malposition is a major complication and
is of primary concern of any surgeon performing eyelid
surgery. In 2000, Hester et al5 quoted a malposition rate
of 8.5%, and similar rates have been reported by several
other prominent surgeons.6–9 These rates were all asso
ciated with traditional transcutaneous blepharoplasty
with or without a concomitant midface lift. It has been
illustrated that a transcutaneous blepharoplasty using a
skin-muscle flap can denervate the pretarsal or presep
tal orbicularis oculi muscle, thereby affecting the mus
cle’s chief role of maintaining lower lid resting tone and
the prevention of lower eyelid malposition.
The ability to preserve muscle integrity by applying
a “no touch” approach popularized by Jelks and myself
(J.W.F.) presents the principle advantage for the trans
conjunctival approach to lower blepharoplasty and mid
face lifting.10 With use of this technique, the lower lid
retractors (capsulopalpebral fascia) are transected while
preserving the muscle, allowing for flexibility of the
lower lid while preserving muscle function and hope
fully avoiding issues of malposition.11 This technique is
particularly useful in patients with good canthal posi
tion, minimal excess skin, sclera show, lid retraction, and
the reoperative eye; however, it should be used with res
ervation in patients with significant malar bags or fes
toons and prominent malar excess.
No discussion of lower blepharoplasty is complete
without mentioning lower lid support techniques to re
juvenate the eye as well as to avoid lid malposition. Can
thopexy or canthoplasty as discussed in the chapter is
an excellent method to help achieve the goal of avoiding
complications. However, if a skin-muscle flap is being per
formed, limiting the myotomy to the orbicularis lateral to
the lateral limbus of the iris can preserve precious medi
ally based buccal branch innervation. We have also found
the use of an anchoring stitch of the remaining lateral or
bicularis oculi muscle to the lateral orbital periosteum is
a less involved technique that can often achieve the same
goals in rejuvenation while adding support to the lateral
canthus. The restoration of the lateral muscle sling may
obviate the need for a lateral canthopexy or canthoplasty
if the core of lower lid muscle tone is preserved.
SECTION IV AESTHETIC SURGERY
286
Continuum of Beauty and Stackable
Treatments
The goal of effective periorbital rejuvenation is to re
store, reposition, and redefine the effects of perior
bital aging. Although surgical techniques often offer
long-lasting solutions, they have inherent risks as dis
cussed in the chapter that can have devastating con
sequences in the wrong patient. In less-than-optimal
surgical candidates and younger patients, nonsurgical
techniques can often offer substantial results. In addi
tion, the use of stackable treatments, the use of mul
tiple nonsurgical modalities in one setting, can often
help to delay surgery in borderline cases or help to
correct complications in blepharoplasty such as over
resection of septal fat.
The use of a neuromodulator can minimize the early
appearance of brow ptosis and fine-line rhytides along
the lateral orbital rim as well as reduce the appearance
of crepey skin along the lower eyelid. As Ahn et al12 il
lustrated in 2000, use of a neuromodulator along the
lateral orbicularis oculi can help to raise the lateral brow
and, by opening the eye, help to mitigate the appearance
of early dermatochalasis. In the lower eyelid, early crepi
ness of the skin is often the result of an overactive pre
septal orbicularis oculi muscle, and we have found that
a small amount of neuromodulator at the midpupillary
level can often smooth this away.
Fillers in various forms can be used in both the up
per and lower eyelid to combat periorbital aging and
correct the overresection of muscle and fat that leads to
the hollow or sunken-appearing eye. Patients with hol
lowness of the supraorbital sulcus or those who have
had too much fat removed can have filler placed to give
a more youthful and softened appearance. Hyaluronic
acid fillers may be used in the tear trough area to mask
the attenuation of the orbital malar ligament, and larger
particle fillers may be used to enhance the infraorbital
rim and malar region, similar to the effects of a cheek
implant, particularly in those patients with a negative
vector. For those who use fillers, bruising or, worse, in
travascular placement leading to skin necrosis around
the eye and potential blindness are real concerns. In our
practice, the use of less hydrophilic fillers, like Restylane
L or Belotero, are placed at the periosteal layer by serial
small bolus injections, typically less than 0.3 mL per side
with a 27-gauge blunt-tipped cannula. We have found
that for placement of hyaluronic acid filler in the supra
orbital sulcus, superficially in the malar region, or deep
tear trough and nasojugal fold, the use of a blunt-tip
27-gauge cannula greatly reduces our rate of bruising
from 20% to less than 2% (unpublished study).
Energy-based modalities, such as microfocused ul
trasound (Ulthera, Merz Aesthetics), have illustrated the
ability to tighten the skin via heat-induced contracture
and collagen production through the use of soft tissue
heating, as evidenced by its first U.S. Food and Drug Ad
ministration–approved indication for ptotic brow eleva
tion.13 Although the degree of tightening cannot be fully
predicted, we have found excellent results, particularly
in the lower eyelid. Photodynamic and laser therapy,
both of which have a long history in the field of plastic
surgery, are proven alternatives to treat minor skin ex
cess. Fig. 22D.2 shows a 46-year-old woman with lower
lid fat herniation, right brow ptosis, and bilateral tear
troughs who did not want surgery. The ability to com
bine bilateral lower eyelid microfocused ultrasound to
the lower lid septal fat and right forehead with filler in
jection to both tear troughs gives a very satisfactory en
hancement and high patient satisfaction.
Although we do a significant number of blepharo
plasties annually, our patient population puts a pre
mium on risk reduction and decreased recovery time.
Therefore we use a stackable approach with many pa
tients to achieve near-surgical results, typically with the
use of energy-based modalities, neuromodulators, and
fillers, all placed in the same setting.
Although nonsurgical modalities can only be pushed
so far, we have found that with a combination approach,
near-surgical results can be obtained (Video 22D.1). This
approach is not practical for every patient, but these tools
are an addition to the surgeon’s armamentarium to pro
duce superior results without devastating complications.
The stackable concept can be quite powerful for the sal
vage of a patient who has had unwanted side effects of
ophthalmic plastic surgery, such as an overresected eyelid.
Fig. 22D.2 A 46-year-old woman with right brow ptosis, bilat
eral lower eyelid herniating fat, and tear trough deformity after
microfocused ultrasound to the right brow and bilateral lower
eyelids with filler to the bilateral tear troughs. (a) Preprocedure.
(b) At 6 months postprocedure.
a
b
287
Chapter 22 Blepharoplasty
Conclusion
The main highlight of this discussion is to illustrate that
nonsurgical, stackable treatments are real tools within
the treating provider’s armamentarium, to not only
minimize risk but also to salvage an undesirable result or
provide surgical alternatives and provide quality results.
Acknowledgment
We would like to thank Natasha Tamagni Kulick for her tre
mendous effort in helping to write this discussion.
References
1. Odunze M, Rosenberg DS, Few JW. Periorbit
al aging and ethnic considerations: a focus on
the lateral canthal complex. Plast Reconstr Surg
2008;121(3):1002–1008
2. Fagien S. The role of the orbicularis oculi muscle and
the eyelid crease in optimizing results in aesthetic
upper blepharoplasty: a new look at the surgical
treatment of mild upper eyelid fissure and fold asym
metries. Plast Reconstr Surg 2010;125(2):653–666
3. Reid RR, Said HK, Yu M, Haines GK III, Few JW. Revisit
ing upper eyelid anatomy: introduction of the septal
extension. Plast Reconstr Surg 2006;117(1):65–66,
discussion 71–72
4. de la Torre JI, Martin SA, De Cordier BC, Al-Hakeem
MS, Collawn SS, Vásconez LO. Aesthetic eyelid ptosis
correction: a review of technique and cases. Plast
Reconstr
Surg
2003;112(2):655–660,
discussion
661–662
5. Hester TR Jr, Codner MA, McCord CD, Nahai F, Gi
annopoulos A. Evolution of technique of the direct
transblepharoplasty approach for the correction of
lower lid and midfacial aging: maximizing results
and minimizing complications in a 5-year experi
ence. Plast Reconstr Surg 2000;105(1):393–406, dis
cussion 407–408
6. McCord CD Jr, Shore JW. Avoidance of complica
tions in lower lid blepharoplasty. Ophthalmology
1983;90(9):1039–1046
7. Baylis HI, Long JA, Groth MJ. Transconjunctival lower
eyelid blepharoplasty. Technique and complications.
Ophthalmology 1989;96(7):1027–1032
8. McGraw BL, Adamson PA. Postblepharoplasty ectro
pion. Prevention and management. Arch Otolaryngol
Head Neck Surg 1991;117(8):852–856
9. Lowry JC, Bartley GB. Complications of blepharoplas
ty. Surv Ophthalmol 1994;38(4):327–350
10. Jelks GW, Jelks EB. The influence of orbital and eyelid
anatomy on the palpebral aperture. Clin Plast Surg
1991;18(1):183–195
11. Seitz IA, Llorente O, Few JW. The transconjunctival
deep-plane midface lift: a 9-year experience working
under the muscle. Aesthet Surg J 2012;32(6):692–
699
12. Ahn MS, Catten M, Maas CS. Temporal brow lift
using botulinum toxin A. Plast Reconstr Surg
2000;105(3):1129–1135, discussion 1136–1139
13. Alam M, White LE, Martin N, Witherspoon J, Yoo S,
West DP. Ultrasound tightening of facial and neck
skin: a rater-blinded prospective cohort study. J Am
Acad Dermatol 2010;62(2):262–269
288
CHAPTER
23
Rhinoplasty
Enrico Robotti
Rhinoplasty is considered the most demanding procedure
in plastic surgery. The surgeon must contend with myriad
nuances in a limited space where millimeters matter, and
every maneuver affects other aspects of the outcome.1 Per
forming rhinoplasty successfully with consistent results re
quires an adequate workload of cases; a sound knowledge
of anatomy, including functional anatomy; and a methodi
cal study of a vast body of literature. Rhinoplasty surgeons
must be perennial students, constantly reevaluating their
results over time and keeping abreast with the constant
influx of innovations. Obviously, the best approach to sec
ondary rhinoplasty is preventing its occurrence, and this
calls for a properly executed primary surgery. Flaws may
still occur, but these imperfections should require only mi
nor revision rather than complete rebuilding of the nasal
structures.
Two mainstay concepts are key in primary rhinoplasty:
1. There is no standard operation for every patient. Every
individual has different deformities and different
facial features, so each operation must be individually
planned and customized (the role of computer imaging
is of patent importance).
2. A routine reduction operation often leads to progres
sive deformity and impairment of function (Fig. 23.1).
Concepts of beauty have shifted toward a desire to
enhance a naturally elegant look with a tall dorsum
and a straight sidewall. Thus rhinoplasty should no
longer center around resection of bone and cartilage,
but rather on a rebalancing reduction with simultane
ous augmentation of other components of the nose.
Repositioning and restructuring are key. Most surgeons,
myself included, consider this easier to achieve with an
open approach.2–5
This chapter addresses several important steps in applying
this concept:
•• Preoperative planning and patient selection, including
identification of those anatomic variants that render
certain patients prone to specific complications.
•• Important technical issues in surgery of the tip, dorsum,
septum, and valves, including their relevance in
preventing postoperative complications.
•• Appropriate techniques for managing complications and
unfavorable results if they do occur. Such techniques are
“reconstructive” as well as “structural.”
These techniques are not universal, but they reflect the
views and guidelines that guide my practice.
Fig. 23.1 Common stigmata of aggressive excisional rhinoplasty,
including alar notching from excessive cephalic trim and saddling
from overresection of the dorsum.
289
Chapter 23 Rhinoplasty
specific spots of weakness of the sidewall on strong inspi
ration. I also review the septum and turbinates, although
such examination has to be complemented by a computed
tomography (CT) scan, which I review and discuss with
the patient on the second consultation. Finally, I assess the
thickness and quality of the skin envelope. Specific indi
vidual anatomic variants can often be picked up by such
examination (Box 23.1).
The number of such variables is so vast that a detailed
analysis of each of them is beyond the scope of a single chap
ter. However, some common variables are particularly con
cerning, because they are not always immediately evident
but predispose, if unrecognized and thus not treated appro
priately, to an unfavorable result.
The prevalence of such “anatomic hazards” in prospec
tive rhinoplasty patients was well summarized in Constan
tian’s landmark paper6 identifying the four most common
anatomic variants. In my rhinoplasty practice, approximately
40% of which is currently composed of secondary cases, the
findings are essentially similar:
1. Malposition of the lateral crura
2. A low radix
3. A narrow middle vault, which has functional as well as
aesthetic significance
To those three, I would add:
4. The issue of length and individual shape of the nasal
bones
5. Identifying which part of the nose is most problematic
toward achieving correct proportions among nasal
components7 (accomplished through measurements, an
aesthetic eye, or both)
Malposition of the Lateral Crura
Some degree of malposition (cephalic rotation of the lat
eral crura) is common, usually combined with a boxy or
bulbous tip. Although the lateral crura normally parallel
the alar rim only in their anterior portion and then diverge
from it (Daniel’s designated “turning point”8) at an angle
between 30 and 45 degrees, malposition starts when such
divergence occurs at a greater degree. This condition often
creates an alar ridge that extends to the rim, progressing
to the semblance of parentheses on frontal view and even
paralleling the midline septum in extreme cases. Lateral
crural malposition usually stands out to the trained exam
iner’s eye, although strict measurements and angles may
be misleading.8 It is confirmed by alar collapse on forced
inspiration, indicating insufficiency of the external valve.
What the patient usually sees is a “ball” at the nasal tip,
circumscribed by the ridges because of cephalically oriented
alar rims. Patient education is essential regarding the need
for lateral crural support or relocation to provide a restruc
tured sidewall, rather than an ill-advised excision (Fig. 23.2).
Avoiding Unfavorable
Results and Complications in
Rhinoplasty
Summary Box
Common Issues in Primary Rhinoplasty
•• Low radix
•• Individual shape and symmetry of nasal bones
•• Narrow middle vault or short nasal bones
•• Convex, concave, asymmetrical, or weak lateral
crura
•• Malposition of lower lateral cartilages
•• Tip support (lower lateral cartilages and distal
septum)
•• Septal deviation
•• Alar base width
•• Thin or thick skin
Entries in italics should be specifically noted.
Identifying Anatomic Variants
Preoperatively
Potential complications in rhinoplasty can be greater in pa
tients with specific anatomic issues; such variants must be
identified and recognized preoperatively. Otherwise, prob
lems may occur, either by commission (such as excessive
excisional maneuvers) or from omission (by failing to per
form necessary maneuvers on specific structures).
I usually examine a nose, both visually and by palpation,
from top to bottom, beginning at the radix and extending to
the nasal bones, upper lateral cartilages, lower lateral carti
lages, and columella. I assess the following views:
•• Frontal
•• Three quarters
•• Profile
•• Nasofrontal and nasolabial angles
•• Dorsal height and width
•• Tip projection and symmetry
•• Alar width and shape
•• Degree of columellar show
This external examination is followed by a functional as
sessment, delicately assessing the internal valve with the
aid of a long and thin speculum, focusable headlight, and
cotton applicators, looking for weakness or tendency of the
upper laterals to collapse on forced inspiration. I then as
sess the external valve by judging the strength and shape
of the lateral crura, the tendency for alar malposition, and
SECTION IV AESTHETIC SURGERY
290
Box 23.1
•• Nasofrontal angle and low or high radix.
•• Length of nasal bones: The shorter, the more prone to inner valve collapse.
•• Width of nasal bones: Bones may actually be wide or may appear so when the hump is taken down; not all
will warrant osteotomies.
•• Shape and symmetry of nasal bones: The shape and symmetry of each nasal bone is best evaluated in a CT
scan; asymmetrical mobilization of nasal bones by individualized opening or closing osteotomies may be
necessary.
•• Bony-cartilaginous hump: Whether it is true or apparent dictates the possible need for tip support and radix
fill to achieve proper proportions.
•• Width of the middle vault and its relevance to the need of reestablishing a proper internal valve and dorsal
contour after osteotomy.
•• Shape, width, length, and symmetry of the lower lateral cartilages, watching for cephalic malposition and
diverse relationships between lateral, middle, and medial crura segments.
•• Tip support and shape of the columellar–lobular angle: Correlates with the strength and shape of the lateral,
middle and medial crura, and distal septum.
•• Proportions in nasal profile, length, and projection: Determining whether the tip needs to be projected, the
radix raised, or the dorsum reduced, or any combination (and in which ratio) guides reestablishment of correct
balance and proportions.
•• The quality of the skin: Only aggressive restructuring will achieve detail with thick skin; whereas special care
combined with new instrumentation and camouflage are necessary for optimal contour at the keystone in
thin-skinned patients.
Anatomical Nasal Variants
Fig. 23.2 Preoperative (a) and 1-year postoperative (b) of a patient for whom lateral crural transposition with lateral crural struts corrected
the evident cephalic malposition of the alar cartilages. Asymmetrical spreader grafts (left wider than right) and bilateral spreader flaps were
used to balance the narrow middle vault after an asymmetrical osteotomy.
a
b
291
Chapter 23 Rhinoplasty
vault, especially when coupled with short nasal bones, is a red
flag for the need for spreader grafts (Video 23.1).
Length and Individual Shape of
Nasal Bones
The length of the nasal bones relates to the previously
mentioned point—short bones with a narrow middle vault
should alert the surgeon to the risk of an inverted-V de
formity and inner valve collapse. Preoperative analysis of
the shape of each individual nasal bone (not the nasal bone
proper, but nasal bone in combination with the frontal pro
cess of the maxilla, where a lateral osteotomy should be
gin) is important in achieving an ideal result. Studying the
bony configuration of each side of the nose (orientation and
obliquity of each bony sidewall from the maxillary plat
form and in relationship to each other) by careful observa
tion, as well as by the axial CT progressive sequence, allows
the surgeon to devise a proper plan, including whether to
involve only one or both bones and regarding opening or
closing osteotomies or osteoplasty (i.e., changing the shape
or contour of nasal bones without infracturing) (Fig. 23.4;
Video 23.2).
These concepts are innovative and time-consuming but
warrant close attention, because they make changes in bone
configuration more predictable, more stable, and less sus
ceptible to imperfections.
Identifying Proper Proportions
The surgeon must determine whether the nose has proper
proportions preoperatively. Stated differently, the sur
geon should consider whether the dorsum is tall or low
Low Radix
Misrecognition of a low radix and thus excessive removal
of what is considered the true hump (which is at least in
part apparent) leads to the vicious circle of over-reduction,
increasing tip hyperprojection and often a redundant skin
envelope, which cannot contract over an over-reduced
framework. These patients typically complain of a “bot
tom-heavy nose” and need to be convinced of the impor
tance of restructuring the low radix and upper third, rather
than reducing the volume of the lower third, which would
worsen the problem (Fig. 23.3).
Narrow Middle Vault
A narrow middle vault is more evident in patients with
short nasal bones. The surgeon must determine whether
the nasal bones need to be narrowed (hump removal will
reduce nasal height and highlight the visual perception
of excessively wide bones) ans whether the middle vault
should be widened, usually by spreaders, autospreaders, or
a combination of both in varying proportions (see Fig. 23.2).
The surgeon must determine the desirable width of the
aesthetic dorsal lines and the status of the internal valve,
which will warrant careful examination by a Cottle or modi
fied Cottle maneuver (by gently lifting the upper lateral car
tilage individually with a small cotton-tipped applicator).9
Obstruction of the internal valve may exist to some de
gree preoperatively or can be produced or worsened by low
ering the cartilaginous hump with resection of the horizontal
portion of the septal T that joins with the medial edge of the
upper laterals. Preoperative recognition of a narrow middle
Fig. 23.3 Preoperative (a) and 1-year postoperative (b) appearance of a woman for whom conservative radix grafting improved the balance
of the proportions of the nose while preserving the proper height of the dorsum.
a
b
SECTION IV AESTHETIC SURGERY
292
Fig. 23.4 (a–c) This 19-year-old woman had nasal bone asymmetry and a radix deficit, as well as a lack of tip support and tip definition.
(d–f) Improved appearance 9 months after asymmetrical osteotomy associated with osteoplasty, radix augmentation with fascia, a septal
extension graft, spreader flaps, and tip sutures. (g) The right bone will move laterally and the left medially (oriented from the top of the
patient’s head).
a
b
c
d
e
f
g
293
Chapter 23 Rhinoplasty
Intraoperative Considerations
Practical Tools for Surgery
Some key elements matter significantly during the
procedure: good lighting (headlight with variable fo
cus capability), adequate magnification (×2.5 loupes),
and full-size patient photos, including CT printouts and
simulations. The preoperative plan is written in a check
list format. If the preoperative analysis is correct, deviation
from that preoperative plan should not be necessary in pri
mary rhinoplasty.
In recent years, I progressively have adopted much
smaller instruments, especially small double hooks; very
fine, sharp scissors; and very small, sharp dental elevators
(Fig. 23.5). The hooks, used singly or in pairs, are very use
ful to delicately expose the rim incisions, whereas the small,
sharp scissors are excellent for making precise tunnels for
alar contour grafts. The dental elevators are best suited for
raising perichondrium with finesse where necessary.
For osteotomies, I have not used guarded osteotomes
for several years and have downsized the width of my os
teotomes, which are prevalently straight and vary from 2 to
4 mm. Powered instruments and piezoelectric inserts have
practically substituted all use of osteotomes in my practice
(Figs. 23.6 and 23.7).
Commercially available self-sustaining columella retrac
tors are excellent tools that free an assistant’s hand. Grafts
should be cut on a rigid, nonslippery platform (e.g., a hard
silicone mat or a sterilizable black rubber platform of ap
propriate thickness) and gently beveled with a knife blade.
I consider dyed PDS sutures to be durable and strong
enough for most applications. I reserve the use of Prolene
for fixating the distal septum to the nasal spine, generally
with a drill hole, for suturing the nasal bones after osteot
omy and, at rare times, for tip sutures on especially robust
alar cartilages. Both Prolene and PDS come on a rounded
needle to prevent the potential stress-breakage points on
the transfixed cartilage at the three angles of a triangular
shaped point. I frequently palpate the dorsum with a wet
fingertip after replacing the skin.
and whether the tip projects properly. Analyzing existing
proportions will often imply modifications to the three
elements, (1) radix, (2) dorsum, and (3) tip, according to
computer simulation and patient desires, but the limits of
contractility of the skin envelope over the framework must
be considered to prevent over-reduction and a polly beak.
There is no golden formula here, only personal experience
and learning from one’s mistakes.
Preoperative Planning and Patient
Assessment
After the examination the surgeon must consider how the
patient’s requests will relate to the clinical picture and thus
whether they will be obtainable. In most instances, they
are. Surgeons should clearly explain the patient’s anat
omy and the surgical plan so the patient can understand
the logic behind it and the time the surgery will require. I
use many photos of similar cases, including intraoperative
photos and video clips. Patients rarely have an issue see
ing intraoperative images. However, even the most detailed
explanations and thorough photos make little sense to pa
tients if not coupled with an accurate computer simulation.
This helps verify whether the patient’s goals are realistic
and within the surgeon’s capabilities and functions as the
best communication tool for an honest contract between
the patient and surgeon. I take a full array of photos in all
views, including “mid–three quarters” and “mid-Waters”
views. I then perform the imaging and discuss it with the
patient on the second preoperative consultation. Although
three-dimensional simulation programs are available, I
prefer two-dimensional imaging for its simplicity and con
venience.
During my consultation, I make a point of listening to
the patient to form a judgment on his or her suitability as
a candidate. I elicit a rank of priorities by asking, “Which
single thing bothers you most?” I record those concerns spe
cifically in the order stated by the patient. Many surgeons
have stressed the importance of a realistic attitude on the
patient’s part, devoid of excessive perfectionism. Obsessive,
unstable, and overdemanding patients can usually be rec
ognized, and surgery can thus be avoided.10,11 The surgeon
must understand and agree with the concerns the patient
expresses and determine whether the surgery required to
address them is justified.
Good clinical judgment, attention to possible red flags,
and previous experience are important. Again, timing is es
sential. I usually plan two preoperative consultations (com
puter imaging is discussed in the second one), sometimes
three consultations for those patients for whom I have
concerns.
Fig. 23.5 The finesse that contemporary rhinoplasty requires is
facilitated by smaller and finer instruments.
SECTION IV AESTHETIC SURGERY
294
dorsum on each upper lateral after having split it in the
midline and then join it in a single plane by meticulous
dissection with the ipsilateral periosteum below each na
sal bone. A full perichondrial-periosteal flap is elevated on
both sides, which can usually be carried well cranial to the
keystone area (Video 23.3). Using this technique provides
several benefits:
•• Precise, unhindered visualization of the bony and
cartilaginous cap, and especially of the anatomy at the
keystone area. This will allow precise manipulation
of cartilage, including autospreader flaps, and bone,
especially by use of power tools and piezoelectric
instruments.
•• A separate layered closure over the dorsum and the
crucial keystone area (Fig. 23.8).
In essence, the usual sub-SMAS dissection of the dorsum is
not joined to a subperiosteal dissection at the bony edge,
but is instead carried up to the radix. The subperichondrial
Dissecting the Nose on the Correct Plane
Although the concept of dissecting the nose on the correct
plane may seem obvious, it warrants attention. Most au
thors agree on dissecting the lower lateral cartilages on the
standard supraperichondrial plane, although some suggest
a subperichondrial approach.12 I have found this essentially
unnecessary.
After tip dissection, the usual suggested practice is to
carry out a subsuperficial muscular aponeurotic system
(SMAS) dissection of the dorsum and then join it to a sub
periosteal dissection at the bony edge. This allows the best
preservation of available skin thickness at the delicate key
stone area. In some patients, the skin at the keystone is
thin, which usually calls for subsequent camouflage. I have
found that raising individual right and left osteoperichon
drial flaps as described by Cerkes13 often solves this issue.
This technique represents a breakthrough development in
achieving precision in surgery of the dorsum. The rationale
is to raise precisely the perichondrium of the cartilaginous
Fig. 23.6 Common powered instruments for primary rhinoplasty. (a) Oscillating saw (to remove the bony cap). (b) Reciprocating saw
(for medial or medialoblique osteotomies). (c) Powered rasp.
a
b
c
Fig. 23.7 Specific piezoelectric inserts can be used for osteoplasty (i.e., shaping the contour of the nasal bones). Other inserts are useful
for precise osteotomies.
295
Chapter 23 Rhinoplasty
dissection then begins right at the septal angle, exposes
both upper laterals, and is carefully joined to a subperios
teal dissection at the edges of the bony cap (as shown in
Video 23.3). Although such osteoperichondrial flaps tend
to differ individually in thickness and continuity, they can
be used proficiently in most cases. The lowering of the
hump will cause redundancy of flaps and facilitate closure,
at times even requiring some resection of the edges to pre
vent excess. I do not find reinserting a thinned bone graft
at the keystone necessary, because that area is typically ap
propriately contoured by osteoplasty (i.e., bone reshaping
rather than just osteotomy) and precise cartilage reduction,
detailed later in this chapter. Precise suturing of the flaps in
the midline usually reestablishes a proper dorsum contour.
The Dorsum
The Importance of Component Separation and
Incremental Reduction
As well described by Rohrich et al,14 incrementally reduc
ing the dorsum by addressing its individual components
allows precision and control in hump reduction, reducing
the likelihood for irregularities, overresection or underre
section, and inverted-V deformities (Video 23.4). The main
goal is separation of the upper laterals from the septum,
incremental reduction of the dorsal septum proper, and
controlled reduction of the bony cap. Reestablishment of
proper dorsum lines follows, facilitated by spreader grafts,
spreader flaps, or a combination. The upper laterals are
thus purposely left tall and not resected at the same level
as the dorsal septum (Fig. 23.9).
Fig. 23.8 Splitting the subperichondral-subperiosteal flap in the midline (a) and joining the subperichondral and subperiosteal flaps in one
single, widely dissected, unit on both sides (b) provides excellent exposure of the anatomy of the keystone area and facilitate its treatment.
a
b
Fig. 23.9 Splitting the dorsum into its components allows the
surgeon to address the septum, upper laterals, and bony cap
individually and precisely.
Fig. 23.10 The upper lateral cartilages often extend under the bony
cap at the keystone for a remarkable distance. (This image is pro
vided courtesy of Dr. Charles East.)
SECTION IV AESTHETIC SURGERY
296
dedicated inserts. Final contouring of bone irregularities af
ter osteotomies, which is difficult to do with conventional
rasps because of bony instability, can be performed easily.
Although adequate exposure (when full osteotomies are car
ried out by piezoelectric instruments this becomes, in es
sence, a complete degloving of the nasal osseous vault) is
needed, this technique may offer superior results and bet
ter precision in treating any bone deformity of the osseous
vault, after a preoperative CT analysis (Video 23.6).
Symmetry, Asymmetry, and the Shape of Individual
Bones: Individual Bone Manipulation
As previously mentioned, nasal bones should be assessed
individually regarding shape, width, and symmetry. This is
best done through a CT scan study, ideally with three-di
mensional reconstruction.
Proper assessment will dictate the need for bilateral or
unilateral osteotomies, symmetrical or asymmetrical, open
ing or closing, and whether they are combined with osteo
plasty (bone contouring) to improve irregularities or exces
sive convexity (Fig. 23.11). Osteoplasty, possibly performed
by power tools or piezoelectric instrumentation, will often
obviate the need of double-level osteotomies. An asymmet
rical bony platform (i.e., some degree of congenital facial
asymmetry) must be taken into consideration: it is actually
far from uncommon and should be noted, considered in the
equation of bony mobilization, and pointed out to the pa
tient to prevent postoperative issues.
Another factor that affects predictability of bone posi
tioning is suturing nasal bones together by drilling holes
in the nasal bones. This new concept adds predictability
and obviates dependence on the splint for bone stability
(Fig. 23.12).
The Cartilaginous Middle Third (Internal
Valve) and the Septum
The essence in addressing the cartilaginous middle third
and septum is preventing the lateral wall from falling
medially when the wide, T-shaped septal dorsal edge is
removed, thus rendering the internal valve incompetent.
Aesthetic dorsal lines in continuity, dictated by the desired
width of the edges of the bony vault, must be reestablished
with varying combinations of spreaders, autospreaders, or
both2,4,19 (Fig. 23.13). Myriad options are available. Spread
ers and autospreaders may be used differentially (for ex
ample, a spreader plus autospreader on one side, and a
single spreader on the other) depending on the asymmetry
between the right and left side (Video 23.7).
Septal deviations must be controlled in a stable fashion,
which often requires spreaders or a perforated ethmoid plate
segment, which serves as the best rigid splint for correcting
deviation (Figs. 23.14 and 23.15; Video 23.8). The whole
Taking Down the Hump: A Decapping
Cadaver studies have revealed the structure of the dorsal
hump and the considerable overlap of the bony vault on top
of the cartilaginous vault to be a true bony cap at the key
stone area, on top of the extension of the upper laterals be
low the nasal bones.15 Because “there is no bony hump, just
a bony cap,”15 and the “hump” is, in essence, cartilaginous,
the bony cap must be reduced first and the cartilaginous
hump reduced after (Fig. 23.10; Video 23.5).
Osteotomy and Osteoplasty
Once the bony cap is fully exposed after component
separation of the cartilaginous dorsum and incremental
reduction of the septum, the surgeon assesses the shape
of the bony cap and determines how to proceed regarding
the following:
•• Extent of lowering of the bony cap
•• Need for osteotomies
•• Need for reshaping (i.e., bone contouring)
The need for osteotomies depends on the extent of lower
ing of the bony dorsum and its width. Contour refinement
of the bones (osteoplasty) is not commonly addressed in
rhinoplasty literature.16–18
Although conventional, well-sharpened osteotomes and
rasps work well in most instances, I have been seeking bet
ter control and precision in managing the bony vault. Asym
metrical lines of osteotomies, destabilization and collapse of
the nasal bones, palpable irregularities of the bony dorsum,
residual bony spicules, and lateral sharp edges are common
findings in revision rhinoplasty. All irregularities are essen
tially a result of poorly controlled manipulation of bone.
Precise planning of the osteotomy lines and use of finely
tuned, narrow, and well-sharpened osteotomes help to pre
vent such problems; however, a greater role is now played
by more sophisticated instrumentation. Powered tools (os
cillating and reciprocating saws) offer a distinct advantage
over chisels, osteotomes, and hand rasps, because they can
configure a straight and controlled osteotomy line rather
than a potentially jagged fracture line, as often occurs when
an osteotome strikes bone with blunt force.17 This is even
more evident in the brittle nasal bones of older patients. The
same advantage of better contouring is offered by burrs and
power rasps over conventional hand rasps (see Fig. 23.6).
The concept of three-dimensional sculpting of na
sal bones has been carried another step forward even
more recently by the introduction of piezoelectric instru
mentation18 (see Fig. 23.7). Already well established in
maxillofacial surgery, piezoelectric-powered ultrasonic
instrumentation is rapidly gaining status both in sculpt
ing nasal bones, thus shaping the bony vault without os
teotomies when possible (osteoplasty), and in allowing
all osteotomies to be carried out under direct vision with
297
Chapter 23 Rhinoplasty
concept of achieving symmetrical and aesthetic dorsal lines
is founded on achieving a straight midline septum.20
Performing a primary rhinoplasty “only” does not rule
out the need for founding the nasal middle and distal third,
once the bones have been dealt with appropriately, on a
straight, solid, residual L-strut (Video 23.9). This means, in
practice, that some deviations will require properly splinting
the septum, whereas others may warrant replacing the dis
tal septum completely with a caudal septum replacement
graft (i.e., a “partial extracorporeal” technique).21 In other
cases, the septum must be completely removed and a new
septum rebuilt with a full extracorporeal technique, as pio
neered and popularized by Gubisch.22 When full exposure
and correction of a deviated distal septum is necessary, the
vertical segment of the L-strut must be stably fixated to the
nasal spine (midline fixation or split for fixation to one side)
by suturing with permanent sutures through drill holes with
4-0 Prolene (Fig. 23.16).
Fig. 23.11 Preoperative (a) and 2 months postoperative (b) views of a patient who had asymmetrical osteotomies. Opening osteoto
mies were performed on the left, with the bone held open by a spreader graft wedged appropriately high, and closing osteotomies were
performed on the right side. (c–e) A preoperative study of the CT scan facilitated proper planning. (c) The axial scan shows asymmetri
cal inclination of right and left nasal bones. (d) The three-dimensional surface rendering offers an interesting view of the nasal contours,
highlighting the deformity and the deviation. (e) The view taken from above shows that the right bone will have to be mobilized medially
and the left bone laterally and a spreader inserted high on the left side.
a
b
d
e
c
Fig. 23.12 Direct suturing of the nasal bones adds stability to the
final bone position after osteotomies and avoids dependency on
the dorsum splint.
SECTION IV AESTHETIC SURGERY
298
Fig. 23.13 Spreader grafts and spreader flaps can be used in varying combinations to achieve the desired aesthetic dorsal lines. (a) Bilateral
spreader grafts. (b) Bilateral spreader flaps. (c) Asymmetrical combination of both.
a
b
c
Fig. 23.14 A splint of ethmoid bone, appropriately thinned by burr and then perforated multiple times by a small drill is ideal to correct
and stabilize a weak or deviated septum in situ.
Fig. 23.15 Splinting a weak portion of septum, which
must be replaced as a partial extracorporeal septoplas
ty or a distal septum replacement graft, can be done
on the table before insertion.
Fig. 23.16 Fixation of a straightened or replaced distal septum to the nasal
spine should be done in a stable fashion by drilling a hole in the spine. Splitting
the spine and suturing it to one side is another option.
299
Chapter 23 Rhinoplasty
lateral cartilages correlates directly with tip shape and are
often evident to the trained eye before the operation be
gins.
An obvious advantage of the open approach is direct
visualization of these anatomic variations. Many surgi
cal maneuvers are available to reconstruct a symmetrical,
well-structured, aesthetic tip.2,4,24 A solid foundation should
be provided for efficient tip support. Then shape should be
given by a combination of sutures and appropriate restruc
turing of the sidewall, when necessary. In the open ap
proach, which I prefer, columellar strut, tongue-in-groove, or
septal extension grafts are the most commonly used meth
ods to build a solid and reliable tip base25,26 (Fig. 23.17).
Proper tip position may need to be adjusted by rearrang
ing differentially the length of the lateral and medial crura
according to the popular concept of the tip tripod proposed
by Sands and Adamson27 and including maneuvers such as
lateral crural overlap and lateral crural steal when suitable28
(Fig. 23.18).
An appropriate tip shape, which usually is considered
to resemble a mildly splayed open “diamond configura
tion,” is aided by an incremental use of sutures.24 Many key
authors have defined personal suture algorithms, which
should be studied and integrated in one’s practice as best
possible.29,30 Adopting a consistent personal algorithm in
The Radix
As previously mentioned, misrecognition of a low radix is
unfortunately common in rhinoplasty and will lead to se
quelae of errors and disproportion. Although the usual con
figuration is that of a limited depression at the radix proper,
a spectrum of variations extend to the low upper or middle
third of the dorsum and thus need to be acknowledged and
addressed. Primary grafting is necessary, typically with
crushed cartilage or soft tissue elements. I prefer Daniel’s
described technique,23 harvesting deep temporal fascia and
using it with a rolled “ball-like” configuration or as a diced
cartilage and fascia (DCF) construct for more significant
and distally extended augmentations (discussed later in
this chapter).
The Tip
Building a Reliable Nasal Tip Base, Tip Position,
Tip Shape, and Sidewall
A considerable amount of time and attention should be
spent on the tip during a rhinoplasty. The great variability
of shape, dimensions, contour, and strength of the lower
Fig. 23.17 The three most commonly used methods to build a solid foundation for tip support. (a) Columellar strut. (b) Tongue-in-groove.
(c) Septal extension grafts.
a
b
c
Fig. 23.18 (a,b) The lateral crural steal maneuver lengthens the medial crural at the expense of the lateral crural, tensioning the latter.
A septal extension graft, as shown, is usually used to project the tip first. (c) Suture techniques to provide appropriate tip shape follow.
a
b
c
SECTION IV AESTHETIC SURGERY
300
Recognizing an Underprojected Tip
A “droopy” tip, which is indirectly supported by the dor
sal hump, often appears to hang from the visible septal
angle on the three-quarter and profile views. The per
ceived hump is often apparent rather than true. Reducing
the hump without reestablishing appropriate tip support
would lead to an even greater drooping. The dangerous vi
cious circle becomes evident here: taking down the hump
(which should have been considered as, at least in part,
an apparent hump) leads to further tip deprojection, and
eventually to a polly beak deformity. Obviously, providing
adequate support by grafting is required, together with the
reestablishment of a proper tip break point.25,26 Although
many measurements have been reported for assessing
proper projection from diverse facial parameters, my pref
erence is to use an aesthetic eye. The relationship of the alar
cartilages complex to the septal angle is paramount. Weak
alar cartilages will not project above the septal angle, and
thus an unsightly double break will result in a profile view.
Strong cartilages will project at or above the septal angle.
suture refashioning of the tip simplifies one’s surgery and
reduces the potential for confusion. The columellar-lobular
angle and middle crura should also be addressed when nec
essary, and usually some camouflage is needed to finalize
the contour (Fig. 23.19).
Finally, an elegant though strong sidewall should be
sought to provide an adequate external valve with a lateral
elevated ridge that continues from tip to ala without notch
ing (thus without the perception of a ball tip) and with a
proper orientation of the caudal versus cephalic margins of
the lateral crura.31 Multiple techniques serve this purpose:
•• Turn-under flaps
•• Mattress sutures
•• Tensioning the lateral crura
•• Lateral crural struts
•• Onlay and inlay grafts
The detailed description of these techniques is beyond the
scope of this chapter. In essence, however, the key principle
remains that of a structural rearrangement rather than a
reduction operation.
Fig. 23.19 Final camouflage will often prevent long-term visibil
ity of possible irregularities of the tip contour. Possible materi
als to be used are cephalic trim segments, intercrural soft tis
sue, fascia when harvested for other reasons, and the T-shaped
septal contour resected during hump reduction (as shown).
Fig. 23.20 An efficient way of securing a stable, well-projected tip is combining a septal extension graft and lateral crural steal. The lateral
crural are “worked” progressively on the septal extension segment, and the new domes are shaped by multiple tip sutures.
301
Chapter 23 Rhinoplasty
Recognizing and Managing Malposition of the
Lower Lateral Cartilages
As described earlier, a condition of lateral crural malposi
tion, although variably defined, should be identified preop
eratively and then treated. If the problem is just seen as tip
bulbosity and treated by aggressive cephalic trim, collapse
of the sidewall, pinching, and the impression of a ball tip
will invariably follow. Available techniques involve trans
position of the lower laterals, usually combined with lateral
crural strut suture reshaping and onlay articulated grafts or
caudally extended underlay crural struts2,31,34 (Figs. 23.22
and 23.23). A valuable adjunct in such cases is the use of
alar contour grafts, which should be considered in most
primary rhinoplasties to ensure support of the alar rim and
for prophylaxis in the external valve area.35
Septum, Turbinates, and Valves
A description of the functional issues that are insepara
bly linked to the execution of cosmetic rhinoplasty is be
yond the scope of this chapter but is discussed in Chapter
26, Postoperative Nasal Airway Obstruction. Attention to
the airway is often not properly provided during primary
The height of the septal angle also comes into play re
garding whether it is appropriate, excessive, or insufficient.
A combination of septal extension graft and lateral crural
steal works well (Fig. 23.20).
Avoiding Excessive Trim
Undesirable shortening of the nose and alar retraction may
result from excessive tip rotation, commonly secondary
to vigorous cephalic trim of the lateral crura.32,33 (see Fig.
23.1). As commonly seen in many secondary cases, pinch
ing of the nasal tip and external valve collapse is also often
a result of overzealous cephalic trim, although the thresh
old for pinching varies widely because of varying cartilage
strength among patients (Video 23.10). Measurements
are less important than maintaining as much width of
the lateral crura as possible, although some conservative
trimming may need to be done, especially just cranial to
the domes (a “paradomal” trim). Current rhinoplasty thus
aims to preserve as much lateral crural cartilage as possible
to prevent structural compromise and alar retraction. This
requires additional suturing and repositioning techniques,
with increase in duration of surgery, but this is justified by
the added structural stability (Fig. 23.21; Video 23.11).
Fig. 23.21 Cephalic trim should be limited to that necessary to help provide proper tip configuration and restricted to the paradomal region.
The goal is to leave as much width as possible to provide long-term stability. Obviously, appropriate suturing techniques will be required.
Fig. 23.22 Different techniques can be used to correct cephalic malposition of the alar cartilages and provide a straight, well-oriented
sidewall. (a) Transposition. (b) Articulated grafts. (c) Turn-under of the cephalic portion of the lower laterals and caudally extended struts.
a
b
c
SECTION IV AESTHETIC SURGERY
302
External valve issues, with lateral wall collapse on inspira
tion, are not exclusive to secondary rhinoplasty, but can be
identified often in primary cases, with malposition, or with
weak lateral crura. They should be treated with one of the
available methods for sidewall restructuring.
The Skin
The issue of skin thickness has a true effect in the result
of rhinoplasty. When the skin is thin, extra attention must
be given to the exact contour underneath, especially at the
keystone. Current dorsum techniques, with the use of new
instrumentation and osteoperichondrial flaps, reduce the
indication to camouflage here, although deep temporal fas
cia or free finely diced cartilage may still be required at the
end of surgery.
When the skin is thick, some cautious “defatting” is
possible, especially for the inelastic and sebaceous tip and
supratip skin. This involves a careful excision under loupe
magnification of the deep fatty layer and the nasal exten
sion of the SMAS (Video 23.12). Such defatting must be
combined with appropriate restructuring by grafting. The
heavier and thicker the skin, the more support and struc
ture are needed.39
rhinoplasty36,37 and thus becomes an issue later. Four ele
ments may play a role, individually or in combination, re
garding function in rhinoplasty: nasal septum, turbinates,
internal valves, and external valves. The septum warrants
proper diagnosis and treatment, because lateral osteoto
mies narrow the airway. Hypertrophied turbinates require
treatment, with the goal of avoiding mucosal resection.38
The importance of reestablishing the internal valve has
been previously discussed regarding the middle vault.
Fig. 23.23 An aesthetic sidewall configuration implies straight and
well-oriented lateral crura.
Fig. 23.24 Preoperative (a,c) and 1-year postoperative (b,d)
photos of patients with especially thick skin. Surgeons must
find a reasonable compromise regarding volume reduc
tion and restructure the framework appropriately. Results
will progressively improve well beyond the 1-year standard
follow-up.
a
b
c
d
303
Chapter 23 Rhinoplasty
always required in my practice to assess in detail the status
of the bones, septum, and turbinates.
Evaluating the suitability of the patient for surgery takes
time, using sound clinical judgment, some basic psychology,
and due attention. A surgeon’s own mistakes are possibly
the best teacher in this. Many individuals do not truly have
body dysmorphic disorder (BDD)42 but still have obsessive
and compulsive tendencies (i.e., be difficult patients). The
surgeon walks a fine line, and there is no textbook recipe.
It becomes a matter of assessing motivation, attitude, com
pliance, and feasibility all at once. Although some patients
are obviously problematic (I have found these patients to
be primarily men), many are likeable, disappointed, and of
ten frustrated and can be essentially reasonable candidates.
Such patients are well informed and usually have a basic or
even good understanding of the problem. Many have spent
hours in research on the Internet. I focus on whether I can
recognize and endorse the concerns that the patient ex
presses in the same order of priority. The fact that such con
cerns may be minor does not necessarily dissuade me from
surgery. More than one consultation is commonly needed.
Deciding whether the deformity can be successfully im
proved by revision and to what degree is the logical final
step. If everything falls together and the patient’s requests fit
in the clinical picture, it will be appropriate to operate, even
for “finesse” work in a demanding patient. In other situa
tions, the patient should be discouraged from seeking sur
gery, because the gain would not be worth the effort and the
patient’s expectations cannot be met.
Patients should be educated and steered away from un
realistic reduction expectations and warned of prolonged
edema. Misguided attempts at excessive reduction will re
sult in a polly beak deformity and poor skin distribution. Es
pecially in these cases, the tip and sidewall need to be strong
and the dorsum kept high (Fig. 23.24).
Managing Complications
Obviously, the best approach to secondary rhinoplasty is
preventing its occurrence, and this calls for an accurately
executed primary surgery. The essential key points regard
ing this have been detailed previously. However, when
complications do occur in rhinoplasty, the treating surgeon
enters the realm of secondary rhinoplasty. The goal is to re
store the function and improve the shape of the nose. This
usually means dealing with all, or most, of the interrelated
elements that compose the nasal pyramid, rather than just
single, independent issues. Thus secondary rhinoplasty
usually means rebuilding the proper structure of the dor
sum and tip, rather than just local camouflage. The errors
encountered fall into two categories: (1) errors of omission
and (2) errors of commission. Often both have occurred.
Sometimes it is possible to bring the patient fully back
to “normal” (i.e., regaining the same result that could have
been achieved primarily, although with additional diffi
culty); other times, some of the damage is irreversible and
thus can be improved but not fully remedied. This result may
be the best compromise possible.
Evaluating the Patient
The importance of proper patient assessment in secondary
rhinoplasty has been well documented.40,41 My evaluation
follows the same steps outlined previously in this chapter,
but with an even greater amount of time and detail. I see
three reasons for which this evaluation is so important and
the time required is time well spent:
1. The multivariate anatomic characteristics of the revi
sion rhinoplasty patient
2. The variability in the patient’s suitability for surgery
3. The necessity of determining whether the deformities
can be successfully improved by revision and, if so, to
what degree
Anatomic issues in revision rhinoplasty are numerous, var
ied, and not always apparent. In practical terms, although
a surgeon should feel pretty confident with a sound pre
operative analysis in a primary case, he or she should be
prepared for surprises in a secondary surgery. However,
most findings can still be detected preoperatively. Attribut
ing a cause to the occurrence of the deformity (i.e., What
was done and what subsequently occurred?) can bring a
possible solution (Box 23.2).
A functional examination, as done with primary rhino
plasty, will follow. As also previously stated, a CT scan is
Box 23.2
•• Alar retraction
•• Saddling
•• Inverted-V deformity
•• Asymmetrical bones
•• Polly beak deformity
•• Residual tip
•• Tip hyperprojection
•• Ptosis
•• Overresection or asymmetrical resection of the
lateral crura
•• Tip bossae
•• Scarring
•• Synechiae
•• Fistulae
•• Varying combinations of these
Common Anatomic Issues in
Revision Rhinoplasty
SECTION IV AESTHETIC SURGERY
304
a low radix and thus mistakenly lowered the dorsum too
much.
Occasionally the septum has been left high, causing a
polly beak deformity, which then requires completion of the
missed reduction. One-piece removal of the dorsal hump
involves loss of the septal-T divergence and medial collapse
of the commonly overshortened upper laterals against the
septum. This leads to an inverted-V deformity, especially in
patients with short nasal bones. The internal valve is nar
rowed and the deficit becomes worse as inspiration causes
further medial collapse. This calls for the reestablishment
of a wider “septal-T–like” configuration of the dorsum, usu
ally by spreader grafts (Fig. 23.25). Spreaders (which often
have to be wedged high in the bony vault) are the usual so
lution, although their actual value in augmenting airflow
remains unclear. Spreader flaps or autospreaders, commonly
used in primary rhinoplasty,2,19 are seldom available in such
instances, because usually the upper laterals have already
been shortened in their vertical height. The same holds for
the recently described perichondro-periosteal flap, which
is of great value in primary cases.20 In any case, this sce
nario necessitates reestablishing a proper supporting dorsal
L-strut with the “composite reconstruction” principles well
established by Daniel43 and others.
Straightening the septum and fixing it in a proper and
stable position is the mainstay maneuver for deviations and
asymmetries, on which the rest will follow.20,44 Wide septal
exposure starting at the septal angle, obviating the need for
a transfixion incision, comes first. This can be complicated
by mucosal leaflets that are stuck to each other where sep
tum has been removed or by fistulas. Such fistulas can sel
dom be closed, so the surgeon has to work around them.
Assessment of the residual septum follows, often along with
extracorporeal septoplasty, either complete, as described by
Gubisch,22 or modified, by leaving a cranial septal segment
at the keystone when feasible21 (Video 23.13).
In all cases, the neoseptum must be set in the midline
and solidly fixated to the nasal spine by permanent sutures
passed through a drill hole in the spine. If the septum is
unavailable or insufficient, the L-strut construct will have
Principles and Techniques: Restructure
or Camouflage
After the patient evaluation and decision for surgery, the
surgeon needs to decide whether to restructure or to cam
ouflage. In some instances, a small revision will indeed suf
fice. This can be the case when, for instance, small grafts
in discrete pockets are needed in an otherwise well-pro
portioned and structured nose (for example, localized alar
buckling or filling a small contour defect of the dorsum).
Such procedures can often be done closed, under lo
cal anesthesia, infiltrating slowly and progressively with a
27-gauge needle on a dental syringe peripherally to the de
fect, or using a local nerve block to limit the distortion of tis
sues. Limited rasping of a small palpable bony spicule at the
keystone, which can be performed using the beveled edge of
a 19-gauge needle, may also suffice. In most instances, how
ever, reestablishing a proper structural support is necessary.
A usual scenario requires complete exposure, full recogni
tion and deliverance of the anatomic structures, and ade
quate restructuring.
Grafting is the mainstay of structural stability and can
lead to long-term results. Of course, some degree of camou
flage will always be part of the revision. In fact, I commonly
use a tailored (i.e., custom-made and exactly measured) DCF
graft. However, this has to be considered as an add-on to re
building a dorsal plateau, which must be constructed with
structural grafting.
The Dorsal Plateau
The Frame
Revision of the frame of the dorsal plateau may concern
both the nasal bones and the middle vault. The problem
is commonly a result of excessive resection, often “mono
bloc” rather than an anatomic component resection,14 or of
imprecise osteotomies. Saddling can be a result of excessive
hump reduction, or the previous surgeon may have missed
Fig. 23.25 Spreaders fashioned from rib are used sequentially. (a) This spreader is first used both to raise the height of the dorsal plateau
beyond the level of the residual septum and to stabilize the septum to a septal extension graft (harvested itself from septum). (b) The other
spreader defines the borders of the dorsal plateau and stabilizes the whole construct. A residual small segment of rib is then be placed in
the central gap. Native septum is ideal for the vertical component of the new L-strut, whereas rib is well suited for spreader grafts.
a
b
305
Chapter 23 Rhinoplasty
When just a little more uniformity is sought as a final
step in the dorsum, an alternative is to just use finely diced
cartilage (Video 23.15). Mixing the diced fragments together
with blood at a specific temperature will help in pasting the
construct together to some extent47 (Fig. 23.30). This will
work only with a skin envelope that is not too tight and al
lows only some dorsal smoothing, not true augmentation.
to come from a rib (preferably) or concha (double-oppos
ing segments). Depending on the case, the distal septum
may have to be strengthened and elongated by septal exten
sion grafts or caudal septal replacement grafts, usually in
an overlapping configuration, and straightened if necessary
with the aid of stable splints of ethmoid bone plate thinned
by a burr and liberally perforated to allow suturing and tis
sue ingrowth. This construct is remarkably strong yet thin,
and it will stand multiple closely spaced small perforations
well (see Fig. 23.15). Custom-built spreaders (sometimes
fashioned with different widths—wider cranially or distally
or doubled, if required) will also work as septal splints and
will differentially establish lateral width and augment the
dorsal height to some degree over the residual septal cranial
border (see Fig. 23.26). In essence, it is necessary for rees
tablishing a dorsal plateau with proper aesthetic and sym
metrical dorsal lines.
Regarding bone work, the radix may have to be deep
ened (by guarded burr) or augmented (Video 23.14). Oste
otomies may have to be completed when an open roof has
been left uncompleted, or they may be performed asymmet
rically according to the inclination of each nasal bone. Study
ing the CT sections is especially useful, together with the
concept of opening or closing osteotomies and using spread
ers as spacers. As previously mentioned, solidly fixating the
bones with transosseous sutures after such osteotomies and
after the aesthetic dorsal lines have been reconstituted, usu
ally by spreaders or upper laterals, helps ensure long-term
stability (see Fig. 23.26). As previously described for pri
mary cases, power tools and especially piezoelectric tools
are very useful for secondary bony work, improving contour
(i.e., removing wedges or feathering off irregularities) with
out destabilizing even small mobile bone segments.
The Contour
Once the dorsal plateau has been established, a proper dor
sal contour must be created. My preference for final mod
eling of the dorsum and moderate augmentation is using
diced temporal fascia (DTF), as described by Daniel and oth
ers.43,45,46 I typically use a full-length DCF construct from
the radix to the septal angle, precisely measured and fix
ated (Figs. 23.27 and 23.28). Quilting sutures may be used
to prevent uniform distribution of the diced fragments and
to preferentially build up the radix. Fixation points are two
transcutaneous sutures at the radix: one at the supratip
break, and a couple more on either side just proximal to
the latter if needed for stability. The term tailored implies
that the DCF element is precisely measured on the nasal
dorsum in length and width, so that it will precisely fit in
the desired distance between the nasofrontal angle and the
start of the supratip break (length) and exactly span the
space between the dorsal lines of the newly constructed
dorsal plateau without lateral excess (width). Such precise
configuration is invaluable for optimal aesthetic results
(Fig. 23.29).
Fig. 23.26 Transosseous sutures help reliably stabilize the nasal
bones after osteotomies.
Fig. 23.27 A designed diced cartilage and fascia construct, precisely
measured in width and length, with preset sutures for fixation. Mea
surements are usually 0.9 to 1.11 cm in width and 3 cm in length.
Fig. 23.28 A diced cartilage and fascia construct that extends to
the septal angle.
SECTION IV AESTHETIC SURGERY
306
This is truly not much different from the current philosophy
for primary rhinoplasty of the tip.2,24,26 Techniques and
maneuvers are essentially similar.
It is initially important to note whether the tip still
needs to be projected or deprojected and lengthened or
shortened. To gain proper projection, I will often use sep
tal extension grafts in variable configurations49 (see Fig.
23.25a). This will rigidly fixate the tip to the dorsum, with
out the relative unpredictability of conventional floating col
umellar struts. Often, these septal extension grafts are quite
large, harvested by a modified extracorporeal septoplasty
and configuring the final L-strut construct after side-to-side
fixation to a residual septal segment at the keystone. Some
times, a tongue-in-groove technique will still be possible as
in a primary case and will work on the same principle as
stated previously.50
If length is still excessive, it can be dealt with as in a pri
mary case (i.e., by adequately shortening a septum left long).
This often requires shortening the lateral crura by overlap or
steal. If the nose has been shortened too much, rigid struc
ture is necessary to withstand soft tissue contraction and
hold the new tip position. This can be usually furnished by
septal extension grafts together with accurate scar release
to lengthen the mucosa and composite grafts if necessary.
For the lateral crura, the surgeon has two options: (1) re
constitute the M-arch or (2) build a new structure on top
of what is left.
Reconstructing the original M-arch (restructuring the
native lateral crural) aims to reconstruct the original lower
lateral cartilages by improving their shape and position (Fig.
23.31). The surgeon may use segmental grafts to bridge
gaps or possibly switch (a flip-over 180-degree principle)
alar segments of inappropriate convexity or concavity (Fig.
23.32). Lateral crural strut grafts of proper strength, but thin
and finely beveled, are commonly used here and may also
be used to lengthen the lower lateral cartilages (Fig. 23.33),
possibly combined with lower lateral cartilage transposition
when a parenthesis deformity has been left uncorrected.34
Alar contour grafts are often needed to splint weak spots of
the sidewall seen on inspiration.35
The Tip
The spectrum of possible problems in the tip can be sur
mised preoperatively, but the true issue in a secondary case
can only be determined intraoperatively. The surgeon must
maintain an open mind to a possible change of plan.48,49
The lower laterals may have been damaged, left in excess,
or overresected. These most often follow a previous closed
rhinoplasty. Underresection or overresection, dome divi
sion, bossae, and asymmetries leave nasal proportions
compromised. Overzealous cephalic trim of the lateral
crura, as has already been discussed, may cause excessive
tip rotation, alar retraction, and alar collapse. When this is
combined with unrecognized cephalic malposition, a ball
tip configuration ensues, without sidewall structure. In
practically all cases, however, the solution requires three
steps:
1. Building the base of the tip, providing support (i.e., the
tip foundation)
2. Reshaping the tip by onlay or inlay grafts and sutures
3. Defining a proper “triangle” with a proper sidewall by
reestablishing straight and strong lateral crura
Fig. 23.29 Reestablishment of proper dorsal lines and dorsal height after diced cartilage and fascia grafting.
Fig. 23.30 Warmed blood will help to some degree in pasting diced
cartilage together.
307
Chapter 23 Rhinoplasty
fashioned as “articulated grafts,” as described by Davis.33,53
What this elegant technique achieves is different in concept
from using alar contour grafts in nonanatomic pockets, be
cause it joins the tip to the sidewall in a stable fashion (Fig.
23.34).
The septum is by far the best material for all such graft
ing, and this justifies an added effort of harvesting residual
septum if available. Sometimes this leads to “composite” re
construction, in which grafts come from septum and rib in
mixed proportions, usually privileging septum for lower lat
eral cartilage and septal extension grafts, if possible.
Final Tip Camouflage and Touch-Ups
Camouflaging the rebuilt tip with available tissue adds a fi
nal touch of finesse to a revision. This is especially true with
thin and scarred skin. The short, additional time is well
spent. When temporalis fascia has been harvested, a small
segment of fascia, infolded if needed, makes a suitable
Precisely placed and spaced mattress sutures will help
straighten the lower lateral cartilages.51 Subdomal grafts
may also be called for to define and fix the proper inter
domal distance and equalize domal heights.52
Building new lateral crura on top aims, instead, to re
construct a new lower lateral cartilage complex on top of
excessively damaged native segments. Lateral crura can be
fully reconstructed according to their original anatomy or
Fig. 23.31 Before (a) and after (b) secondary rhinoplasty with aggressive alar resection and dorsal reduction. The lateral crural M-arch
architecture has been reconstructed.
a
b
Fig. 23.32 Segmental grafts for alar reconstruction.
Fig. 23.33 Lateral crural strut grafts from rib are used to straighten
and elongate the lateral crura. Rib cartilage has also been used with
remaining septum for the dorsal plateau.
Fig. 23.34 Articulated grafts from septum are laid on the tip rem
nants to reestablish proper sidewalls. Interpositional grafts from rib
cartilage are also shown.
SECTION IV AESTHETIC SURGERY
308
During the harvesting, muscle fibers are spread along
their axis rather than transected across, and a whole piece of
rib cartilage of appropriate length is taken circumferentially,
leaving perichondrium below but with a perichondrial
strip attached anteriorly. I then “laminate” (segmentally
cut) multiple rib segments, longitudinally or obliquely
depending on the rib shape, using hair transplant blades
onlay camouflage, which can extend to the infralobular
space and between the edges of the medial crura (Fig.
23.35). Soft tissue is sometimes available, as is uneven scar
tissue harvested during dissection. When rib is harvested,
a strip of perichondrium serves well for the same purpose.
A touch-up final grafting can then be done after the colu
mella is closed, gently slipping some soft tissue or crushed
cartilage in between sutures in the facet, tip, or infratip.
Alar wedges may have to be excised, whether limited to the
sill, the ala proper, or a combination of both. Possible fi
nal attention needs also to be paid to the footplates, which
were commonly ignored in the primary surgery.
Routine postoperative measures include night taping
and a staged 1-year follow-up. The result can usually be ex
pected to finally settle at around a year, although it may
take longer in multiply operated noses or scarred thick skin.
A Note on the Use of Rib Cartilage
Rib cartilage is a popular and versatile choice in secondary
rhinoplasty (Video 23.16).54 I turn to rib without hesitation
whenever septum is insufficient, because I believe conchal
cartilage lacks the desired structural rigidity for most indi
cations. I often use rib in composite with residual septum
to craft a new solid L-strut when possible (Fig. 23.36). The
septum is obviously the best option for lateral crural recon
struction and strut or septal extension grafting. I also use
rib cartilage for columella struts, septal extension grafts,
intercartilaginous interpositional spacers, and lateral cru
ral struts and for dicing.
In female patients, I create a 3 to 4 cm inframammary in
cision (even in women with breast implants) somewhat more
medial than that used for an augmentation, but still hidden
in the fold. The resulting scar is barely noticeable (Fig. 23.37).
If the incision is too lateral, the exposure will end up on the
bony segment of the rib, rather than the cartilaginous por
tion. In men, this is not an issue, so I directly place the scar, of
similar length, on the rib segment I choose to be harvested.
If a skin fold is present in the inframammary crease (as
in males with a tendency toward gynecomastia), I use the
crease as in a female patient. Although rib can be harvested
through a very small incision, this tends to cause a widely
spread scar, albeit short, because of excessive tension and
stretching with subsequent suboptimal healing.
Fig. 23.35 Fascia can serve well for final tip contouring.
Fig. 23.36 Rebuilding the L-strut using a central and vertical seg
ment from residual septum and two stabilizing extended spreaders
from rib cartilage, making a composite construct.
Fig. 23.37 The inframammary scar after rib cartilage harvest is
barely noticeable.
Fig. 23.38 Rib lamination using a hair transplant blade.
309
Chapter 23 Rhinoplasty
Outcomes
Case 1: Primary
A 23-year-old man presented with complaints of a hump
and drooping tip when smiling (Fig. 23.42). His other con
cern was functional, left airway obstruction, which was
found on a CT scan to be caused by a significant posterior
septal spur.
Examination showed inappropriate dorsal lines with a
narrow middle vault, a significant osteocartilaginous hump,
and a weak unsupported tip. Such a hump should be consid
ered in part true and in part apparent because of the lack of
proportions between the dorsum and the underprojecting
tip. Some degree of alar malposition was also present.
An open rhinoplasty was performed, with wide tip and
dorsum exposure; component separation and incremental
reduction of the dorsum; septoplasty; graft harvesting; me
dial oblique, transverse, and low-to-low osteotomies; and
bilateral spreader flaps to reconstitute the middle vault.
Appropriate tip projection was achieved with a septal ex
tension graft, and tip shaping was finalized with a lateral
crural steal, extended lateral crural struts to reinforce and
straighten the lateral crura, and lateral crural transposition.
Final tip contour was achieved by appropriately filling the
gap between the medial crura and domes with their re
sected T-shaped segment from the cranial edge of the sep
tum. Small and thin alar contour grafts were placed as a
final maneuver.
The 9-month postoperative image show proper
proportions between the tip, dorsum, and sidewall in
or pathology blades (Fig. 23.38). Multiple slices of varying
length and thickness are immersed in saline in a kidney
bowl until needed.
My experience is that the segments with a tendency to
warp will do so rather readily and will be identifiable. Ac
cording to need, I use the straight ones or use convexities
to advantage or even in a counter-opposed fashion. The key
principle is having abundant choices to select for the mul
tiple configurations necessary for rebuilding the dorsum and
tip (Fig. 23.39; also see Fig. 23.25a).
Regarding calcifications, I do not find it worthwhile to
use a CT scan to preemptively look for the least calcified rib,
but instead simply assess the situation intraoperatively. Al
though calcifications vary significantly from patient to pa
tient, according, in part, to age, I just harvest more rib when
I find calcifications. I select the best segments, often using
small power burrs. In practice, this obviously limits the po
tential of the rib segments to bend and requires more rigid
grafting configurations. If well planned, well-crafted and
properly dimensioned rib grafting provides nicely structured
and elegant configurations, thus preventing the tendency to
excessive dimensions (Figs. 23.40 and 23.41).
Fig. 23.39 Rib cartilage is used for extended lateral crural struts,
which are underlapped to the short remaining elements of native
lateral crura.
Fig. 23.40 Dorsum and tip fully restructured by rib grafts.
Fig. 23.41 Extensive rib grafting must be finely crafted to prevent
excessive volume of restructured areas.
SECTION IV AESTHETIC SURGERY
310
Fig. 23.42 Primary rhinoplasty. (a) A weak, unsupported tip. Middle and intermediate crural are narrow and buckled. (b) Autospreader
flaps have been inserted. (c) Using a septal extension graft with appropriate height complemented by a lateral crural steal maneuver to
create the new domes. (d) Transposition of the lower lateral cartilages, strengthened, straightened, and lengthened by lateral crural struts.
(e) Computed tomography reveals a significant posterior left bony spur. His preoperative appearance (f) can be compared with the 1-year
postoperative results (g).
Continued
a
b
c
d
e
f
g
311
Chapter 23 Rhinoplasty
Fig. 23.42, cont’d His preoperative appearance (h,j,l) can be compared with the 1-year postoperative results (i,k,m).
h
i
j
k
l
m
SECTION IV AESTHETIC SURGERY
312
An open rhinoplasty was performed with wide tip and
dorsum exposure, component separation and incremen
tal reduction of the dorsum, and septoplasty with resec
tion of the deviated distal septum and its replacement after
straightening and stabilization with a perforated ethmoid
splint. Asymmetrical osteotomies were performed based the
axial views of the CT scan.
Spreader flaps and an asymmetrical left spreader graft
were used in the middle vault. The long lower lateral car
tilages were recontoured by turn-under flaps, transection,
overlap to reduce length and allow rotation, and multiple
sutures. A septal extension graft was used to provide stable
tip projection.
Because of her very thin skin, a DCF construct was used,
differentially built to provide a mild degree of radix aug
mentation for the deficient nasofrontal angle. Deep temporal
fascia was also applied to provide final camouflage on the
restructured tip.
Her 1-year postoperative images demonstrate
significant improvement, although a minimal residual
all projections. This case demonstrates the importance of
recognizing the following individual anatomic preoperative
variants:
•• Bony-cartilaginous hump—true or apparent
•• Width of the middle vault
•• Shape and orientation of the lower lateral cartilages
•• Quality of tip support and relevance of appropriate
proportions
Case 2: Primary
A 34-year-old woman presented with complaints of deviation,
a hump, and a long and drooping tip (Fig. 23.43). She also had
a functional impairment, which was found on the CT scan to
result from relevant septal deviation to the left. Clinical analy
sis demonstrated very thin skin, bony deviation to the right
and septal and tip deflection to the left, a bony-cartilaginous
hump, and a drooping tip with long, concave lateral crura.
Fig. 23.43 Primary rhinoplasty. (a) The tip is exposed and conservative cephalic trim resection planned. (b) The dome equalization suture
is best carried out from the head of the table and allows symmetrical positioning of the cranial portion of each new dome. (c) The final
diamondlike tip shape is visible. A deep temporalis fascia layer to the dorsum is also evident. (d) Residual fascia is a good option for final
camouflage to the tip. (e,f) Axial computed tomography shows obvious septal deviations.
Continued
a
b
c
d
e
f
313
Chapter 23 Rhinoplasty
Fig. 23.43, cont’d Her preoperative appearance (g,i,k) can be compared with the 1-year postoperative results (h,j,l).
g
h
i
j
k
l
Continued
SECTION IV AESTHETIC SURGERY
314
Fig. 23.43, cont’d Her preoperative appearance (m,o) can be compared with the 1-year postoperative results (n,p).
m
n
o
p